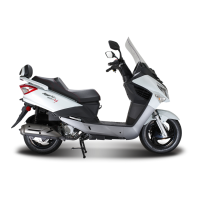
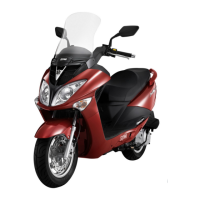
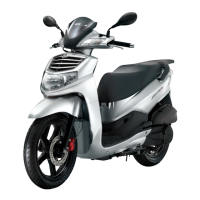
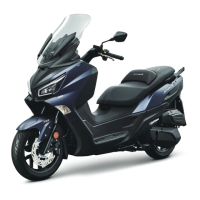
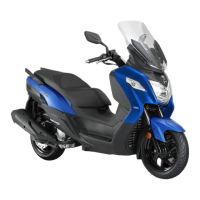
This document describes the SYM Joyride 200 EFi (LF18W-6) and Joyride 125 (LF12W-6) scooters, covering their functions, technical specifications, usage, and maintenance.
General Description and Applicable Region
The manual outlines features and warnings applicable to the United States and Canada. It covers noise emission, tampering warnings, safety information, and safety defect reporting.
Noise Emission Warranty
SANYANG INDUSTRY CO., LTD. warrants that the exhaust system meets U.S. EPA Federal noise standards at the time of sale. This warranty extends to the first purchaser and all subsequent buyers. Warranty claims should be directed to: 3,chung-Hua Road, Hukou, Hsin-Chu Taiwan, R.O.C. Tel: +886 35981911, Fax: +886 35981844.
Tampering Warning
Federal law prohibits tampering with the noise control system. This includes removing or rendering inoperative any noise control device or element of design before sale, delivery, or while in use. Using the vehicle after such tampering is also prohibited. Acts presumed to be tampering include removing or puncturing the muffler, baffles, header pipes, or any other exhaust gas component, removing or puncturing any part of the intake system, and lack of proper maintenance. Replacing parts of the vehicle, exhaust, or intake system with non-specified parts is also considered tampering.
Users are advised to always wear a DOT-approved helmet correctly fastened, suitable protective clothing, and eyewear. Loose items should not be carried. Good psychophysical conditions are crucial for safe operation; avoid operating under the influence of drugs/alcohol or when physically fatigued or drowsy. Slow down on slippery surfaces, unfamiliar terrain, and in reduced visibility. Remain alert while operating. Do not exceed weight capacity. The addition of accessories or luggage can adversely affect the motorcycle's safety, stability, and handling. Only install accessories or replacement parts approved by SYM. Failure to follow these warnings can lead to accidents, serious injuries, or death. Use unleaded fuel with an octane rating (R+M)/2 method of between 87 and 92. Read the owner's manual carefully before operating. Obey posted speed limits and traffic signs/signals.
Safety Defect Report
If a defect is believed to cause a crash, injury, or death, it should be reported immediately to the National Highway Traffic Safety Administration (NHTSA) in addition to Sanyang Industry Co., Ltd. NHTSA may investigate and order a recall if a safety defect is found in a group of vehicles. However, NHTSA does not intervene in individual problems between the user, dealer, or Sanyang Industry Co., Ltd. To contact NHTSA, call the Auto Safety Hotline toll-free at 1-800-424-9393 or write to: NHTSA, 1200 New Jersey Avenue SE W43-488, Washington, DC 20590. Further information on motor vehicle safety is available at http://www.safercar.gov.
Safe Riding Practices
Relaxed and proper attire are important for driving. Observe traffic regulations and avoid rushing. New scooter riders often become reckless after familiarization, leading to accidents. Always wear a safety helmet with the chin belt tightened. Wear tight-sleeved clothes to prevent cuffs from catching on the steering handle. Hold the steering handle with both hands. Observe speed limits and wear low-heel shoes. Perform periodical maintenance. Passengers should place their feet on the pedals to avoid burns from the exhaust pipe. The exhaust pipe is hot after running, so exercise caution during inspection/maintenance and when parking. Modified scooters can affect structure, performance, and cause poor engine operation or exhaust noise, shortening service life and voiding warranty. Maintain a comfortable posture with relaxed arms, palms, lumbar, and toes to react quickly. Keep body gravity centered on the saddle; rearward gravity reduces front wheel load, causing steering handle shaking. Incline the body inward when turning for easier control. On bumpy or unpaved roads, slow down and use shoulder force to control the handle. Avoid loading objects on front pedals to prevent affecting riding safety and steering. Overloading can cause the handle to swing. Do not place flammable materials near the engine. Avoid loading objects in unspecified areas. The first month or 1000km is the wear-in period; avoid rapid acceleration and keep speed below 60km/hr.
Use of Genuine Spare Parts
To maintain optimal performance, use "SYM Genuine Spare Parts" which conform to design requirements and are made from high-quality materials. Purchase from "SYM Authorized Dealers or Franchised Dealers." Cheap or fake parts may lack quality, durability, and can lead to unexpected troubles, lowering performance.
Gauges and Indicators
The scooter features a speedometer (outer ring Km/h, inner ring MPH), odometer (total kilometers driven), high beam indicator (blue), turn signal indicators (green), and a fuel gauge. The fuel gauge does not operate when the main switch is "OFF." When "ON," the pointer above "E" indicates fuel level. Below "E," the fuel indicator flashes, and the orange warning light comes on, meaning approximately 1.72 liters of fuel remain. Refuel with octane 92/95/98 unleaded gasoline immediately. A water temperature gauge indicates engine coolant temperature. If the pointer stays above "H," check coolant level and cooling fan. The indicator may stay above "H" during prolonged high-temperature operation; stopping the engine is the only way to cool it.
Function Setting
Two buttons on the speedometer:
- SET button:
- Short press in normal mode switches between ODO & TRIP displays.
- Press for 2 seconds in TRIP mode resets trip readings.
- Press for 2 seconds in ODO mode (vehicle still) enters CLOCK mode. Short press increases hour readings. Press for 2 seconds enters tenth-minute setting; short press increases readings. Press for 2 seconds enters unit-minute setting; short press increases readings. Press for 2 seconds exits CLOCK mode.
- OIL button:
- The oil indicator illuminates every 1,000 km to prompt an engine oil check/change. Press the OIL button for over 2 seconds to turn it off.
Ignition Switch Operation
- ON: Engine can be started; key cannot be removed.
- OFF: Engine is shut off; key can be removed.
- LOCK (Steering handle lock): Turn handle left, press key down, turn left to "LOCK." Handle is locked; key can be removed. To unlock, turn key from "LOCK" to "OFF."
- Fuel tank cap open: Insert key into ignition, turn left to open. Push cap to lock.
Caution: Never operate the ignition switch key while riding. Turning to "OFF" or "LOCK" will shut off the electrical system, potentially causing a dangerous accident. Only turn off after the scooter has stopped. Always remove the key after locking the steering handle. Leaving the ignition "ON" for prolonged periods will reduce battery capacity.
- Light Switches: When starting the engine, headlight, rear light, instrument panel light, and position light come on. Position light indicates the scooter's position in dim, rainy, or foggy weather. Turning the switch to the "OFF" position turns off all lights. The hazard switch can only be closed when the main switch is "ON."
- Electrical Starter Button: Press this button with the main switch "ON" while holding the front or rear brake lever to start the engine. Release immediately after starting to avoid damage. This is a safety design; the engine only starts when a brake lever is applied. Do not use the light system when starting the engine.
- High/Low Beam Switch: Toggles between high and low beams. High beam for open roads, low beam for city riding.
- Seat Open Switch: Turn ignition switch "ON" and press this button to unlock the seat. It returns to the original position upon release.
- Horn Switch: Press this button when the ignition switch is "ON" to sound the horn. Avoid using in areas where honking is prohibited.
- Turn Signal Switch: Used for left/right turns or lane changes. Turn ignition switch "ON" and slide left/right to flash. Return to original position to release. Right-side flash indicates a right turn, left-side flash indicates a left turn.
Safety Helmet Hook
Hook the safety helmet chin belt onto the hook. Do not hang the helmet while riding to avoid damage or loss of function.
Saddle Lock
- Unlock: Insert ignition key and turn left, or press the seat open button when ignition is "ON."
- Lock: Press the saddle down until it locks automatically. Check for proper locking by lightly lifting the saddle.
Caution: Do not leave the key in the storage box after unlocking to prevent it from being locked inside. Always remove the key after locking the saddle.
Storage Box
Located under the saddle. Maximum load capacity: 10kg. Do not store valuables. Ensure the saddle is completely locked. Remove valuables before washing. Do not place heat-sensitive objects due to engine heat.
Engine Control Switch
Located in the luggage box under the seat. Switch to "ON" or "I" to set. Switch to "OFF" or "O" before starting the engine. Ensure the seat is properly locked after setting the switch.
Fuel Tank Cap
- Insert ignition key and turn left to remove the cap.
- Do not fill above the upper limit.
- Turn the cap right and push to lock.
Caution: Put the main stand down, shut off the engine, and keep flames away when refueling. Overfilling can cause fuel to flow out, damaging paint or causing fire. Ensure the cap is properly tightened.
Brake System
Avoid sudden braking. Use front and rear brakes simultaneously. Avoid continuous braking for long periods to prevent overheating and reduced efficiency. Slow down and brake early on rainy or slippery roads; avoid sudden braking to prevent skidding. Using only one brake increases the risk of falling.
Engine Brake: Return the throttle handle to its original position. Apply both brake and engine brake intermittently on long or stiff slopes.
Starting Engine
Caution: Check engine oil and fuel levels before starting. The main parking stand must be firmly on the ground, and the rear brake applied to prevent sudden forward movement.
- Turn ignition switch to "ON."
- Apply rear wheel brake.
- Do not accelerate; press the starter button.
Warning: If the engine doesn't start after 3-5 seconds, turn the throttle handle 1/8-1/4 turns and press the starter button again. Do not press continuously for over 15 seconds. If it still doesn't start, wait 10 seconds before trying again. It may be harder to start after long idle periods or after refueling from an empty tank; press the starting lever/button several times with the throttle closed. Cold starts may require several minutes to warm up. Start in a well-ventilated area due to harmful exhaust gases.
Starting with starting lever: After step 1, forcefully press the starting lever by foot with the throttle closed. For cold engines, rotating the throttle 1/8-1/4 turns may help. Return the lever to its original position after starting.
Caution: Firmly support the scooter with the main parking stand. Use the starting lever occasionally to prevent loss of function.
Parking Method
- When approaching a parking lot, turn on the signal light early, observe traffic, take the inner lane, and approach slowly.
- Return the throttle handle to its original position and apply brakes in advance.
- After stopping completely, return the turn signal switch to its original position and turn the ignition switch to "OFF."
- Get off from the left side, select a level parking spot that won't interfere with traffic, and put down the main parking stand.
- Hold the steering handle with the left hand, and the front end of the saddle or parking handle on the lower-left side of the saddle with the right hand.
- Press the main parking stand with the right foot firmly onto the ground.
Reminder: Lock the steering handle and remove the key to prevent theft. Park in a safe place.
Routine Inspection
- Engine Oil: Check if adequate.
- Fuel: Check if adequate and Octane 90 or above.
- Brake (Front/Rear): Check braking condition. Brake lever free play: 10-20mm.
- Tires (Front/Rear): Check if tire pressure is normal (Standard: 1.75kg/cm² for front, 2.25 kg/cm² for 1 person/2.5 kg/cm² for 2 persons for rear).
- Steering Handle: Check for abnormal vibration or difficulty turning.
- Speedometer, lights, rearview mirror: Check if operated properly, lights come on, and visibility from behind.
- Tightness of Main Components: Check for loose screws/nuts.
- Abnormal Points: Check if previous troubles persist.
Caution: Correct any problems found during inspection before using the scooter. Have it checked by a "SYM dealer or authorized service personnel" if necessary.
Engine Oil Inspection and Change
Inspection:
- Support the scooter on level ground with the main stand.
- After 3-5 minutes, remove the dipstick, wipe clean, and reinsert (do not rotate).
- Remove dipstick and check oil level between upper and lower marks. Add oil to the upper limit if needed. Check for leakage.
Oil Change:
- Change after the first 300km, then every 3,000km.
- Clean oil filter after the first 300km, then every 6,000km.
- Check oil level every 1,000km.
- Use API SH, SAE 10w-30 grade or better engine oil (Recommended: SYM Genuine EXTRA 4X OIL).
- Oil Capacity: 1.0 Liter (0.8 liters for routine change), 0.8 liters for oil filter change.
Oil Filter Cleaning: Open the filter nut assembly, remove the element, and clean foreign materials with gasoline or an air spraying gun.
Warning: Oil level checks are inaccurate on unleveled ground or immediately after engine stops. Engine and exhaust pipe are hot; be careful not to get burned.
Fuel Inspection
- Turn main switch to "ON" and check fuel gauge.
- Engine designed for unleaded fuel of Octane 90 or above.
- Secure main stand, shut off engine, and keep flames away when refueling.
- Do not fill above upper limit.
- Ensure fuel tank cap is properly tightened.
- Ethanol in gasoline should not exceed 10%.
Transmission Oil Inspection and Change
Inspection:
- Support scooter on level ground with main stand. After 3-5 minutes, remove the transmission oil infusion bolt. Place a measuring glass under the drain bolt, remove the drain bolt, and check the oil volume (disassembly: 110 cc, change: 90-100 cc).
Oil Replacement:
- Stop engine, support scooter on level ground. Remove infusion and drain bolts to drain oil.
- Install drain bolt, fill with new transmission oil (90-100 cc), install infusion bolt, and tighten both. Check for leakage.
- Recommended Oil: Genuine SYM HYPOID GEAR OIL (SAE 85W-140). Use SAE85-90 below 0°C.
Inspection and Adjustment of Brake Free Play
Inspection: (Engine shut off)
- Brake lever free play for front and rear wheels should be 10-20mm. Spongy feel indicates abnormality.
Adjustment:
- Turn the adjustment nut on the brake arm of front and rear wheels.
- Hold hand-brake levers after adjusting until effective brake feeling.
- Measure free play with a rule.
Caution (Drum type): If free play is 10-20mm, check brake indicators. If the arrow on the brake arm aligns with "△" on the brake disk, the brake lining is excessively worn and must be replaced.
Disk Brake Inspection (Applicable for models with disc brake)
- Visually check brake lines for leakage, damage, or looseness. Check connections with a wrench. Check for steering handle vibration or interference with parts that might damage lines. If found, bring to a SANYANG dealer for repair.
Caution: Drive slowly on a dry road surface and operate brakes to check for malfunctions and ensure optimum condition.
Throttle Valve Handle Clearance Adjustment
- Correct clearance allows 2-6mm rotation.
- Loosen lock nut, turn adjust nut, then tighten lock nut.
Check Items:
- Check if the throttle valve cable moves smoothly.
- Rotate steering handle side to side to check for cable interference.
- Check if the cable is obstructed by other cables.
Inspection and Maintenance of Battery
- Maintenance-free battery; no need to check/add electrolyte. Have it checked by a SYM Authorized Dealer if abnormality is found.
Cleaning of battery terminals: Remove terminals, clean dirt/corrosion.
Battery removal: Turn ignition "OFF," open battery cabinet door, remove negative cable screw, disconnect negative cable. Then remove positive cable screw and positive cable.
Caution: Clean posts with warm water if eroded. If obvious erosion, disconnect cables, clean with steel brush/sandpaper. Install cables after cleaning, apply thin grease. Install in reverse order of removal.
Caution (Closed type battery): Never remove caps. To prevent leakage/self-discharge during long idle periods, remove the battery, store it in a well-ventilated, dimly lit place after full charge. Disconnect negative cable if left on scooter. Replace with the same closed-type battery if needed.
Tire Inspection
- Check and inflate tires with engine shut off.
- If ground contacting curve is abnormal, check with air pressure gauge and inflate to specified pressure.
- Check pressure with an air pressure gauge when cold.
- Visually check sidewalls for cracks/damage.
- Check for nails/small stones in tread.
- Check tread wear indicator; replace if tread groove depth is insufficient (wear bar showing).
Caution: Abnormal tire pressure, wear, or cracks are major causes of loss of control and punctured tires.
Steering Handle Front Shock Absorbers Inspection
- Perform with engine shut off and ignition key removed.
- Visually check for damage.
- Operate handle up/down, check for noises due to bends.
- Check bolts/nuts for tightness.
- Shake handle up/down, left/right, front/rear to check for looseness, resistance, or pulling to one side.
- Check for tightness due to brake cables.
- Take to SYM Authorized Dealer for check/adjustment if abnormal.
Rear Cushion Hardness Setting
5-stage adjustable type, factory set at 3rd stage. Adjust by turning the collar (counterclockwise to harden, clockwise to soften). Adjust both cushions simultaneously for riding stability.
Checking and Changing Fuses
Turn off ignition, check fuses. Replace blown fuse with a new one of the same amperage (20A). Do not use fuses over 20A or brass/iron wire.
- Remove storage box to find fuse box.
- Open cover, pull out fuse, check for damage.
- Secure fuses firmly.
- Use only specified bulbs to avoid damage or over-discharge.
- Avoid spraying water directly on fuse box when washing.
- Take to dealer if fuse blows for unknown reasons.
Checking the Turn Signal Lights and Horn
- Turn ignition switch to "ON."
- Turn on signal light switch, check front/rear, left/right lights flash, and warning buzzer sounds.
- Check covers for dirt, cracks, looseness.
- Press horn button to check function.
Caution: Use specified bulbs. Turn on signal light before turning/changing lanes. Turn off immediately after use to avoid confusing other drivers.
Checking the Front and Rear Lights
- Start engine, turn on head lamp switch. Check if head lamp and rear lamp come on.
- Check brightness and direction of front light.
- Check covers for dirt, cracks, looseness.
Checking the Brake Light
- Turn ignition switch to "ON," hold hand-braking levers. Check if brake lights come on.
- Check cover for dirt, cracks, looseness.
Caution: Use only specified bulbs. Do not modify or add other electrical components to prevent overload/short circuit.
Checking for Fuel Leakage
Check fuel tank, fuel cup, fuel hoses, carburetor for leakage.
Checking the Lubrication of Body's Various Mechanisms
Check pivot points for lubrication (main stand, side stand, brake lever, etc.).
Checking the Spark Plug
- Remove cap of spark plug cable, then spark plug with wrench.
- Check electrode for dirt/carbon deposits.
- Remove carbon deposits with steel wire, clean with gasoline, wipe dry.
- Check electrode, adjust gap to 0.8 mm with a feeler gauge.
- Hand tighten spark plug, then tighten another 1/2-3/4 turns with a wrench.
Warning: Engine is very hot after running. Use only spark plugs recommended by the manufacturer.
Cooling System Inspection
Checking coolant level:
- Support vehicle on level ground with main stand.
- Check reserved tank from viewing window; level should be between upper and lower limits.
- Add coolant to upper mark if close to lower mark.
Checking cooling system for leakage: Check radiator, piping, and ground for drips.
Replenishment of coolant: Keep radiator cap tightly closed.
- Support vehicle on level ground.
- Open battery cabinet door.
- Open surge tank cap, refill coolant to upper mark.
- If coolant level is often low, it may indicate a system problem.
- Do not use non-recommended coolants to avoid rust.
- Coolant recommended: SYM Bramax radiator agent, Concentration: 50%.
- Radiator capacity: Main radiator: 780 c.c., Surge tank: 420 c.c.
Caution: Use soft water when mixing coolant. Poor quality coolant shortens radiator service life. Change coolant once a year.
Anti-freeze concentration table (below 0°C):
- 20% anti-freeze: -8°C frozen temperature.
- 30% anti-freeze: -15°C frozen temperature.
- 40% anti-freeze: -24°C frozen temperature.
- 50% anti-freeze: -36°C frozen temperature. (50% concentration used for all scooters before delivery).
Use equivalent high-quality anti-freeze if specified is unavailable. Increase radiator maintenance in extremely cold weather.
Checking the Air Cleaner
Disassembly:
- Remove mounting screws from air cleaner cover.
- Remove air cleaner cover, then filter element.
- Take out and clean element (refer to maintenance schedule).
Assembly: Assemble in reverse order.
Caution: Dust reduces horsepower and increases fuel consumption. Change element more frequently on dusty roads. Improper installation allows dust into cylinders, causing premature wear. Do not soak air cleaner when washing scooter.
Diagnosis When Engine Does Not Start
- Is the ignition switch key turned to "ON"?
- Is the anti-theft switch set to "OFF" or "I"?
- Is there enough fuel in the tank?
- Are the rear or front wheel brakes applied when pressing the starting button?
- Is the throttle valve handle rotated while pressing the starting button?
- Turn ignition key "ON," press horn button. If no sound, the fuse may be blown.
If problems persist, have the scooter checked by a SYM authorized dealer.
Suggestions on Engine Fuel
- Designed for UNLEADED gasoline of Octane No. 90 or higher.
- In high altitude areas, readjust air/fuel ratio for maximum performance.
Transmission Oil
- Recommended Oil: Genuine SYM HYPOID GEAR OIL (SAE 85W-140).
- Use SAE85-90 below 0°C.
Cautions for Riding Scooter
- Raise scooter with main stand, sit on saddle. Push forward to raise main parking stand.
Caution: Never rotate throttle handle to increase engine RPM before driving off.
- Get on from left side, sit properly, keep feet firmly on ground.
Caution: Apply brake on rear wheel before driving off.
- Rotate throttle handle slowly; scooter will begin to move.
Caution: Rapid rotation may cause sudden forward movement. Ensure side parking stand is completely sprung back.
Do not use brake suddenly and make a sharp turn: Causes slip and fall, especially in rain.
Drive with extreme caution during rainy days: Braking distance is longer. Slow down and prepare to brake earlier. Release throttle, apply brakes properly when reducing speed downhill.
Periodical Maintenance Schedule
(The schedule is based on monthly 1,000 kilometers, whichever comes first.)
- Air cleaner element: Inspect (I) every 1 month/1,000km, Clean (C) every 3 months/3,000km, Replace (R) every 6 months/6,000km. Clean/replace more often in dusty/polluted environments.
- Oil filter (Screen): Clean (C) every 300km, then every 3,000km.
- Engine oil: Replace (R) every 300km, then every 2,000-3,000km.
- Tire, pressure: Inspect (I) every 1 month/1,000km.
- Battery: Inspect (I) every 1 month/1,000km.
- Spark plug: Replace (R) every 12 months/12,000km.
- Carburetor (idle speed): Inspect (I) every 3 months/3,000km.
- Steering bearing and handles: Inspect (I) every 3 months/3,000km.
- Check Transmission for leakage: Inspect (I) every 1 month/1,000km.
- Check crankcase for leakage: Inspect (I) every 1 month/1,000km.
- Transmission Oil: Replace (R) every 5 months/5,000km or 3,000mi.
- Drive Belt/roller: Replace (R) every 12 months/12,000km.
- Fuel tank switch and lines: Inspect (I) every 1 month/1,000km.
- Throttle valve operation and cable: Inspect (I) every 1 month/1,000km.
- Engine bolts and nuts: Inspect (I) every 1 month/1,000km.
- Cylinder head, cylinder, and piston: Inspect (I) every 6 months/6,000km.
- Exhaust system/cleaning carbon: Inspect (I) every 6 months/6,000km.
- Cam Chain/ignition time: Inspect (I) every 1 month/1,000km.
- Valve clearance: Inspect (I) every 6 months/6,000km.
- Shock absorbers: Inspect (I) every 6 months/6,000km.
- Front/rear suspension: Inspect (I) every 6 months/6,000km.
- Main/side stands: Inspect (I), Lubricate (L) every 6 months/6,000km.
- Crankcase Blow-by system (PCV): Inspect (I) every 6 months/6,000km.
- Coolant: Replace (R) every 12 months/12,000km.
- Cooling fan, lines: Inspect (I) every 1 month/1,000km.
- Clutch disk: Inspect (I) every 6 months/6,000km.
- Brake mechanism/brake lining (pad): Inspect (I) every 1 month/1,000km.
- Bolts/nuts for each components: Inspect (I) every 1 month/1,000km.
- Code: I = Inspection, cleaning, and adjustment; R = Replacement; C = Cleaning (replaced if necessary); L = Lubrication.
- Maintenance should be performed more often if the scooter is frequently operated at high speed or has accumulated higher mileage.
Specifications (SYMEN2009/01)
| Item |
Specification (Joyride 200 EFi LF18W-6) |
Specification (Joyride 125 LF12W-6) |
| Length |
2,100mm (82.7 in) |
2,100mm (82.7 in) |
| Width |
760 mm (29.9 in) |
760 mm (29.9 in) |
| Height |
1,390 mm (54.7 in) |
1,390 mm (54.7 in) |
| Wheel base |
1,440 mm (56.7 in) |
1,440 mm (56.7 in) |
| Net Weight |
156 kg (343.9 lb) |
156 kg (343.9 lb) |
| Type |
4-stroke 4V electroplated ceramic cylinders engine |
4-stroke 4V electroplated ceramic cylinders engine |
| Fuel |
UNLEADED (OCTANE 90 OR HIGHER) |
UNLEADED (OCTANE 90 OR HIGHER) |
| Cooling type |
Water-cooled |
Water-cooled |
| Displacement |
171.2 cc |
124.5 cc |
| Compression ratio |
10:1 |
10.5:1 |
| Max. HP |
15 ps / 8,000 rpm |
13 ps / 8,500 rpm |
| Max. torque |
1.35 kg-m / 6,500 rpm |
1.1 kg-m / 6,500 rpm |
| Starting methods |
Electrical starter |
Kick and electrical |
| Front shock absorber |
TELESCOPE |
TELESCOPE |
| Rear shock absorber |
UNIT SWING |
UNIT SWING |
| Clutch |
Centrifugal type |
Centrifugal type |
| Transmission |
CVT |
CVT |
| Front tire |
110/90-13 56P |
110/90-13 56P |
| Rear tire |
130/70-12 64L |
130/70-12 64L |
| Wheel |
Aluminum alloy |
Aluminum alloy |
| Tire pressure (Front) |
STD 1.75kg/cm² (25psi) |
STD 1.75kg/cm² (25psi) |
| Tire pressure (Rear) |
STD 2.25 kg/cm² (32psi) for 1 person, 2.5 kg/cm² (36psi) for 2 person |
STD 2.25 kg/cm² (32psi) for 1 person, 2.5 kg/cm² (36psi) for 2 person |
| Front brake |
Disc type (Ø 273 mm) |
Disc type (Ø 273 mm) |
| Rear brake |
Disk type (Ø 200 mm) |
Disk type (Ø 200 mm) |
| Front light bulb (high, low) |
12V 55W/55W |
12V 55W/55W |
| Brake light bulb (tail light) |
12V 5W/21W |
12V 5W/21W |
| License light bulb |
12V 5W |
12V 5W |
| Turn signal light bulb |
12V 21W |
12V 21W |
| Speedometer light bulb |
12V 1.7W |
12V 1.7W |
| Engine oil capacity |
1.0 L (0.8 L for change) |
1.0 L (0.8 L for change) |
| Transmission oil capacity |
110 cc. (100 cc. for change) |
110 cc. (100 cc. for change) |
| Fuel tank capacity |
7.6 L |
7.6 L |
| Fuse |
20A×2, 15A×3, 10A×1 |
20A×2, 15A×3, 10A×1 |
| Spark plug |
CR 8E |
CR 8E |
| Battery capacity |
12V 8Ah (closed type, maintenance-free battery) |
12V 8Ah (closed type, maintenance-free battery) |
| Air cleaner |
Paper type |
Paper type |
| Fuel tank cap |
Open lock type |
Open lock type |
| Front light |
General type (single) |
General type (single) |
| Rear grab frame |
Can not load cargo |
Can not load cargo |