XL-GPS Quick Start
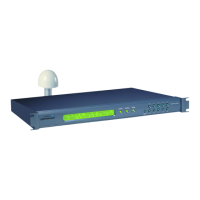
This Quick Start guides you through an initial test configuration of the XL-GPS with a
standard GPS receiver, antenna, and antenna cable. If you’re using a different configuration,
or for permanent installation instructions, see the “Installation/Configuration” section in the
XL-GPS User Guide, included on the product CD.
Outline Procedure
• Position the GPS antenna with a good view of the sky and connect it to the unit.
• (optional) Connect the network port, serial port, timing inputs and outputs, as
needed.
• Connect the power cord and wait for the unit to complete its startup.
• (optional) Configure the network settings using F100 on the front panel keypad.
• (optional) Configure the time display, using F1, F2, F66, and F69 on the front panel
keypad.
• Verify GPS receiver is operating using F119, F73, and STATUS on the front panel
keypad.
Positioning the GPS Antenna
Select a site for the standard antenna supplied with the XL-GPS. The optimal site:
• Is the highest point available.
• Offers a full 360° view horizontally, to within 10° vertically of the horizon.
• Is higher than neighboring buildings/obstructions.
• Is protected from strong radio frequency (RF) and microwave transmissions.
• Is set away from RF-reflective surfaces that cause multi-path interference.
• Is set 3 ft. (1 m) away from other GPS antennas.
If positioning the antenna outdoors is difficult or inconvenient, you may be able to test the
system by placing the GPS antenna in a window that gets the noon-time sun (e.g., south-
facing for users in the northern hemisphere). East/west-facing windows with good visibility
are okay. Avoid views obstructed by nearby trees, buildings, metallic window coatings, and
window shades, all of which block GPS signals. Window-mounted GPS antennas have
reduced visibility of GPS satellites, and receive weaker GPS signals, so the unit may have
difficulty locking to, and remain locked to, GPS satellite signals.
P/N 098-00212-000 File Name 098-00212-000_RevA.pdf 05/09/2010 Page 1