- 12 - EN
9I03
DELETING (OR ADDING)
CHANNEL
CHANNEL SET UP AGAIN
Make sure ...
•
Press the POWER button to turn on the TV/VCR.
1 Select “CHANNEL SET UP”
Press the MENU button on the
remote control.
Press the PLAY/K or STOP/L but-
ton to point to “CHANNEL SET
UP”.
Then, press the F.FWD/B button.
2 Begin auto preset
Press the PLAY/K or STOP/L but-
ton to point to “AUTO PRESET”.
Then, press the F.FWD/B button.
The tuner scans and memorizes all
the active channels in your area.
3 After scanning
The tuner stops on the lowest memorized channel.
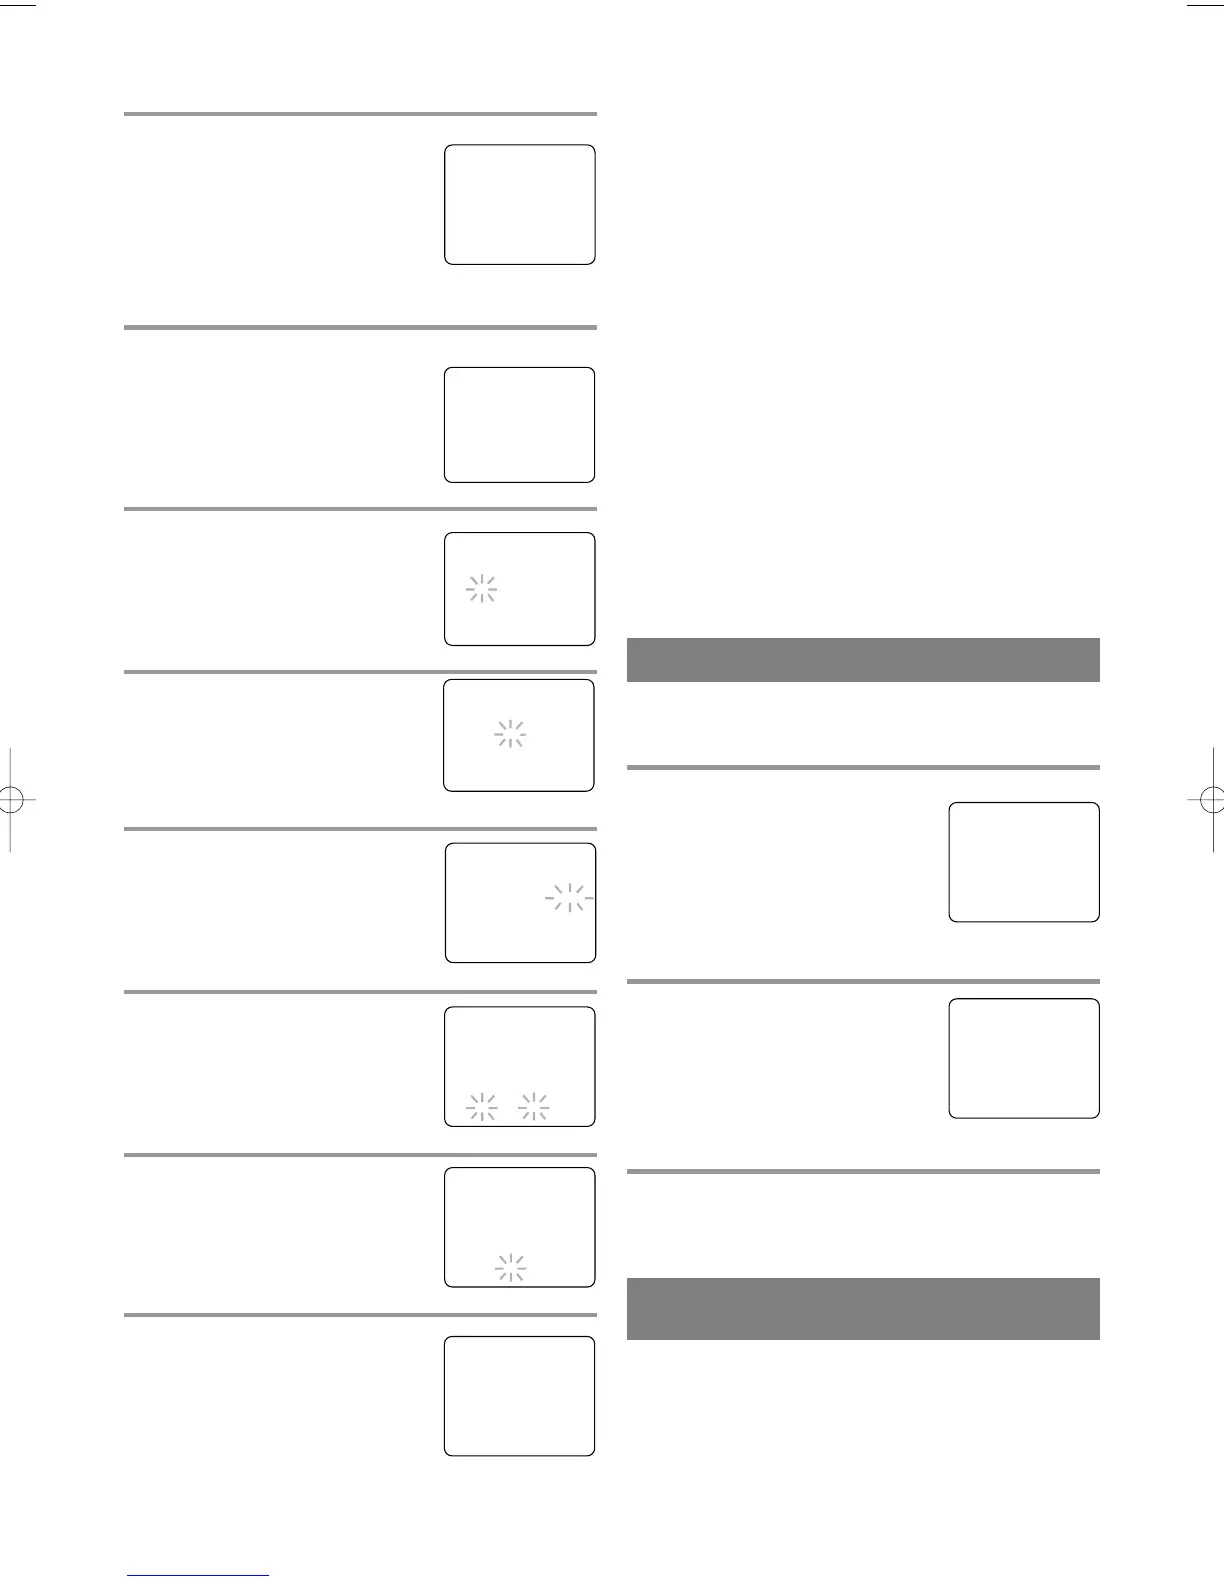
– M E N U –
TIMER PROGRAMMING
PICTURE CONTROL
SETTING CLOCK
B CHANNEL SET UP
USER’S SET UP
V-CHIP SET UP
LANGUAGE [ENGLISH]
CAPTION [OFF]
ZERO RETURN
TIME SEARCH
– CHANNEL SET UP –
ADD / DELETE CH (TV)
B AUTO PRESET
The channels you no longer receive or seldom watch
can be deleted from the memory. (Of course, you
can add the deleted channel into the memory again.)
5 Select the year
Press the PLAY/K or STOP/L but-
ton until your desired year appears.
(Example: 2002)
Then, press the F.FWD/B button.
6 Select the hour
Press the PLAY/K or STOP/L but-
ton until your desired hour appears.
(Example: 5, PM)
Then, press the F.FWD/B button.
7 Select the minute
Press the PLAY/K or STOP/L but-
ton until the desired minute
appears. (Example: 40)
8 Start the clock
Press the MENU button on the
remote control.
Although seconds are not dis-
played, they begin counting from
00 when you press the MENU but-
ton on the remote control. Use this feature to syn-
chronize the clock with the correct time.
– MANUAL CLOCK SET –
MONTH DAY YEAR
0 5 / 0 7 THU 2 0 0 2
HOUR MINUTE
– – : – –– –
NOTE:
When unplugging the AC cord or if there is a power
failure for more than 3 seconds, you may have to
reset the clock.
TO CHANGE CLOCK SETTING
If you want to change the clock,
1)Follow steps [1] and [2].
2)Select where you want to change using the
F.FWD/B or REW/s button.
3)Enter correct numbers using the PLAY/K or
STOP/L button.
4)Press the MENU button on the remote control to
start the clock.
PLEASE NOTE:
If there is no local PBS station in your area or on
your cable system, select “AUTO CLOCK” and press
the F.FWD/B or REW/s button to turn [OFF] this
function. Then you can manually adjust the clock.
– MANUAL CLOCK SET –
MONTH DAY YEAR
0 5 / 0 7 TUE 2 0 0 2
HOUR MINUTE
0 5 : – – PM
– MANUAL CLOCK SET –
MONTH DAY YEAR
0 5 / 0 7 TUE 2 0 0 2
HOUR MINUTE
0 5 : 4 0 PM
5:40 PM
1 Select “SETTING CLOCK”
Press the MENU button on the
remote control.
Press the PLAY/K or STOP/L but-
ton to point to “SETTING
CLOCK”.
Then, press the F.FWD/B button.
2 Select “MANUAL CLOCK SET”
Press the PLAY/K or STOP/L but-
ton to point to “MANUAL CLOCK
SET”.
Then, press the F.FWD/B button.
3 Select the month
Press the PLAY/K or STOP/L but-
ton until your desired month
appears. (Example: May
→ 05)
Then, press the F.FWD/B button.
4 Select the day
Press the PLAY/K or STOP/L but-
ton until your desired day appears.
(Example: 7th → 07)
Then, press the F.FWD/B button.
– M E N U –
TIMER PROGRAMMING
PICTURE CONTROL
B SETTING CLOCK
CHANNEL SET UP
USER’S SET UP
V-CHIP SET UP
LANGUAGE [ENGLISH]
CAPTION [OFF]
ZERO RETURN
TIME SEARCH
– SETTING CLOCK –
AUTO CLOCK [ON]
AUTO CLOCK CH [AUTO]
B MANUAL CLOCK SET
D.S.T. [OFF]
– MANUAL CLOCK SET –
MONTH DAY YEAR
0 5 / – –– – –– – – –
HOUR MINUTE
– – : – –– –
– MANUAL CLOCK SET –
MONTH DAY YEAR
0 5 / 0 7 – – –– – – –
HOUR MINUTE
– – : – –– –
T5300/7300UA 01.11.19 19:03 Page 12
 Loading...