4
Chapter 1: Before You Start
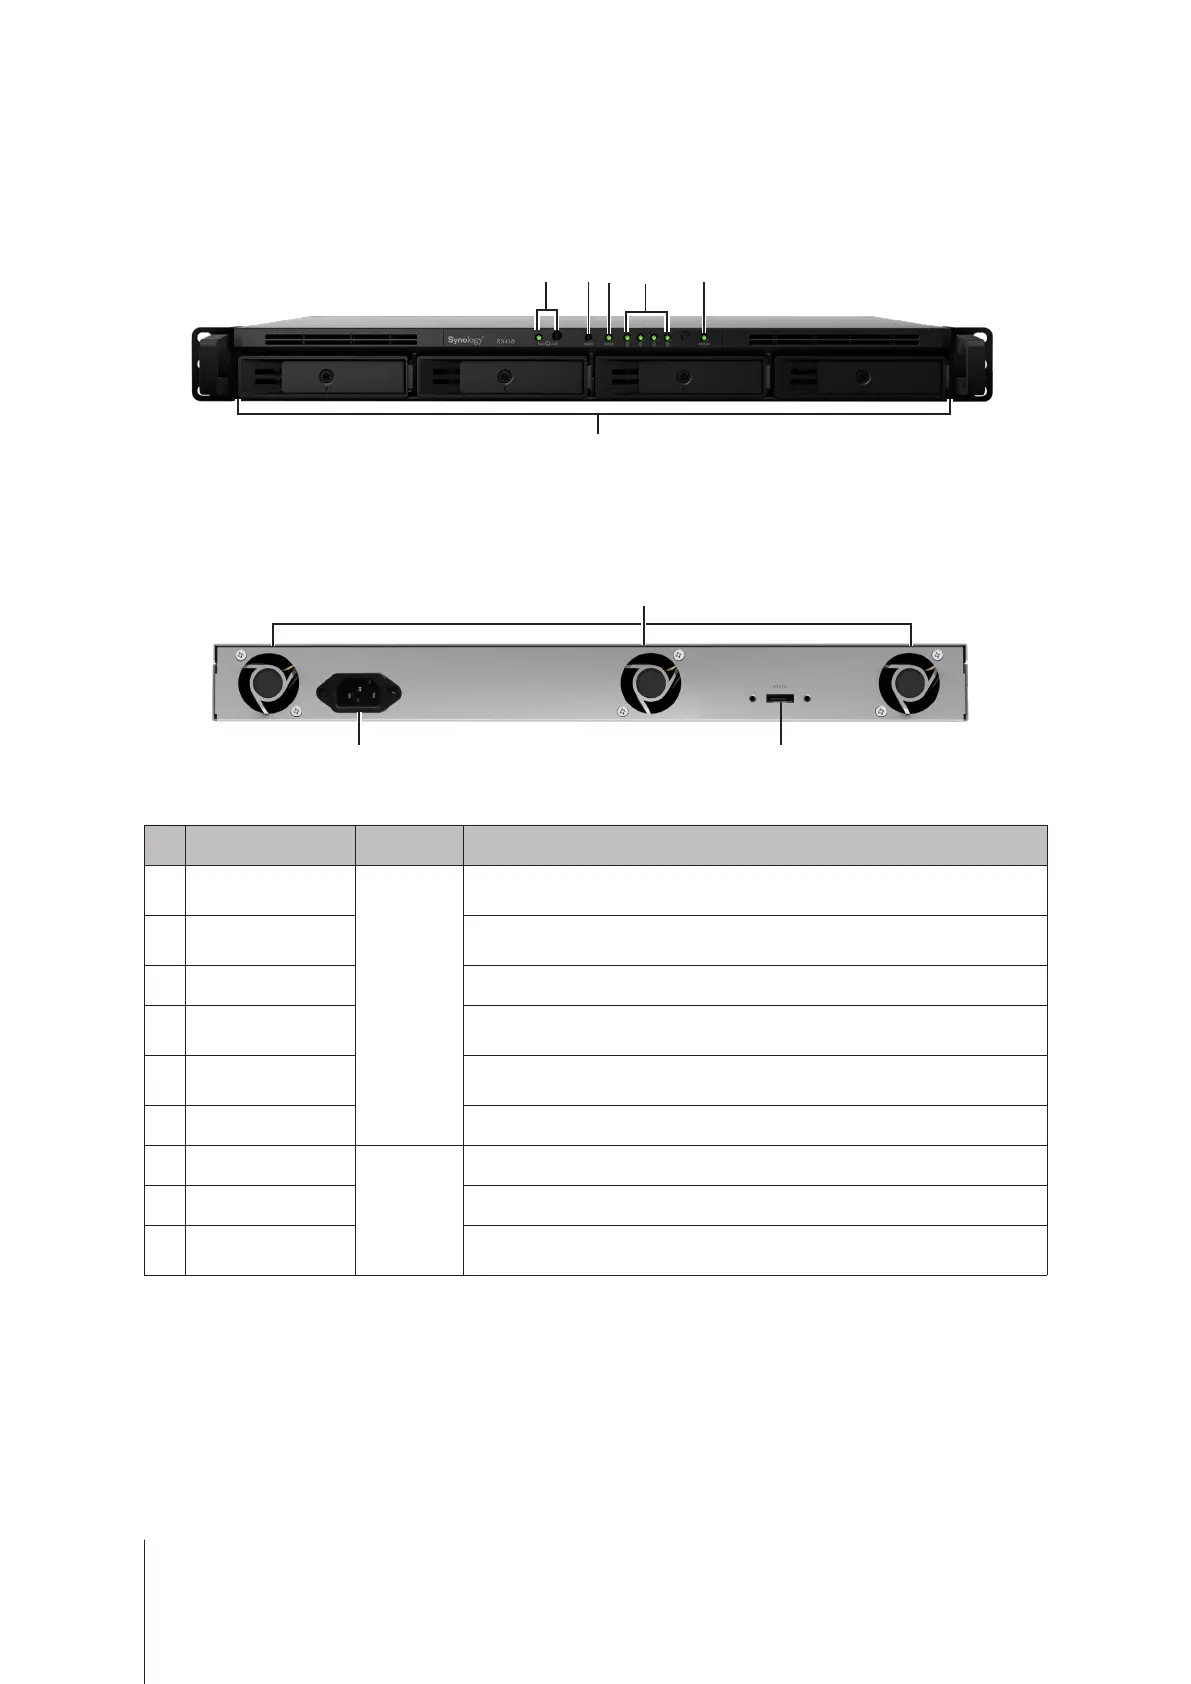
Expansion Unit at a Glance
Front
1
2 3 4 5
6
Back
7
8 9
No. Article Name Location Description
1
POWER Button and
Indicator
Front
Press to manually power on the expansion unit. For more information, please
see "Appendix B: LED Indicator Table".
2
ALERT Indicator
Displays warnings regarding fan or temperature status. For more information,
please see "Appendix B: LED Indicator Table".
3
eSATA Indicator Displays the status of the linked RackStation.
4
Drive Status Indicator
Displays the status of drives. For more information, please see "Appendix B:
LED Indicator Table".
5
STATUS Indicator
Displays the status of the system. For more information, please see "Appendix B:
LED Indicator Table".
6
Drive Tray Install drives here.
7
Fan
Back
Disposes of excess heat and cools the expansion unit.
8
Power Port Connect the AC power cord here.
9
eSATA Port
Connect the expansion unit to a Synology RackStation here. For compatible
models, please visit
www.synology.com
.