Tools and Parts for Component Installation
Please prepare below tools and parts before setting up your Synology NAS:
• A Screwdriver
• At least one 3.5” or 2.5” SAS/SATA drive (please visit
www.synology.com/compatibility
for compatible drive
models).
Warning:
If you install a drive that contains data, the system will format the drive and erase all existing data. Please
back up any important data before installation.
• Rail mounting kit (please see the
Optional Accessories
section to nd out the suitable rail kit for cabinet
installation)
Warning:
We suggest mounting your Synology NAS on a cabinet before installing any drives since the heavy weight
will increase the installation diculty.
Install Drives
Please follow below steps for drive installation:
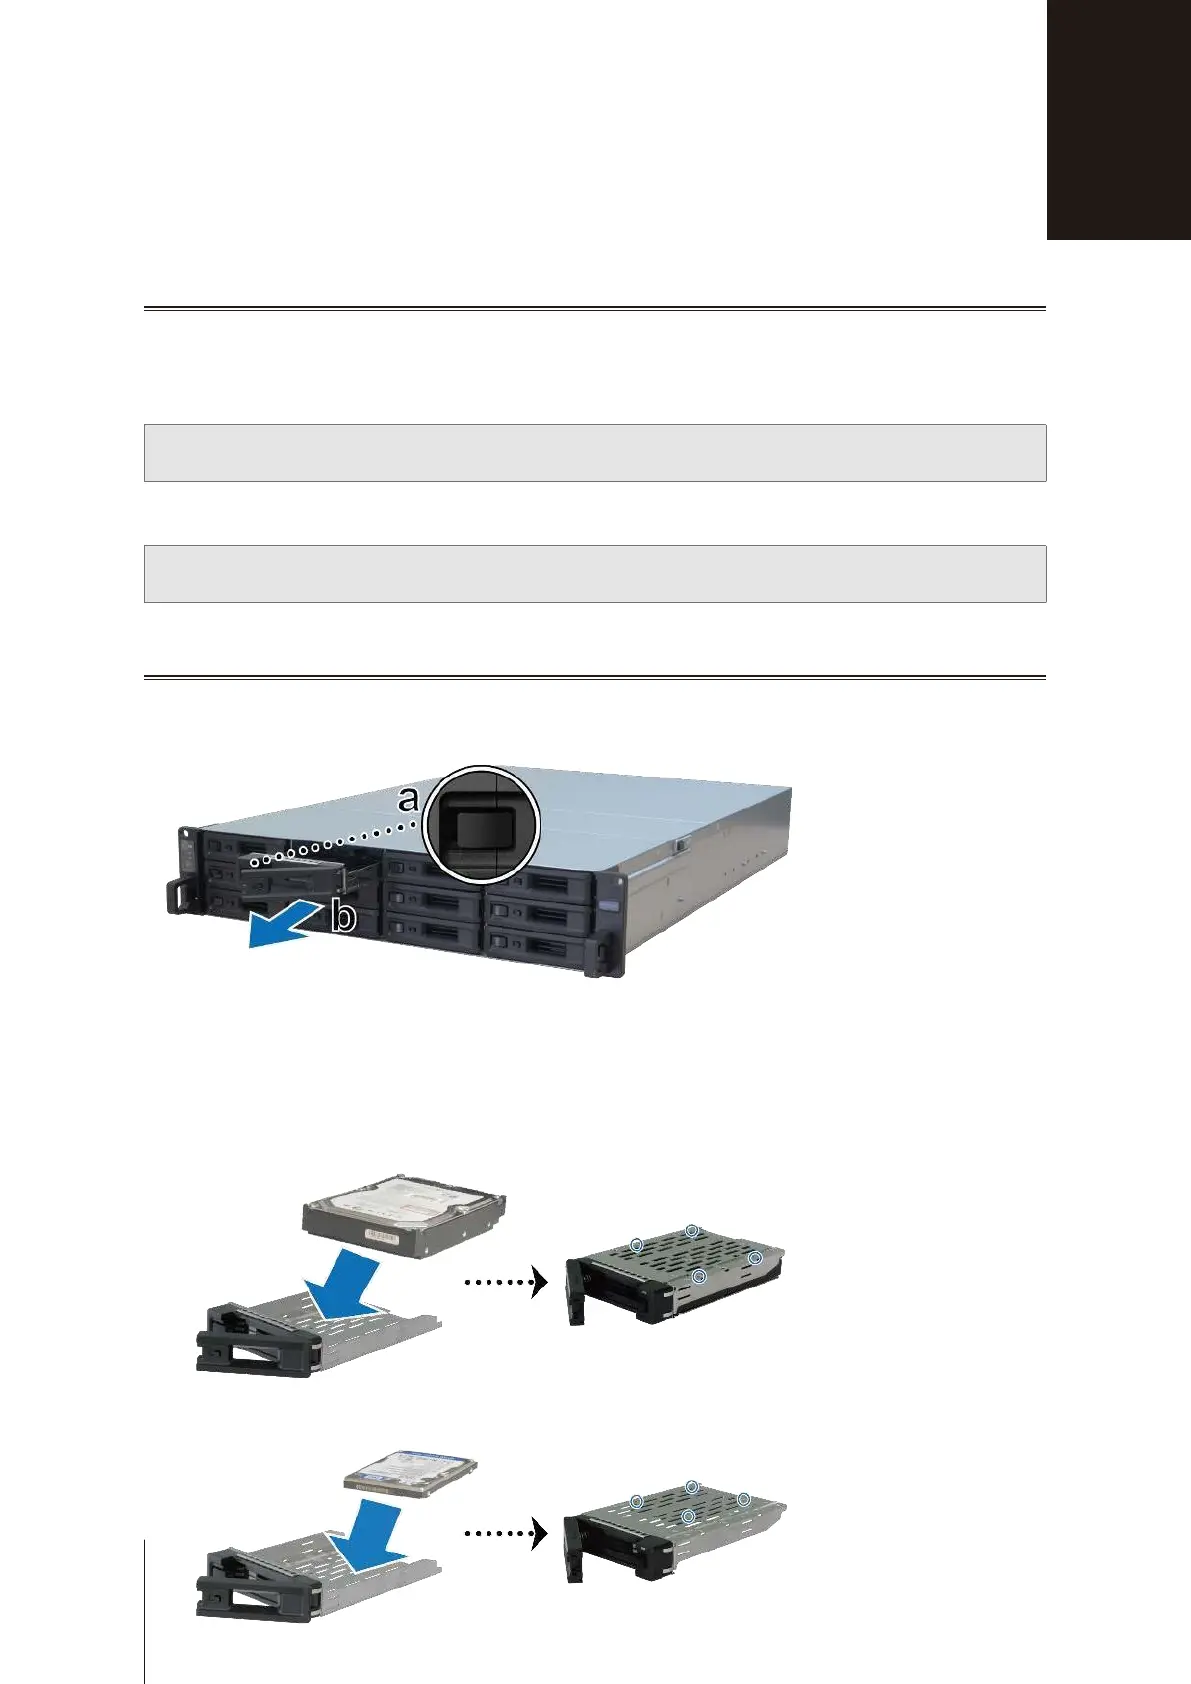
1
Open the drive tray.
a
Find the small button located on the left side of the drive tray handle. Press the button down, and the drive
tray handle will pop out.
b
Pull the drive tray handle out as illustrated above.
2
Install drives:
•
For 3.5” drives:
Place the drive in the drive tray. Turn the tray upside down and tighten screws into the four
spots indicated below to secure the drive.
•
For 2.5” drives:
Place the drive in the drive tray. Turn the tray upside down and tighten screws into the four
spots indicated below to secure the drive.
Hardware Setup
9
2
Chapter

 Loading...