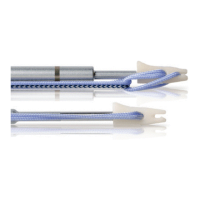
Do you have a question about the Synthes Expert Tibial Nail and is the answer not in the manual?
Use radiographic ruler on AP/lateral X-rays to precisely measure the medullary canal for nail selection.
Entry point location is critical for preventing fragment displacement in proximal and distal fractures.
Secure guide wire, mark insertion point, and insert 8-10 cm, confirming position radiographically.
Open medullary canal to 8-10 cm depth with cutter and protection sleeve, avoiding posterior cortex contact.
Prepare canal with drill bit and protection sleeve to 8-10 cm depth, ensuring no posterior cortex contact.
Open medullary canal with cannulated awl using a twisting motion to 8-10 cm depth, avoiding posterior cortex.
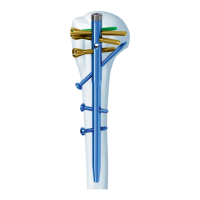
Connect insertion handle, connecting screw, and nail, ensuring correct orientation and secure attachment.
Insert nail into canal with twisting motion, hyper-flexing knee. Monitor passage and final position radiographically.
Attach aiming arm and guide wire to verify proximal nail placement and orientation using lateral imaging.
Verify final nail position in both AP and lateral views. Ensure secure connection to the insertion handle.
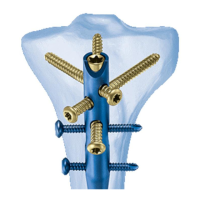
Select appropriate screws/bits. Lock distally first using backstroke technique for compression and stability.
Center drill bit tip in locking hole and drill through both cortices. Use tip for better control after near cortex perforation.
Measure screw length using a direct measuring device after drilling, considering compression needs.
Use screwdriver and holding sleeve to insert screws of correct length. Verify placement and repeat if necessary.
Choose appropriate screws, sleeves, trocars, and drill bits based on nail diameter and locking option (DYNAM, STAT 2, STAT 1).
Attach aiming arm to insertion handle after confirming nail connection. Avoid applying undue force.
Assemble trocar, drill sleeve, and protection sleeve. Insert through aiming arm hole, make stab incision, and advance to bone.
Ensure drill sleeve is firm. Drill through cortices. Measure screw length from calibrated drill bit.
Insert screws through protection sleeve using screwdriver. Verify length; tip should not protrude excessively.
Advance compression screw through connecting screw to reduce fracture gap, monitoring radiographically.
Insert second proximal screw (Static 1) and remove compression screw. Optional cancellous bone screws can be added.
Use leg extension and cancellous screws in oblique (OBLI 1, OBLI 2) and A/P holes for proximal fragment fixation.
Insert screws through protection sleeve using screwdriver. Verify screw length and avoid over-tightening.
Gently tap the nail out with a hammer or use an extraction screw with an air pulse system.
| Indication | Fractures of the tibia |
|---|---|
| Diameter Options | 8mm, 9mm, 10mm, 11mm, 12mm |
| Compatibility | Compatible with Synthes instrumentation |
| Material | Titanium |
| Locking Options | Static and dynamic |
| Distal Locking Options | Static and dynamic locking options |
| Intended Use | For fixation of fractures and osteotomies of the tibia |