1. Valve body may be installed in any position, in any orientation (see Figure A). 3-way actuator’s power connections must be over the
supply port to ensure proper flow direction (see Figure A).
2. Before mounting body, refer to Figure B and Dimensions Section for clearances.
3. Use of a lead or tin based solder with a melting point below 600°F is recommended. Do not overheat. Make sure the ball valve is in
the FULL OPEN position during soldering. Direct flame tip away from the center of the valve. Cool valve quickly with a wet rag.
4. Solder build-up on the ball valve may prevent proper opening and closing of the valve. Rotate the manual operation button several
times to loosen any possible build-up.
5. Valve body can be submerged for leak testing before the actuator is attached.
Actuator Installation / Removal
1. Valve actuator may be attached to the valve body in either direction (see Figure A). The 3-way actuator must be attached with the
power connections over the supply port to ensure proper flow direction (see Figure A).
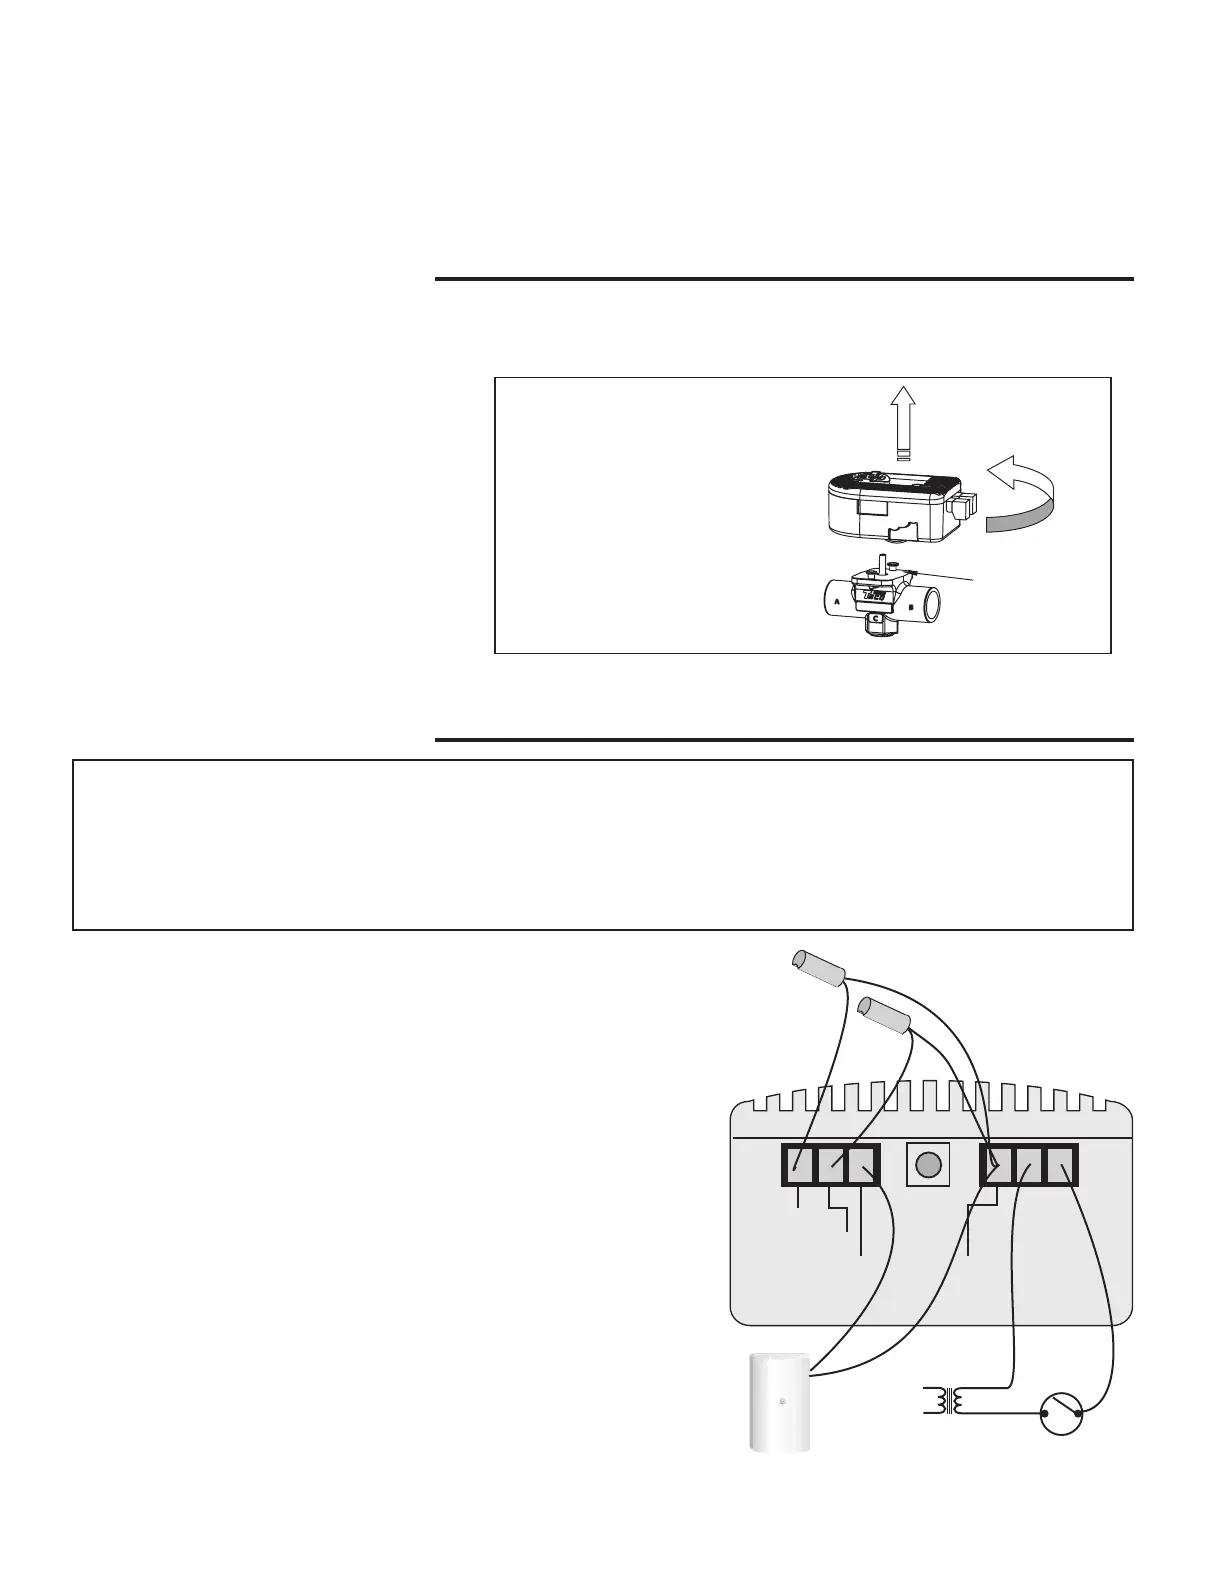
2. Actuator removal: Remove valve actuator prior
to soldering by rotating the actuator counterclock-
wise approximately 30 degrees and lifting upward
approximately 3/4” (see Figure C).
3. To re-assemble actuator to valve body: Position
actuator such that the “D” shaped valve stem aligns
properly with the “D” shaped actuator drive cavity
(Note: The “D” shaped stem design allows for cor-
rect insertion every time). Next, slide valve stem
into actuator cavity and rotate until the actuator
slips over the valve’s locking posts (see Figure C),
once the actuator is flush with valve body, turn actu-
ator clockwise and lock into position.
Wiring and Sensor Installation
All terminals provided with the iSeries-R are removable. In order to prevent
damage to the electronics, disconnect all plugs before the power is turned on
and check voltages and sensors. Once the circuits are tested, plug in the ter-
minals.
Powering the Control
For intermittent operation, connect one side of the end switch (e.g. Taco
ZVC/SR series zone control) or thermostat to an external 24 V (ac) trans-
former. Connect the other side of the zone control’s end switch to the R ter-
minal on the iSeries-R. The C terminal must then be connected to the other
side of the transformer. For continuous operation, simply wire the transformer
directly to the R and C terminals on the iSeries-R. Ensure that no power is
present during this process.
Sensors
Do not apply power to these terminals as this will damage the iSeries-R. The
wiring terminals for the sensors may be removed for ease of installation.
Outdoor Sensor
Remove the screw and pull the front cover off the sensor enclosure.
The outdoor sensor can either be mounted directly onto a wall or in a 2” x
4” electrical box. When the sensor is wall mounted, the wiring should enter
through the back or bottom of the enclosure. Do not mount the sensor with
the conduit knockout facing upwards as rain could enter the enclosure and
damage the sensor.
WARNING: Wiring connections must be made in accordance with all applicable electrical codes.
CAUTION: To prevent electrical shock, disconnect electric power to system at main fuse or
circuit breaker box until installation is complete. When a service switch is installed, more than
one disconnect switch may be required to deenergize this device for servicing.
Foe!Txjudi
Pvuepps
Tfotps
Tztufn
Tvqqmz
Tfotps
Cpjmfs
Sfuvso
Tfotps
35!W!)bd*
Usbotgpsnfs
TFOTPS!DPNNPO
D S
35!WBD
QPXFS!JOQVU
CPJMFS
QPXFS
HSFFO
TFOTPS
FSSPS
SFE
TVQQMZ
PVUEPPS
Figure C: Actuator Removal
Step 1
Rotate actuator counter
clockwise approximately 30
degrees
Step 2
Move actuator upward
3/4" to discharge
Locking
Post
4
 Loading...