TALAMEX SMART BATTERY CHARGER 10A
MANUAL 0012015/16
7
FIRST AID – SKIN:
• If battery acid contacts skin or clothing, wash immediately with soap and water for at least 10 minutes and
get medical attention immediately.
FIRST AID –EYES:
• If battery acid comes in contact with eyes, flush eyes immediately, for a minimum of 15 minutes and seek
immediate medical attention.
PRODUCT FEATURES
• Using state of the art technology, the battery Charger with 5 steps enables the re-charging of Batteries to
almost 100% of their original capacity.
• Automatically diagnose, recover, charge and maintain batteries for months, fully automatic operation from
Charge to Maintenance modes.
• Five output options are available - 28.8V, 29.4V, 14.4V, 14.7V and 13.6V Supply.
• Supplied with two detachable and interchangeable color coded lead sets one with clamps for bench charging
and one with eyelet terminals for
permanent attachment to the battery posts to allow quick connection/disconnection through connector.
• It features a 9-Stage charging strategy, i.e. 1.5A
-
10A
-
7.5A
-
5A
-
4A
-
3A
-
2A
-
1.5A Maintenance &
13.6V/5A Power Supply.
• No risk of over charging
• Electronically safe against user error
• Spark proof
• Over heat protection with mini cooling fan inside
• Full protected against short circuit and wrong connections
• Works as power generator ( 13.6V/5A)
OPERATION INSTRUCTIONS
1. Connecting the terminal rings/clamps directly to the corresponding connectors on the battery posts.
Note:
Make sure correct polarity connection before plugging in the AC power.
• Position the RED terminal on the POSITIVE post connector
• Position the BLACK terminal on the NEGATIVE post connector
1. Connect the AC power cord with the AC power outlet.
• The Power LED indicator turns on after the connection.
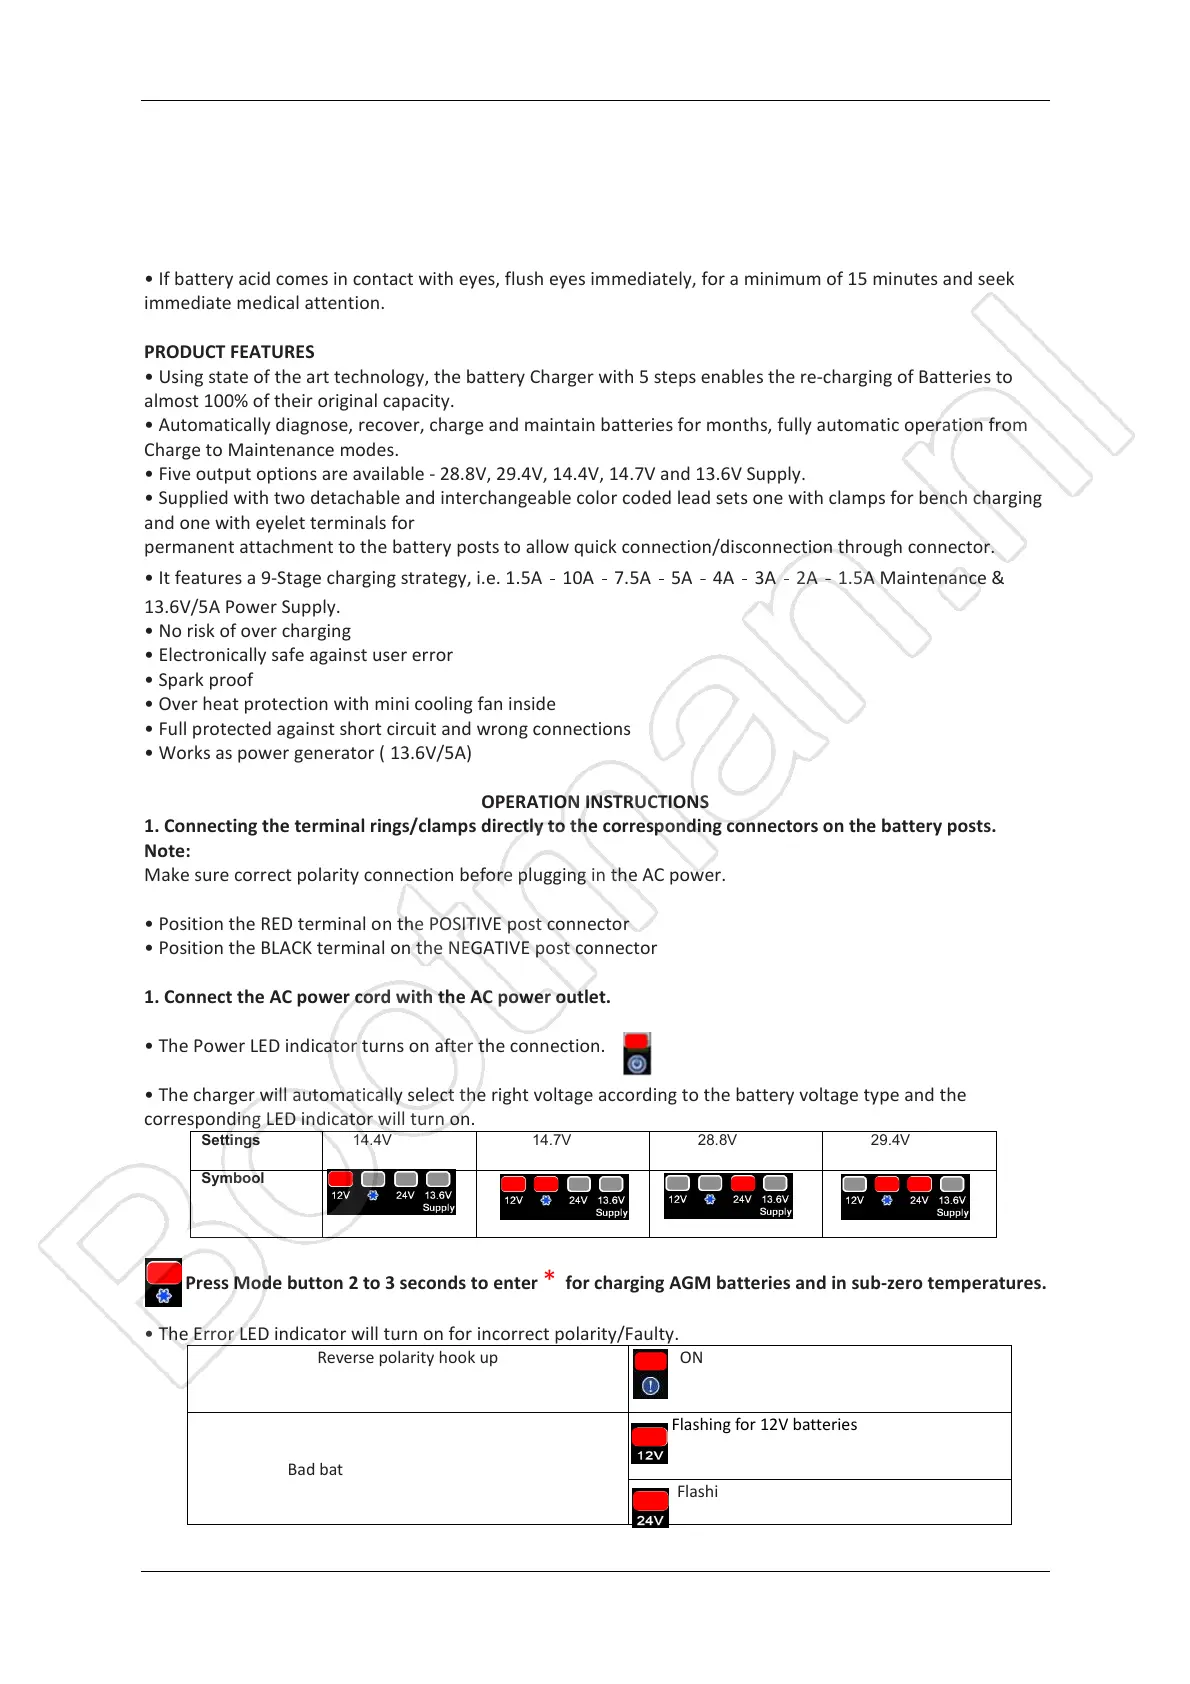
• The charger will automatically select the right voltage according to the battery voltage type and the
corresponding LED indicator will turn on.
14.4V 14.7V 28.8V 29.4V
Press Mode button 2 to 3 seconds to enter
*
for charging AGM batteries and in sub-zero temperatures.
• The Error LED indicator will turn on for incorrect polarity/Faulty.
Reverse polarity hook up ON
Bad batteries, cannot be charged
Flashing for 12V batteries
Flashing for 24V batteries
 Loading...