Do you have a question about the Tamiya TT-01 TYPE E and is the answer not in the manual?
Details the recommended Tamiya EXPEC SP R/C system (2-channel R/C unit with electronic speed controller).
Specifies the use of Tamiya 7.2V Custom Pack or Racing Pack for the power source.
Instructions for attaching the spur gear to the chassis.
Instructions for installing the propeller shaft.
Steps for attaching motor components.
Instructions for mounting the motor to the chassis.
Guide for assembling the rear differential gear.
Instructions for installing the rear differential gear assembly.
Steps for attaching the rear suspension arms.
Guide for assembling the rear axle components.
Instructions for attaching the rear bumper.
Steps for installing the rear axle assemblies.
Guide for assembling the front suspension arms.
Guide for assembling the front differential gear.
Instructions for installing the front differential gear.
Steps for attaching the front suspension arms.
Instructions for attaching the front bumper.
Guide for assembling the front upright components.
Steps for installing the front upright assemblies.
Instructions for assembling the shock absorbers.
Steps for mounting the assembled shock absorbers.
Guide for assembling the steering linkage arms.
Instructions for mounting the urethane front bumper.
Steps for installing the steering linkage arms.
Guidance on charging the 7.2V battery for the RC car.
Steps to check and verify the radio control system setup.
Instructions for installing the servo mounting bracket.
Steps for installing the radio control components onto the chassis.
Guide on how to connect the motor to the speed controller.
Diagram and instructions for wiring the electronic components.
Instructions for assembling the wheels, including tire mounting.
Steps for mounting the assembled wheels onto the chassis.
Guide on how to install and secure the main battery pack.
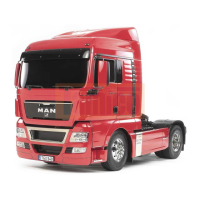
Instructions for mounting the model's body shell onto the chassis.
Steps to modify snap pins for proper body attachment.
Lists recommended Tamiya paints for the RC truck body parts.
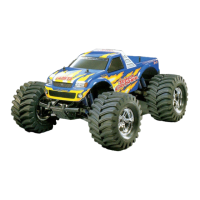
Instructions for cutting out the RC truck body shell.
Steps for trimming the truck cab section.
Guide on applying masking stickers to the windows.
Detailed instructions for painting the truck cab using Tamiya paints.
General guidance on painting procedures, including masking and layering colors.
Further instructions for trimming the RC truck body.
Additional steps for painting the main body sections.
Instructions for assembling and attaching the side mirrors.
Steps for attaching various small parts to the truck cab.
Guide for installing optional LED lights into the truck body.
Instructions for assembling the main parts of the truck body.
Instructions for applying numbered stickers in the correct order.
Detailed steps for applying stickers, including cutting and positioning.
Details on how to order replacement and optional parts using postal transfer or COD.
Customer service contact numbers and address for part inquiries.
| Scale | 1/10 |
|---|---|
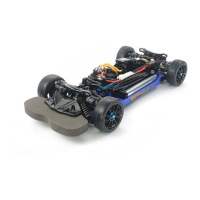
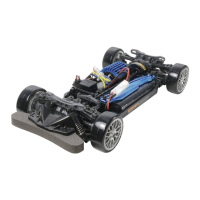
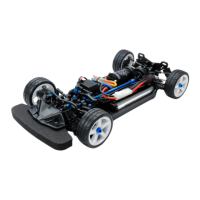
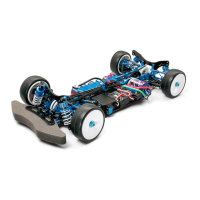
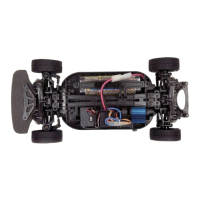
| Drive Type | 4WD |
| Motor | 540-type |
| Suspension | 4-wheel independent double wishbone |
| Differential Type | Gear differential |
| Body Material | Polycarbonate |
| Gear Ratio | 8.35:1 |
| Height | 130mm |
| Wheelbase | 257mm |
| Shock Damper | Friction dampers |
| Gear Pitch | 0.6 module |
| Chassis Material | ABS plastic |
| Chassis Type | TT-01 Type-E |
| Width | Approx. 185mm |
| Bearings | Plastic bushings |