CONNECTOR PORT (Ref. Fig. 1) *For Nikon Z only
Lenses with the connector port can be connected to a computer using the TAMRON connection cable (sold separately). Then, using
the dedicated “TAMRON Lens Utility
TM
” application, you will be able to update the firmware.
See the online help of “TAMRON Lens Utility” using the link below for more details.
https://www.tamron.com/jp/consumer/support/help/lensutility/en/
• Do not use the TAMRON connection cable (sold separately) for any purpose other than connecting the TAMRON lens equipped
with a connector port to a computer.
• Tamron will not bear any responsibility for any loss or damage of data in use of the TAMRON connection cable (sold separately).
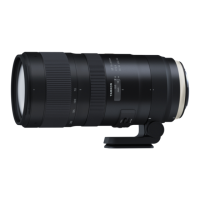
VIBRATION COMPENSATION (Ref. Figs. 1, 5, 6)
For Sony E / FUJIFILM X
To compensate for the vibrations, set the VC (Vibration Compensation) switch ⑲ to ON. (Ref. Fig. 5)
Switching the modes (Ref. Fig. 6)
You can switch the modes by using the VC mode switch ⑳.
MODE 1 Basic vibration compensation mode
MODE 2 Panning mode
MODE 3 Mode that prioritizes framing. Makes it easier to maintain subjects moving quickly within the frame.
* MODE 1 and MODE 3 do not support panning.
For Nikon Z
For vibration compensation, the lens do not have a switch for vibration compensation, please activate the function from the camera
body.
z Vibration compensation is effective under the following conditions
• Dimly lit locations
• Locations where flash photography is prohibited
• Locations where tripod cannot be used
z Vibrations may not be compensated sufficiently under the following conditions
• When a photograph is taken from a vehicle that is shaking greatly
• Shooting during excessive movement of the camera
• When shooting while using a tripod
• Set the VC switch ⑲ to OFF when taking pictures with bulb photography (long exposures). Otherwise, vibration compensation may
cause a malfunction. (For Nikon Z, the lens do not have a switch for vibration compensation, please activate the function from the
camera body)
• When MODE 1 or MODE 2 is set (For Sony E / FUJIFILM X), the viewfinder image may become blurred immediately after
the shutter button is pressed halfway. This is due to the principles of the vibration compensation mechanism and not a
malfunction. (For Sony E / FUJIFILM X / Nikon Z)
• When MODE 3 is set, the viewfinder image may become blurred even without touching the shutter button in the case the
camera is turned on with the VC switch ⑲ set to ON. This is due to the principles of the vibration compensation mechanism and
not a malfunction. (For Sony E / FUJIFILM X)
• Set the VC switch ⑲ to OFF when you are shooting while the camera is secured by something other than your hand (such as
a tripod). (For Nikon Z, the lens do not have a switch for vibration compensation, please activate the function from the camera
body)
• You may feel the lens rattle when the camera is turned off or when the lens is removed from the camera. This is not a
malfunction.
• For details, please read the instruction manual of your camera.
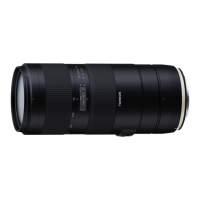
FOCUS LIMITER (Ref. Figs. 1, 7 - 9 for Sony E / 7’ - 9’ for FUJIFILM X / Nikon Z)
When autofocus is set, switching the focus limiter switch can speed up focusing by limiting the focus range.
For Sony E mount lens
To limit the autofocus range to subjects from infinity to 3 m (Ref. Fig. 7)
Set the focus limiter switch to “∞-3m”.
To limit the autofocus range to subjects from infinity to 15 m (Ref. Fig. 8)
Set the focus limiter switch to “∞-15m”.
To use the full focus range (Ref. Fig. 9)
Set the focus limiter switch to “FULL”.
For FUJIFILM X / Nikon Z mount lens
To limit the autofocus range to subjects from MOD* to 10 m (Ref. Fig. 7’ )
Set the focus limiter switch to “MOD-10m”.
* MOD: Minimum Object Distance
To limit the autofocus range to subjects from 10 m to infinity (Ref. Fig. 8’ )
Set the focus limiter switch to “10m-∞”.
To use the full focus range (Ref. Fig. 9’ )
Set the focus limiter switch to “FULL”.
ZOOMING (Ref. Fig. 1)
Turn the zoom ring ⑥ to adjust the focal length (Zoom position) to a desired position.
WIDE-END ZOOM LOCK (Ref. Figs. 1, 3, 4)
You can lock the zoom ring ⑥ at a focal length of 150 mm to keep it from rotating.
Setting the zoom lock (Ref. Fig. 3)
Align 150 mm on the focal length scale ⑦ with the focal length mark ⑧.
Set the wide-end zoom lock switch to the zoom ring side.
Releasing the zoom lock (Ref. Fig. 4)
Set the wide-end zoom lock switch to the camera side.
• To zoom, release the lock, and then rotate the zoom ring ⑥.
 Loading...