Pressing the
S
key will alternately start and stop the picture. Wait for a
picture and start printing. Adjust the clarify control for best contrast, only
a small movement is necessary. Turning clockwise will increase the
pitch of the note from the receiver and make the picture lighter. Adjust
until the background
is
peak white and the dark areas are black. As the
picture builds up (and this can take several minutes)
it
may be split
about its centre axis and may be slanted to one side. To correct the
slant press the keys
\
or
/
whilst a picture is printing to make the edges
vertical. (Once this is set the result
is
stored and need not be altered.
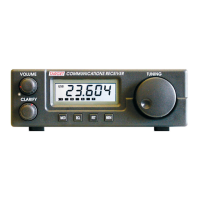
You are now set to receive weather charts. Turn the volume control of
the receiver to a convenient level to hear the signal.
At the beginning of a chart you will hear a loud buzzing noise, this is
followed by a continuous blip
-
blip
-
blip
-.
This
is
a synchronising signal
to get the edge of the chart aligned with the end of the screen.
Press
S
when the buzz is heard to start the picture. The blips will create
a vertical line somewhere at the top of the screen. Using the
c
or
+
key, move this line until it is off the screen either to the left or right.
When the blips stop the chart will start to print. Press
R
to delete the
blips and return the chart to the top of the screen. The volume can be
turned down
if
necessary. (Its setting does not affect the chart.) At the
end of the chart a buzz will be heard. Press the
S
key to end the
recording. The chart can be viewed by pressing the page up or page
down keys. Move the chart to the area you require. This chart can be
saved in memory for future reference or to be manipulated or printed.
Press the
Q
key. A bar to the right of the screen indicates the data being
copied to hard disk. The program returns to the main menu. Press the
SPACE bar. Enter the name you want to give the chart followed by
.BMP
(e.9.
-
WEFAX.BMP).
Press return and the map will be saved.
To
recover a map select the menu page. Press the
R
key and then the
SPACE bar. Enter the name of the map followed by
.BMP
then press return.
The maps are stored as bitmap files and can be manipulated by any
software which can handle bitmap files
e.g. Paintbrush (Windows 3.1) or
Paint (Windows 95).
15