GETTING
STARTED
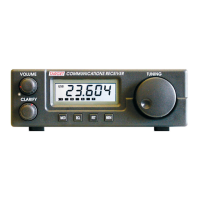
The
HF3
is supplied with a simple long wire antenna connected to a
phono plug. The wire length is
30
feet and is a good compromise for
general coverage.
A
shorter wire will be less sensitive and, whilst a
longer wire may pick up more of the desired signal,
it
may
also
pick up
much more undesirable signals in the form of interference. The
antenna wire should be strung up as high as possible and as far away
from mains wiring, striplights, televisions, or any other source of
interference (see Page
9).
The shorter black wire from the phono plug
is the ground terminal. Connect this to something that is well
grounded.
A
cold water pipe or *mains earth is usually adequate.
Do
not connect to anything
you
are not certain is earthed.
*Do
not
attempt to connect directly to any Mains Supply without the
aid of a qualified Electrician.
Plug the
12
Volt line from the power supply into the receiver, plug in
the antenna and set the attenuator on the rear of the receiver to it’s
normal position. You are now ready to go.
Switch on the receiver by rotating the volume control clockwise. The
display
will
show the frequency and the mode. Set the mode to AM. To
select mode
USB,
AM and
LSB
press
MOD.
This rosters through the
modes. Set the Clarify control to it’s central position. Adjust the volume
to a convenient level and use the tuning knob to move up and down
the spectrum and listen to the
AM stations.
To
Store
a
Frequency In memory
Tune to the desired frequency and press
MEM.
The S meter then
becomes the memory location pointer. Select the memory location
using the tuning knob. When the desired location is selected press
MEM,
the desired frequency is stored in that location and the receiver
returned
to
normal operation.
3