3 – Preparation
Connecting microphones
This section explains how to connect mics and other recording
devices as well as various connection settings.
Connecting a single mic that uses phantom
power
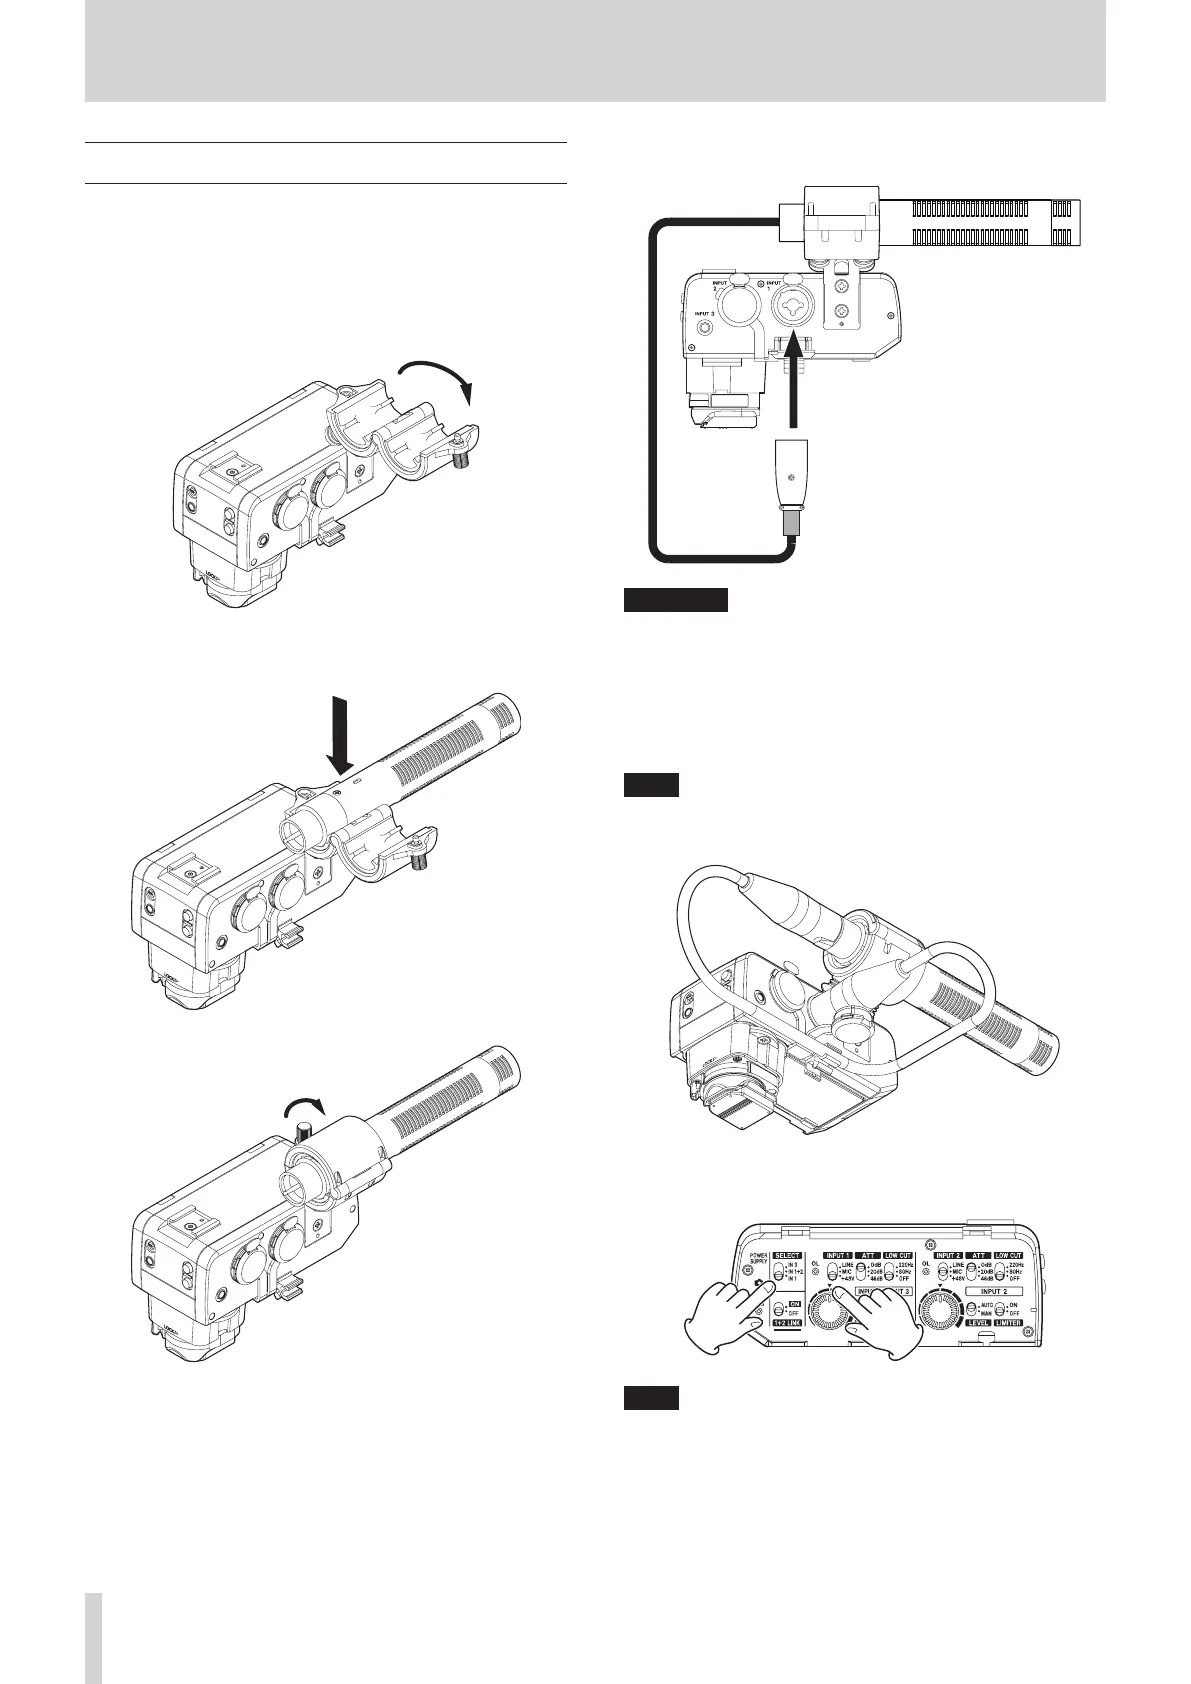
1. Loosen the mic holder screw and open the holder.
2. Place the mic in the holder, and close the holder while
keeping the mic in place. Then, tighten the screw securely.
3. Connect the mic cable to the INPUT 1 jack (i) on this unit.
ATTENTION
i Before connecting or disconnecting a mic or other recording
device, turn this unit o.
i Do not connect or disconnect mics when the INPUT 1 switch
(4) is set to +48V. Doing so could cause a loud noise and
might damage this unit and connected equipment.
i Do not set the INPUT 1 switch (4) to “+48V” when
connecting mics that do not require phantom power.
NOTE
If the cable is long, attach the cable to the cable holder so
that it stays out of the way.
4. Set the SELECT switch (2) to “IN 1” and set the INPUT 1
switch (4) to “MIC” or “+48V”.
NOTE
i The mic holder can be used to mount mics with 19–23 mm
diameters.
i The mic holder can be detached. Remove it with its screws if
it is unneeded. (see “Removing the mic holder” on page 13)
12 TASCAM CA-XLR2d