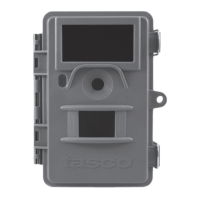
The Tasco Trail Camera, model #119259CW, is a compact, portable, and weather-resistant digital trail camera designed for recording animal activity outdoors. It features a rugged construction and is equipped with a 1MP digital sensor, capable of producing 3MP image resolution through interpolation.
Important Technical Specifications:
- Model Number: 119259CW
- Image Sensor Type: 1/4 Inch CMOS
- Sensor Resolution: 1.0 Megapixels
- Effective Focal Length: 7.6 mm
- Lens Aperture: f/2.0 ~ 2.5
- IR Filter: Automatic IR Filter
- PIR Sensor: Yes
- Trigger Speed: 1.0 second
- Number of IR LED: 12 LEDs
- Max Night Vision Lighting Distance: 30 feet
- Storage: SD Card, up to 32 GB Capacity
- PIR Indicator: Yes
- Image Resolution: 3 MP* (*3MP resolution via software interpolation)
- File Format: JPEG
- Date/Time Imprint: Yes (initial data input via text file on SD card)
- Moon Phase Imprint: Yes
- Exposure: Auto
- White Balance: Auto
- Power Supply: 4 or 8 AA cell batteries (alkaline or lithium)
- Power Consumption: <200ma (<600ma w/LED flash)
- Average Continuous Running Time: approx 2 mo. (+/- 1 mo. depending on # of photos using LED flash)
- Water Resistant: Yes
Usage Features:
The camera is designed for ease of use and offers several features to optimize its performance in the field:
- PIR Motion Sensor: The Passive Infrared Sensor detects motion, triggering the camera to capture images. It senses infrared energy (heat) in addition to motion.
- Automatic IR Filter: Ensures optimal image quality by automatically adjusting for infrared light.
- 12 Night Vision LEDs: Provides illumination for capturing clear images in low-light conditions, with a maximum night vision distance of 30 feet.
- Date, Time & Moon Phase Imprint: Automatically imprints the date, time, and moon phase on each photo, providing valuable data for tracking animal activity. This feature requires initial setup via a text file on the SD card.
- Compact Size: Its small form factor makes it easy to conceal and transport.
- Mounting Strap Supplied: Facilitates easy installation on trees or other surfaces.
- Power On/Off: To power on the camera, insert batteries and an SD card, then slide the power switch to the "On" position. A red LED on the PIR indicator will flash for 10 seconds, indicating the camera is preparing to capture photos. If the red light flashes rapidly for 10 seconds, there is a problem with the SD card. If the red light stays on for 20 seconds, the battery level is low.
- Setting Up the Camera:
- Mounting: The camera should be mounted about 4 or 5 feet off the ground, pointed slightly downward. Avoid aiming it east or west to prevent false triggers from rising/setting sun. Clear branches and other debris from the front of the camera to avoid blocking the camera lens or PIR sensor. Secure the camera using the strap through the strap slots on the rear housing, ensuring the strap is tight and the buckle is locked.
- Power On: After inserting the SD card and batteries, move the switch to "ON." The PIR sensor's heat/motion detection will be triggered. The camera will take a new photo following a 10-second delay. For the first three minutes of operation, the PIR indicator will glow for about 3 seconds when it senses animal or human activity within the PIR coverage area.
- Testing Coverage Area: To test the coverage area, open the front housing and slide the power switch to the "ON" position. The PIR indicator LED will glow for 3 seconds when you trigger the PIR by entering the coverage area. Adjust the camera position as needed and repeat the test until the desired coverage area is achieved. After three minutes, the PIR indicator will not glow when you are in the coverage area.
- Viewing Photos: Photos can be reviewed by either:
- Using an SD Card Reader: Gently push the SD card to release it, then pull it out. Insert the SD card into a USB-connected SD card reader (dedicated or multi-card) or directly into your computer's SD card slot. The SD card or reader should appear as a connected drive, allowing you to double-click and view/download the .jpg photo files.
- Security: A standard padlock can be used in the camera's lock hole to secure it and prevent theft.
Maintenance Features:
- Battery Installation: The camera requires 8 AA lithium (for longest life) or alkaline batteries. It can also be powered by just four batteries installed in the first slots only. Battery life will be shorter with 4 batteries. Always ensure the power switch is in the OFF position when installing or removing batteries. Incorrect voltage or polarity (+/-) will damage the camera.
- Important Battery Guidelines:
- Do not mix old and new batteries.
- Do not mix battery types—use ALL lithium or ALL alkaline.
- Rechargeable batteries are not recommended.
- SD Card Installation: The camera accepts memory cards up to 32 GB.
- Installation Steps:
- Ensure the power switch is in the OFF position.
- Insert an SD card into the card slot, label up, contacts facing down, and notched corner on the right.
- To remove, depress the SD card and pull it out gently.
- Formatting SD Cards: New, blank SD cards are recommended. If using a previously used SD card, make sure to format it (FAT16) using your computer before setting up the camera to capture photos.
- Date and Time Imprint Feature: To set or update the date and time:
- Insert a new SD card into the camera's slot. Switch the Trail Camera to "ON." The "Timetool.exe" software will be automatically saved to the card.
- Turn off the camera and remove the SD card. Insert the card into your computer's SD card slot or a compatible USB connected card reader. View the SD card contents and double-click to open the "timetool.exe" file.
- Click "Update" in the Timetool window to automatically fill in the date and time from your computer's clock. If this is not the correct date and time, click "Edit" and make changes as needed.
- Click the "..." button above Cancel and select the SD card location (drive letter). Or, if you know the drive letter for the SD card (e.g. "D:"), change the "A" in the white box to the correct letter.
- Once the date/time data is correct and you've selected your SD card location, click OK to save the text file.
- Remove the SD card (eject it first if necessary) and insert it into your Trail Cam (label side up as previously described). The date and time data will be automatically loaded into the camera, and the text file (.txt) will be deleted. It is important to get the card from computer to camera as soon as possible to ensure the initial time is still accurate.
- Note for Mac (OSX) users: Although the Timetool software is Windows only, you can create a compatible file using any application that supports plain text files (.txt format). Using this app, type the current date and time using this format: "TIME"YYYYMMDDHHMM (include the word "TIME" with quote marks. Do not add spaces, hyphens or slashes). For example, "TIME"201507171038 represents July 17th, 2015 at 10:38 AM. Save this as a .txt file to your SD card, naming the file "TIMESYNC".
Troubleshooting / FAQ:
- Battery life is shorter than expected: Battery life varies with operating temperature and the number of images taken over time. Ensure you are using new alkaline or lithium batteries. Tasco recommends using 8 Energizer® Lithium AA batteries in this Trail Cam to obtain maximum battery life. Also, ensure you are using a good quality name brand SD card up to 32GB. Poor quality SD cards can sometimes reduce battery life.
- Camera stops taking images or won't take images:
- Ensure the SD card is not full.
- Check batteries for newness and correct polarity.
- Make sure the camera power switch is in the "ON" position and not in the "OFF" position.
- Ensure you are using a good quality SD card up to 32GB.
- If the SD card has its write protect switch in the lock position, the camera will not take images.
- If you have used an SD card in another device, you might need to format it in your computer (FAT16).
- Camera won't power up:
- Ensure you have installed at least 4 batteries in the battery compartment. Tasco recommends using 8 Energizer® Lithium AA batteries.
- Make sure batteries are installed correctly, observing proper polarity.
- Ensure the battery is in contact with the spring tab side of its slot.
- Still Photo and/or Video Quality Problems:
- Night photos appear too dark: Use new batteries. Flash performance decreases with low battery. Best results are within 30' from the camera.
- Daytime photos appear too dark: Avoid aiming the camera at the sun or other light sources, which can cause auto exposure to produce darker results.
- Night photos appear too bright: Best results are no closer than 10' (3m) from the camera. Subjects may appear too light at closer distances.
- Daytime photos appear too bright: Avoid aiming the camera at the sun or other light sources.
- Red, green or blue color cast: This can occur under certain lighting conditions if the sensor becomes confused. If consistent, the sensor may need servicing.
- Photos Do Not Capture Subject of Interest:
- Set up the camera in an area without a heat source in its line of sight.
- Avoid setting the camera near water, as it can cause false triggers.
- Avoid setting the camera up on small trees that are prone to being moved by strong winds.
- Remove any limbs which are right in front of the camera lens.
- PIR Sensor LED Flashes/Doesn't Flash:
- For the first three minutes after the camera is switched on, the PIR Indicator LED on the front of the camera will flash for 3 seconds whenever it senses motion. This is for setup purposes only and will help the user aim the camera.
- During use, the LED will not flash when the camera takes an image. This is to help keep the camera hidden from game.
- Time/Date Imprint is Not Accurate:
- If you let any significant amount of time elapse between setting and saving the current time on the SD card using your computer (following the Timetool directions on pg. 9) and inserting it back into the camera, the time will be off by that much. If you don't put the card back into the camera until two days after you saved the text file on it with the time & date, the camera will "think" the current date is still the same as it was two days ago, and the imprint on your photos will be off by that much.
Warranty:
Tasco provides a one-year limited warranty against defects in materials and workmanship from the date of purchase. This warranty does not cover damages caused by misuse, improper handling, installation, or maintenance performed by someone other than a Tasco Authorized Service Department. Returns require a check/money order for $10.00 to cover postage and handling.