ed selector button. (M)
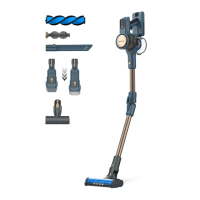
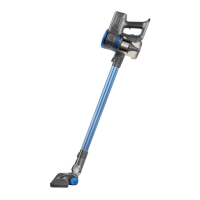
FITTING AN ACCESSORY TO THE HAND
VACUUM:
- The hand vacuum is designed in such a way
that it allows the following accessories to be
tted: (use the combination that best meets
your requirements). (Fig.2).
- Furniture brush: Equipped with a brush at the
end, which brushes the surface as it is used.
- Crevice nozzle: Specially designed for getting
into cracks and difcult corners.
ONCE YOU HAVE FINISHED USING THE
APPLIANCE:
- Turn the appliance off using the on/off button.
- Remove the battery from the appliance if you
are not intending to use the appliance during
an extended period.
- Clean the appliance.
CLEANING
- Disconnect the battery charger from the mains
and allow it to cool before undertaking any
cleaning task.
- Clean the equipment with a damp cloth with a
few drops of washing-up liquid and then dry.
- Do not use solvents, or products with an acid or
base pH such as bleach, or abrasive products,
for cleaning the appliance.
- Never submerge the appliance in water or any
other liquid or place it under running water.
EMPTYING THE DUST BOX
- Empty the dust box when it is full (observation
facilitated by transparent windows), or when
vacuuming power is notably reduced.
- Open the lid of the dust box and empty the
contents into the appropriate waste disposal
receptacle.
- Check the condition of the dust box lter.
- Check the condition of the motor lter.
- Close the lid of the dust box.
CHANGING THE FILTERS:
- Dust motor EPA lter (high efciency air lter
that efciently retains spores, ash, sawdust,
pollen…), it is advisable to change it a least
once a year or after every 100 hours of use, or
if its potency diminishes remarkably.
to over-charge the battery (although it is re-
commended that the rst charge of the battery
be of 6 hours in duration).
- The pilot light will come on to indicate that the
charger is charging the battery.
- At the end of the time period specied above,
remove the battery from the charger.
- When the battery is charged disconnect the
charger from the mains supply.
- NB: Do not use the appliance while it is con-
nected to the charger.
HOW TO CHECK THE BATTERY’S CHARGE
LEVEL:
- Press the battery charge level indicator button,
the pilot lights that indicate if it is charged will
light up.
- If all pilot lights come on, this means that the
appliance is fully charged.
- If only one pilot light lights up this means that
the battery has very little power remaining.
- If no pilot light lights up, this means that the
battery is completely at.
- NB: For a long battery life, it is advisable to
charge the battery, only, when it has run out
completely.
ASSEMBLING THE BATTERY/S
- Caution: During the handling of batteries, do
not touch both poles at the same time, as this
will provoke the partial discharge of the stocked
energy therefore affecting longevity.
- Connect the battery in its housing, respecting
the indicated polarity. (Fig.1)
INSTRUCTIONS FOR USE
BEFORE USE:
- Make sure that product’s packaging has been
removed.
- Before using this product for the rst time, it is
important to make a full charge of batteries.
- Prepare the appliance according to the function
you wish to use:
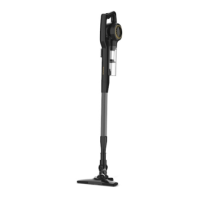
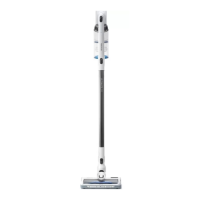
VACUUMING FUNCTION:
USE:
- Turn the appliance on, by using the on/off
button. (L)
- Select the desired speed by pressing the spe-