PARALLEL
GUIDE
ROUTING
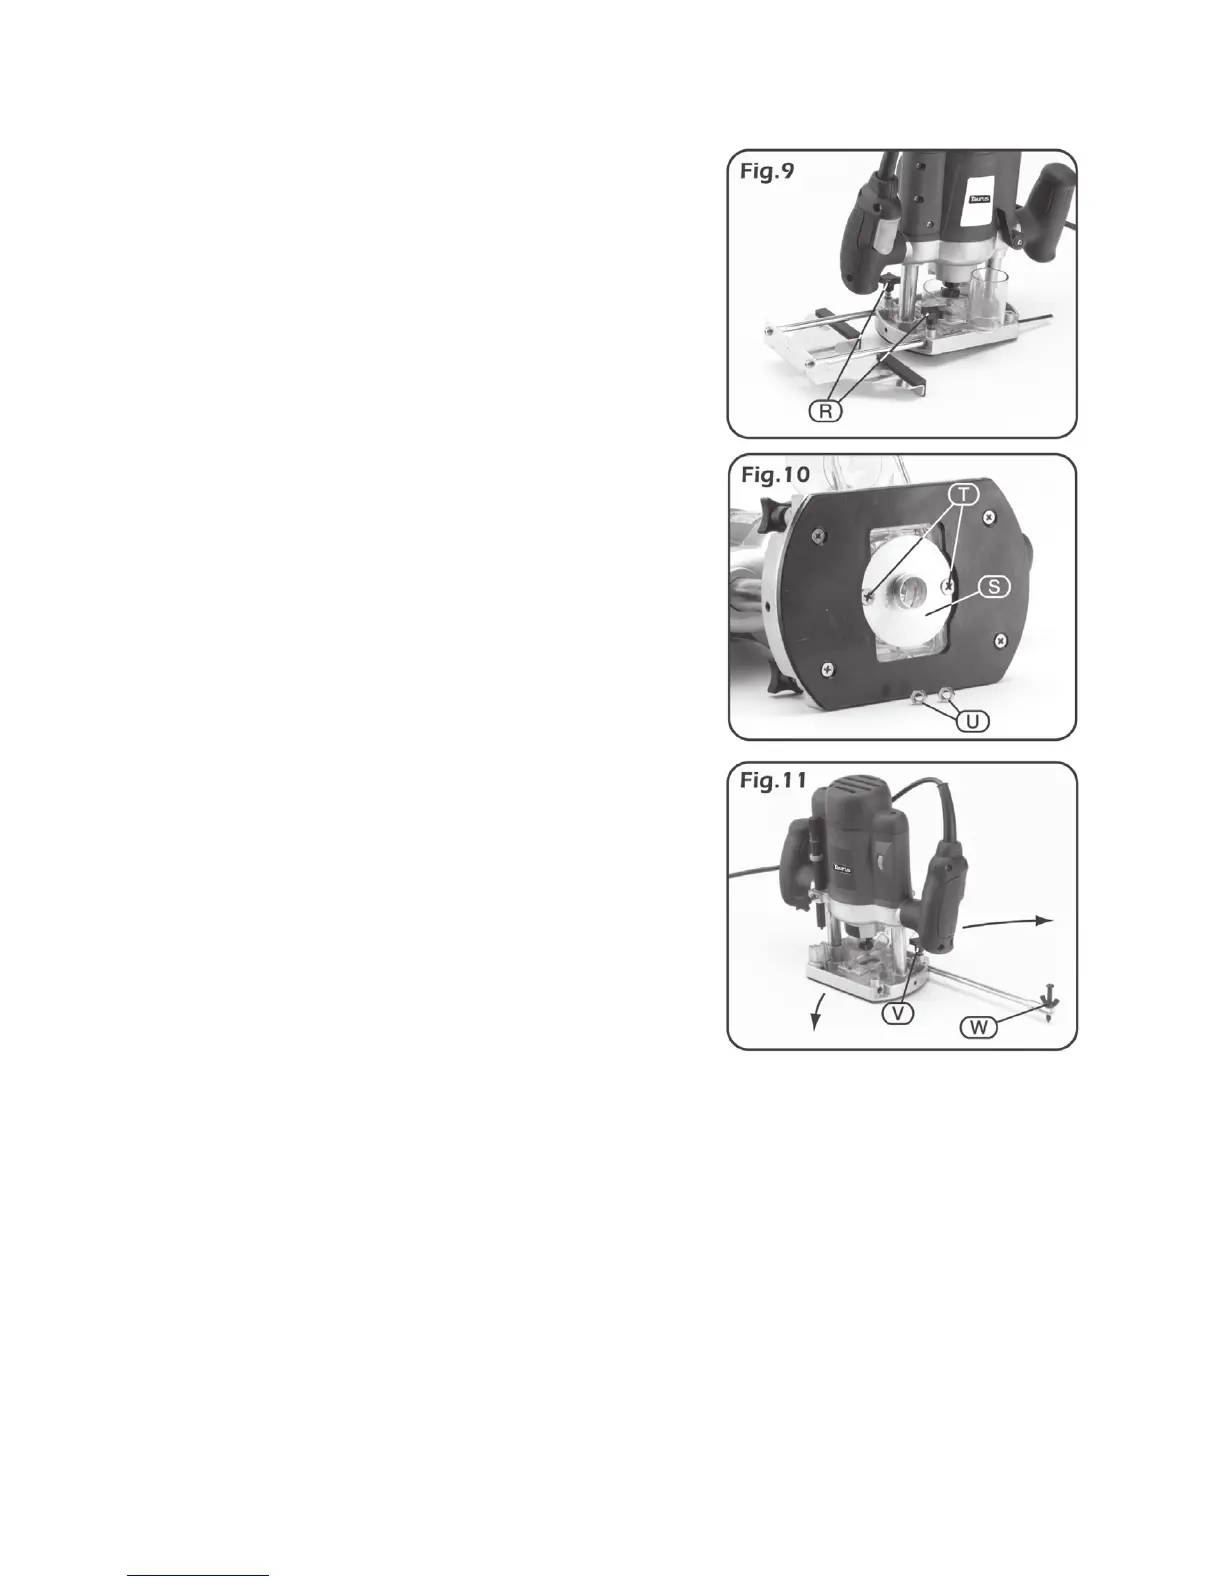
(Fig.9)
Ensure the edge along which the guide is going to travel is
smooth and true as any inconsistencies will translate into
the cut.
Pass the parallel guide rods through the four pointes in the
router’s base and secure in place with lock knobs ®. When
using the parallel guide an even pressure should be applied
to each face except on a leading/trailing edge of a work
piece. When leading on to a work piece apply the pressure
to the forward face until both faces are on. When trailing off
a work piece apply the pressure to the rear face until the cut
is complete.
16mm
INNER-18mm
OUTER
DIAMETER
TEMPLATE
FOLLOWER
(Fig.
10)
For detailed information on templates refer to a routing/
woodworking book.
Lay the template follower (S) into the recess. Ensure the
template follower faces downward and secure with the two
countersunk screws (T)
NOTE:
For operations using the template follower without
the dust extraction port tted use the two 8mm nuts (U).
PIVOT
ROD
TRAMMEL
(Fig.11)
Secure one of the parallel guide rods into the rear channel.
Remove the rod locking knob from the front channel and
secure it into the additional rod locking point. Loosen the
wing nut and slide the trammel (W) on to the rod end. Adjust
the point height to suit before locking the wing nut. Adjust
the distance between the router bit and pivot point.