ASSEMBLY
Note:
Remove the plug from the socket before carrying out adjustment, servicing or maintenance.
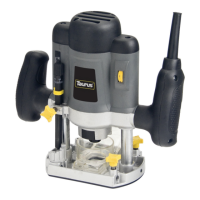
PARALLEL
GUIDE
FENCE
(Fig.
1)
Attach the two face plates (a) to the parallel guide fence (B)
with the four machine screws (C) supplied. Insert screw
(D) through spring washer (E) and at washer (F). Secure the
rods onto the guide fence (B) with the screw assembly.
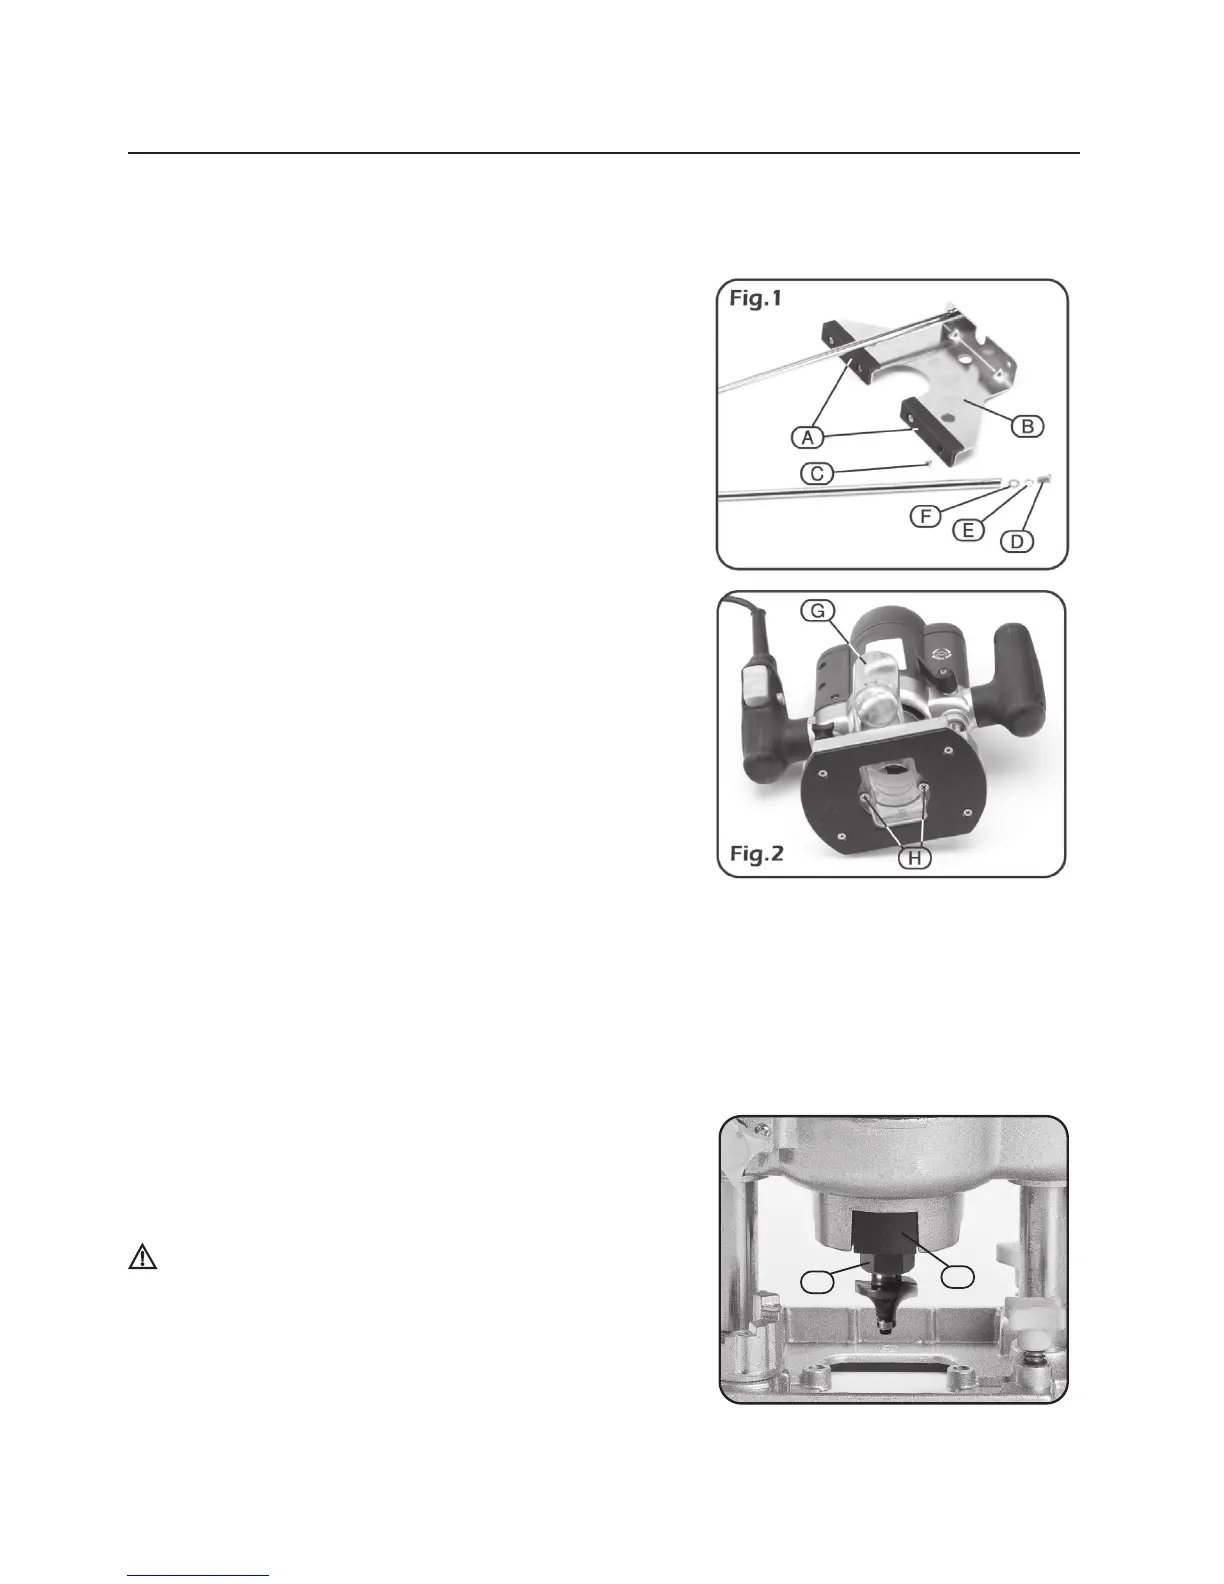
DUST
EXTRACTION
PORT
(Fig.
2)
The majority of operations will require the dust extraction to
be tted, however some operations will be impossible with
the port tted. These require appropriate safety equipment
to be worn. Fit the dust extraction port (G) into the recess.
Pass the two machine screws (H) up through the base and
into the nuts in the port. Secure the port without damaging
the plastic parts by over tightening the machine screws.
NOTE:
With the dust extraction port tted, the plunger
stroke is reduced to 38mm.
DUST
EXTRACTION:
Inhalation of dust particles can be detrimental to health.
The dust outlet must be connected with a dust extraction
machine.
NOTE:
Due to the outlet diameter, a size adaptation may be necessary. All wood dust (including
dust form composites like chipboards and bre boards etc.) is hazardous to health; it can affect the
nose, the respiratory system and the skin. For example MDF (medium density berboard) which
contains formaldehyde is a known carcinogen. In addition to the above measures a correctly tted
dust mask, suitable for the activity and in accordance to the relevant standard, must be worn.
For work activities involving exposure to ne wood dust a mask should be used.
ASSEMBLY
FITTING
&
REPLACING
ROUTER
BITS
(Fig.
3):
This router is designed for use with 1/4” and 5/16” shank
router bits only.
WARNING:
Use bits of the correct shank diameter
suitable for the speed of the tool. Selection of the correct
router bit, suitable for the intended application is vital. Seek
guidance if uncertain of selection. Press the spindle lock
button (G) and unscrew the collet nut (H) using the spanner
supplied.
NOTE:
Take care not to be lose the spring behind the
collet. Choose from the collets provided, the appropriate size for the cutters shank 1/4” or 5/16”. If