After Sales Support TEL: 1300 922 271 EMAIL: service.australia@einhell.com
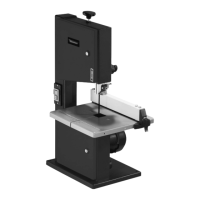
12
•
Slo
wlyturntheupperbladepulley(8)clockwisebyhand.
The blade (26) should run in the middle of the pulley. If
it does not, you will have to adjust the tilt of the upper
blade pulley (8).
• Iftheblade(26)tendstoruntothebackoftheblade
pulley (8), i.e
. towards the machine frame(25), turn the
setting screw (22) anti-clockwise while turning the blade
pulley (8) by hand until the blade (26) runs in the middle.
•
I
ftheblade(26)tendstoruntothefrontedgeof
the blade pulley (8), turn the setting screw (22) in a
clockwise direction.
•
Aftersettingtheupperbladepulley(8)youneedtocheck
the blade (26) position on the lo
wer blade pulley (7). The
blade (26) should run in the middle of the blade pulley (7),
as above. If it does not, you will have to adjust the tilt of
the upper blade pulley (8) again.
• Turntheupperbladepulleyseveraltimesuntilthe
adjustmen
t to the upper blade pulley (8) has an eect on
the blade position of the lower blade pulley (7).
• Afteranyadjustmentshavebeencarriedout,theside
c
overs (12) must be closed again and re-secured with
the fasteners (13).
8.4. Setting the blade guide (Fig. 7 - 10)
Whenever you change the blade you must re-set both the
support bearings (30 + 31) and the guide pins (28 + 29).
• Undothefasteners(13)andopenthesidecover(12).
8.4.1. Upper support bearing (30)
• Undo
thescrew(33).
• Movethesupportbearing(30)sothatitisnolonger
t
ouching the blade (26). There should be a maximum gap
of 0.5 mm.
• Re-tighten
thescrew(33).
8.4.2. Adjusting the lower support bearing (31)
• Dismantle
thesawtable(15).
• Swing
thebladeguard(34)away.
•
A
djustinthesamewaythattheuppersupportbearing
w
as adjusted.The blade (26) is only supported by the
support bearings (30 + 31) during cutting. When idle the
blade should not touch the ball bearing.
8.4.3. Adjusting the upper guide pins (28)
• Undo
theAllenscrew(35)
• M
ovethemount(36)oftheguidepins(28)sothatthere
is a gap of appr
ox. 1 mm between the front edge of the
guide pins (28) and the gullet of the blade in front.
• Re-tighten
theAllenscrew(35).
• C
AUTION! The blade will be rendered useless if the teeth
touch the guide pins while the blade is running.
• Undo
theAllenscrews(37).
• M
ovetheguidepins(28)towardsthebladesothatthere
is a gap of appr
ox. 0.5 mm between the guide pins (28)
and the blade (26). The blade must not jam.
• Re-tighten
theAllenscrews(37).
•
T
urntheupperbladepulley(8)severaltimesina
clock
wise direction.
•
Check
thesettingoftheguidepins(28)againandre-
adjust if necessary.
8.4.4. Adjusting the lower guide pins (29)
• Dismantlethesawtable(15).
• Undothescrew(40).
• Movethemount(49)oftheguidepins(29)sothatthere
is a gap of appr
ox. 1 mm between the front edge of the
guide pins (29) and the gullet of the blade in front.
• Re-tightenthescrew(40).
•
C
AUTION! The blade will be rendered useless if the teeth
touch the guide pins while the blade is running.
• Undo
theAllenscrews(38).
• M
ovetheguidepins(29)towardsthebladesothatthere
is a gap of appr
ox. 0.5 mm between the guide pins (29)
and the blade (26). The blade must not jam.
•
R
e-tightentheAllenscrews(38).
• T
urnthelowerbladepulley(7)severaltimesina
clockwise direction. Check the setting of the guide pins
(29) again and re-adjust if necessary.
CAUTION! When the adjustments have been nished, the
blade guard (34) must be closed again.
8.5. Adjusting the upper blade guide (Fig.11/Item 11)
• Undo
thexinghandle(Fig.2/Item20).
•
T
urnthesettingwheel(Fig.2/Item19)tolowertheblade
guide (F
ig.11/Item 11) as close as possible to the work
piece to be cut. The gap should be approx. 2-3 mm.
• Re-tighten
thexinghandle(Fig.2/Item20).
•
Check
thesettingbeforeeachcutandre-adjustif
nec
essary.
8.6. Adjusting the machine table (Fig.12/Item 15) to 90°
•
Movetheupperbladeguide(Fig.12/Item11)
to the top.
• Undo
thexinghandles(Fig.2/Item8).
•
Settheangle(Fig.12/Item11)betweentheblade
(Fig.12/Item 26) and the table (Fig.12/Item 15).
• T
urnthesettingwheel(Fig.12/Item19)totiltthesaw
table (Fig.12/Item 15) until it is at an angle of exactly 90°
to the blade (Fig.12/Item 26).
• Re-tighten
thexinghandle(Fig.2/Item18).
• Undo
thenut(Fig.13/Item42).
•
A
djusttheAllenscrew(Fig.13/Item41)untilthereis
c
ontact with the machine frame.
•
R
e-tightenthenut(Fig.13/Item42)tofastentheAllen
scr
ew (Fig.13/Item 41).
 Loading...