Do you have a question about the TCL L26E9AD and is the answer not in the manual?
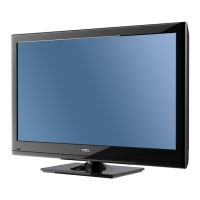
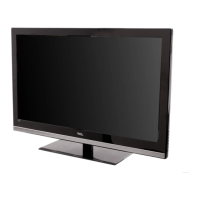
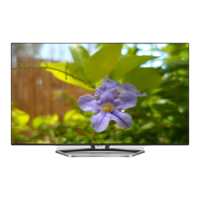
This document is an operation manual for TCL LCD TVs, specifically covering models L26E9AD, L32E9AD, L42E9ADF, L42E9ADZ, L46E9ADF, L46E9ADZ, L42E77DF, and L32E77D. It provides comprehensive instructions for setting up, operating, and maintaining the television sets, ensuring users can maximize their viewing experience.
The manual begins with a crucial "Precautions" section, emphasizing safety and proper handling of the product. It advises users against blocking ventilation openings, pushing objects into the cabinet slots, or attempting to open the cabinet themselves, as these actions could lead to fire, electric shock, or damage. Users are also warned not to touch or impact the LCD screen with fingers or hard pressure to prevent scratches or severe damage. Special attention is given to the safety of young children, recommending supervision to prevent them from playing with the appliance.
Regarding "Power and Plug," the manual instructs users to unplug the set if it won't be used for a long time, if the power cord or outlet is damaged, or if the set has been impacted or dropped. It also provides guidance on proper installation and adjustment of controls, advising users to refer to service personnel if improper adjustments cause damage. The "Power Cord and Signal Cable" section highlights the importance of protecting these cables from being rested on, rolled over, or trampled, and warns against overloading or exposing them to moisture.
For the "Use Environment," the manual recommends placing the TV on a stable surface with good ventilation, away from damp, cold, or dusty areas, and direct sunlight. It also specifies that the set should not be exposed to dripping or splashing liquids, and no objects filled with liquids, such as vases, should be placed on it.
"Cleaning" instructions advise using a soft, clean cloth or special liquid cleaner for the screen and cabinet, cautioning against excessive force or the use of water or other chemical cleaners on the screen, which could damage its surface.
For users intending to hang the TV on a wall, a "Warning" is issued, stating that this operation requires two people. Safety notes include checking wall support for the TV and mount weight, following mounting instructions, ensuring vertical installation, using appropriate screws, and placing cables to prevent tripping hazards. The "Important Information" section further elaborates on stability, recommending manufacturer-approved cabinets or stands, ensuring the TV doesn't overhang furniture, and educating children about climbing dangers.
The manual then details the "Side Panel Buttons" and "Sockets," providing a visual guide and descriptions for both the remote control and the TV itself. For side panel buttons, it covers the Power, Menu, Volume Up/Down, Program Up/Down, and Standby Indicator functions. The sockets section describes AV2 RCA audio + video inputs, a USB socket for software upgrading, and a headphone output. For the back of the TV, it details HDMI1/HDMI2/HDMI3 inputs for high-definition multimedia, VGA/DVI AUDIO input for PC audio, VGA input for computer connection, YPBPR component video and audio inputs for high-quality video, AV1 RCA audio + video inputs, S-VIDEO input for improved picture quality, AUDIO/VIDEO OUT outputs for recording, SPDIF OUT for digital audio, and ANTENNA IN for external antenna connection.
The "Remote Control Functions" section provides a comprehensive overview of each button's purpose. This includes the On/Off button, Mute, Source for signal selection, Picture for preset settings (Standard, Dynamic, Power saving, Personal, Bright), Sound for audio modes (Standard, Movie, Music, Personal, News), numeric buttons for channel entry, Aspect for picture size (16:9, 4:3), FAV for favorite program list, Exit for menu exit, Menu for main menu access, directional buttons for navigation, OK for confirmation, Guide for Electronic Programme Guide, Return for previous channel, INFO for status information, Volume +/- for volume adjustment, PR +/- for channel scanning, Subtitle for subtitle display modes, View for full/part view, Text for teletext, and colored buttons for tasks and teletext pages. It also explains CEC function buttons for controlling HDMI CEC compliant DVD players, including CEC On/Off, Device menu, Power, Eject, Skip, Fast Reverse/Forward, Stop, Play, and Pause. A note clarifies that CEC functions may vary between DVD brands.
"Chapter 2: General Operation" guides users through "Switching on" and "Switching off" the TV. To switch on, users must insert AAA batteries into the remote, connect the power cable to the TV and then to a mains socket (emphasizing AC supply only), connect an aerial or cable network to the ANTENNA IN socket, and finally press the AC power button at the back of the TV. If the standby indicator lights up, the TV is in standby mode, and the remote's power button or side panel buttons can turn it on. To switch off, users can put the TV into standby mode using the remote or side panel power button, or completely switch it off using the power button at the back.
The "Using Menu System" section explains how to navigate the TV's menus. Users press the Menu button to access the main menu (Picture, Sound, Features, Install), use directional buttons to select options, and OK or right directional buttons to confirm. Text at the bottom of the screen provides help. The Exit button exits the menu system directly, or the Menu button can be pressed repeatedly.
"Automatic Channel Set-up" details how to search for, find, and store analog and digital channels. Users access "Install" from the main menu, then "Channel installation," and select "Automatic Search." The TV will search for digital and then analog channels, displaying the number found. The red button stops the search, and found channels are not stored if stopped prematurely. The red button finishes the search, or the Menu/Exit buttons return/close the menu.
"Automatic Update" allows tuning or updating channels without altering existing sorting. Users select "Automatic update" under "Channel installation" and press OK to start. The red button stops the update, and the red/Menu/Exit buttons finish/return/close the menu.
"Digital Test Reception" helps users check digital channel signal quality for antenna repositioning. Under "Channel installation," users select "Digital: Test reception." The green button starts an automatic test, or users can manually enter a frequency and then press the green button. If the signal quality is good, the yellow button stores it; if poor, users should check frequency, antenna connection, and position. The red button returns to the previous menu, and Menu/Exit buttons return/close the menu.
"Rearrange TV Channels" allows renaming, reshuffling, uninstalling, or reinstalling stored channels. Users access "Rearrange" under "Channel installation." Yellow or blue buttons select a channel. The red button renames a channel, using digit keys and color buttons for editing. The green button reinstalls or uninstalls a channel, removing it from the program list if uninstalled. Menu/Exit buttons return/close the menu.
"Chapter 3: Advanced Functions" covers "Adjusting the Picture" and "Adjusting the Sound." For picture adjustments, users access the "Picture" menu. Options include Picture Preset (Standard, Dynamic, Power saving, Personal, Bright), Contrast, Brightness, Color, Back Light, Sharpness (not available in VGA mode), Tone (COOL, NORMAL, WARM), Noise reduction, Tint (NTSC system only), and Picture format (16:9, 4:3). A note advises against prolonged use of 4:3 format with black bars to prevent LCD screen damage.
For sound adjustments, users access the "Sound" menu. Options include Sound Preset (Standard, Movie, Music, Personal, News), Bass, Treble, Balance, Incredible Surround (On/Off), Auto Volume Leveling (On/Off), and Audio Language.
"Special Functions" are accessed via the "Features" menu. "Timer" provides access to submenus for "Clock," "Start time," "Stop time," and "Sleeptimer." "Clock" allows setting Clock Mode to Automatic (from DTV signals) or Manual. If Manual, users can set the Time using digit keys and directional buttons, with the red button to clear/reset. Time zone and Daylight savings (Off/On) can also be set. "Start time" and "Stop time" allow setting periods for the TV to automatically switch On or Off, with settings similar to the Clock menu. "Sleeptimer" sets a period (up to 180 minutes) for the TV to go into standby mode, with 0 Min disabling it. "Parental control" requires a personal code (default 0000) to access. It includes "Lock Channel" to lock specific TV channels or external sources, "Parental rating" to set program ratings, "Clear all" to unlock all channels, and "Change code" to change the 4-digit PIN. "Subtitle" enables subtitles for digital TV channels, with options for On (always), On during mute, or Off. "Subtitle Language" allows selecting a preferred language from broadcasted options. "TV Channel Installation" covers "Preferences" and "Source labels." "Location" sets TV location to Home (optimal picture settings, energy efficient) or Shop. "Easy Link" (HDMI CEC) can be set to On or Off. "Source labels" allows users to select and label accessory devices connected to external inputs/outputs. "Factory reset" resets picture and sound settings to factory values while maintaining channel installation settings.
"Chapter 4: Other Information" provides "Troubleshooting" tips for common issues. "No picture, no sound" solutions include checking fuses/circuit breakers, other electrical devices, power plug contact, and signal source. "No color" suggests adjusting Color settings or trying another channel. "Remote control does not work" advises changing batteries, checking battery installation, and main power connection. "No picture, normal sound" points to adjusting brightness/contrast or broadcasting failure. "Normal picture, no sound" suggests increasing volume, checking mute status, or broadcasting failure. "Unorderly ripples on the picture" is attributed to local interference, recommending antenna adjustment. "Blank screen in VGA mode" suggests changing PC resolution. "Snowy dots and interference" in fringe areas recommends adjusting indoor/outdoor antenna position/orientation, checking connection, trying another channel, or installing a special antenna. "Ignition" interference (black spots, streaks, fluttering) is linked to car ignition, neon lamps, or electric drills. "Ghost" images are due to signal reflections, suggesting antenna direction/position changes. "Radio frequency interference" causes ripples or streaks, and loss of contrast, requiring identification and removal of the source.
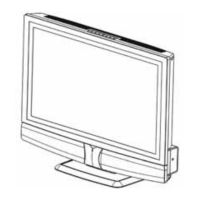
Finally, "Base Installation" provides instructions for models where the base is not pre-assembled (L32E77D and L42E77D). It involves getting the base and screws, carefully placing the base, and using a screwdriver to fix the screws. A note clarifies that these graphics are for presentation only. The manual concludes with a disclaimer that design and specifications are subject to change without notice.
| Screen Size | 26 inches |
|---|---|
| Display Technology | LCD |
| Aspect Ratio | 16:9 |
| Resolution | 1366 x 768 |
| Input Ports | HDMI, Component, Composite, VGA |
| Sound Output | 2 x 10W |