1. BATTERY AND CHARGER
- 11 -
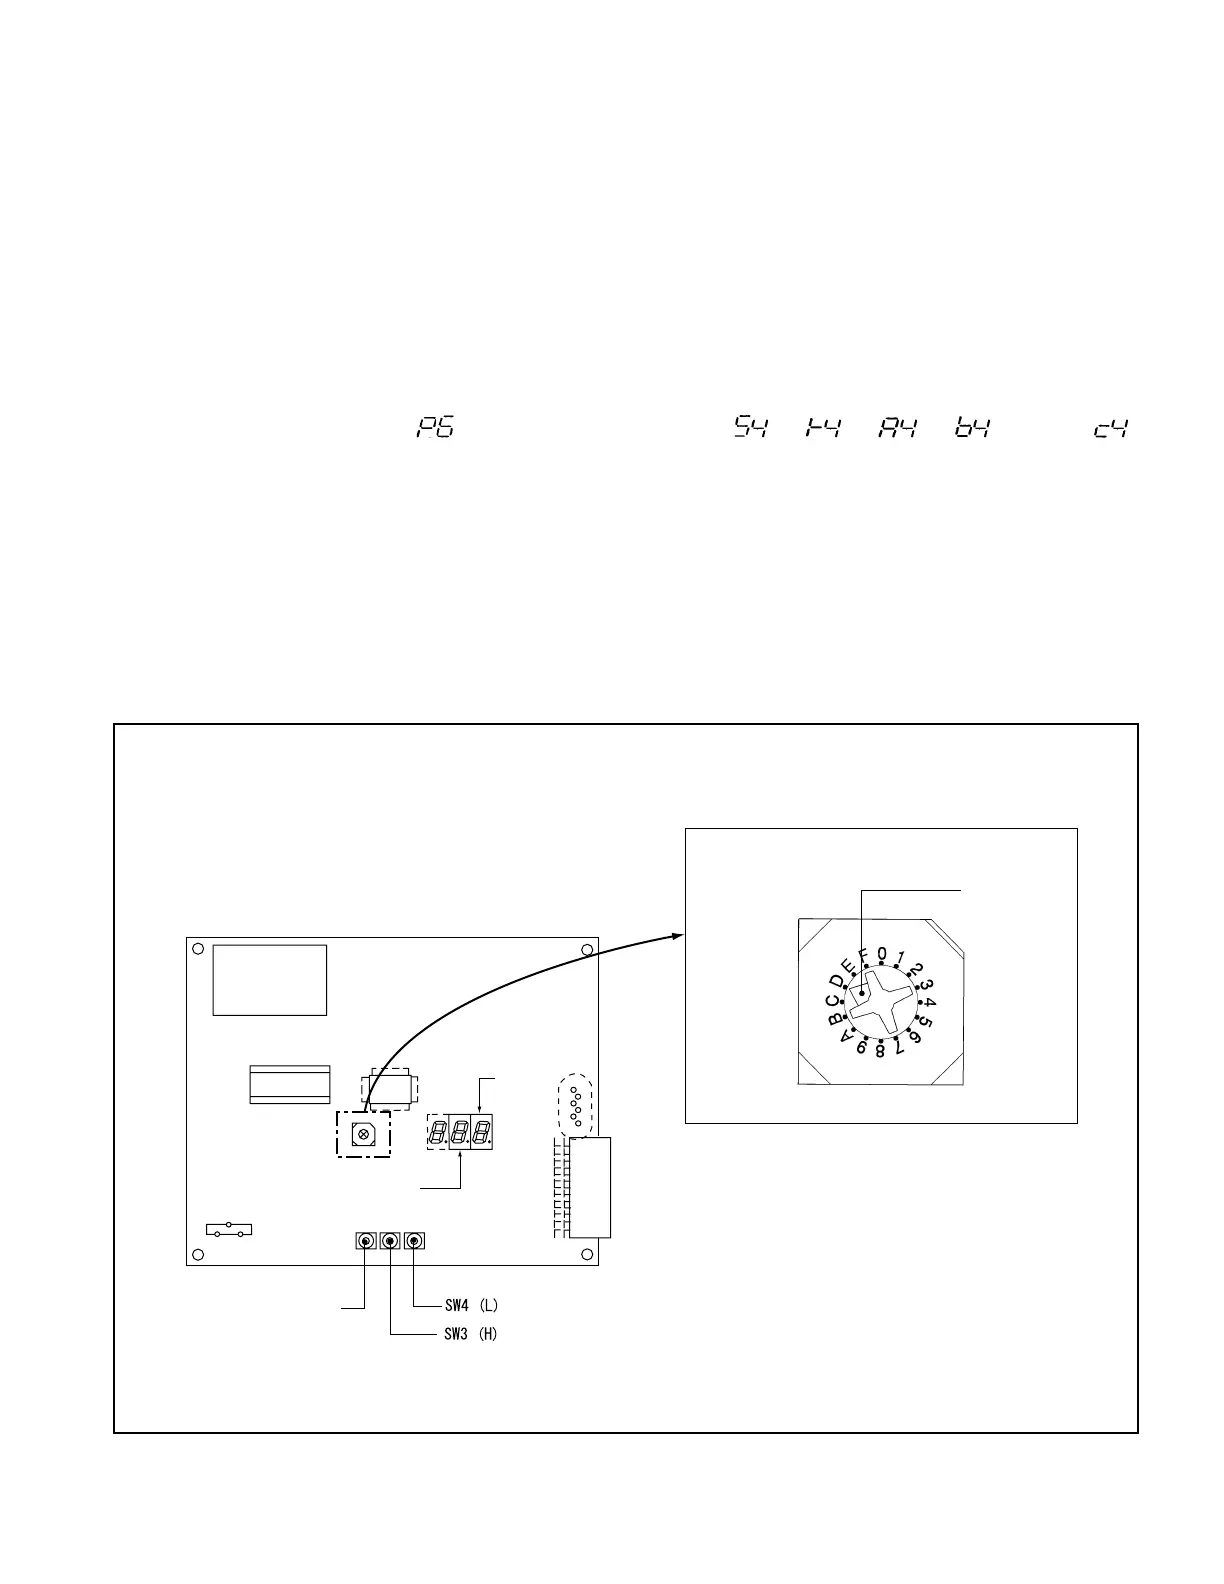
[Procedure for changing VTM settings] (for trucks manufactured earlier than January 31, 2004)
①
Park the truck on a level surface and turn the key switch off.
②
Disconnect the battery connectors.
③
Remove the left side cover of the truck.
④
Remove the VTM unit cover.
⑤
Check that the setting switch on the VTM unit PWB is at position “D”. If it is not at “D”, set it to
the position “D” using a small Philips screwdriver.
⑥
Connect the battery connectors. The 2-digit LED on the VTM PWB shows the present battery
voltage (in the form of a coded number).
⑦
Set the setting switch to “8”.
⑧
The 2-digit LED shows “ ”. The reading changes to “ ”, “ ”, “ ”, “ ” and to “ ”
every time the mode setting switch SW2 is pressed. The 1st digit shows the mode symbol and the 2nd
digit the speed limit or operating level number.
⑨
Set the 1st digit to the mode symbol you want. Press the SW3 or SW4 to set the speed limit or
operating level to the value you want.
⑩
After changing the settings, turn on the key switch. The communication LED will blink for 5
seconds. After making sure the communication LED has turned off, turn off the key switch and then
return the setting switch to the position “D”.
⑪
Disconnect the battery connectors. Reinstall the VTM unit cover and then the side cover.
⑫
Connect the battery connectors.
Fig. 1.10
VTM Adjustment (for trucks manufactured earlier than January 31, 2004)
MODE SETTING
SWITCH SW2
White setting
mark
SETTING SWITCH
Upper digit
Lower
digit