CONNECTING THE UNIT
Insert the power plug correctly into a power outlet. The clock display will show "12 : 0 0" and you need to set the
correct time. It will also return to show "12 : 0 0" if there has been a power outage and no back-up battery is
fitted.
TO SET THE TIME
Set the unit to Standby mode. You can only set the time when unit is in Standby mode.
1. Press and hold the Time Set Button for about 2 seconds. When the time display starts flashing, release the
button.
2. Press the Hour Button repeatly to adjust the hour digit. Pay attention to the PM indicator so that the correct
AM/PM hour is set. The PM indicator should light up during PM hours (12PM - 11.59PM).
3. Press the Minute Button repeatly to adjust the minute digit.
Note: Press and hold the Hour/Minute Button to change the digit at a fast speed.
4. Press the Time Set button when you have finished adjusting the time. The display will stop flashing.
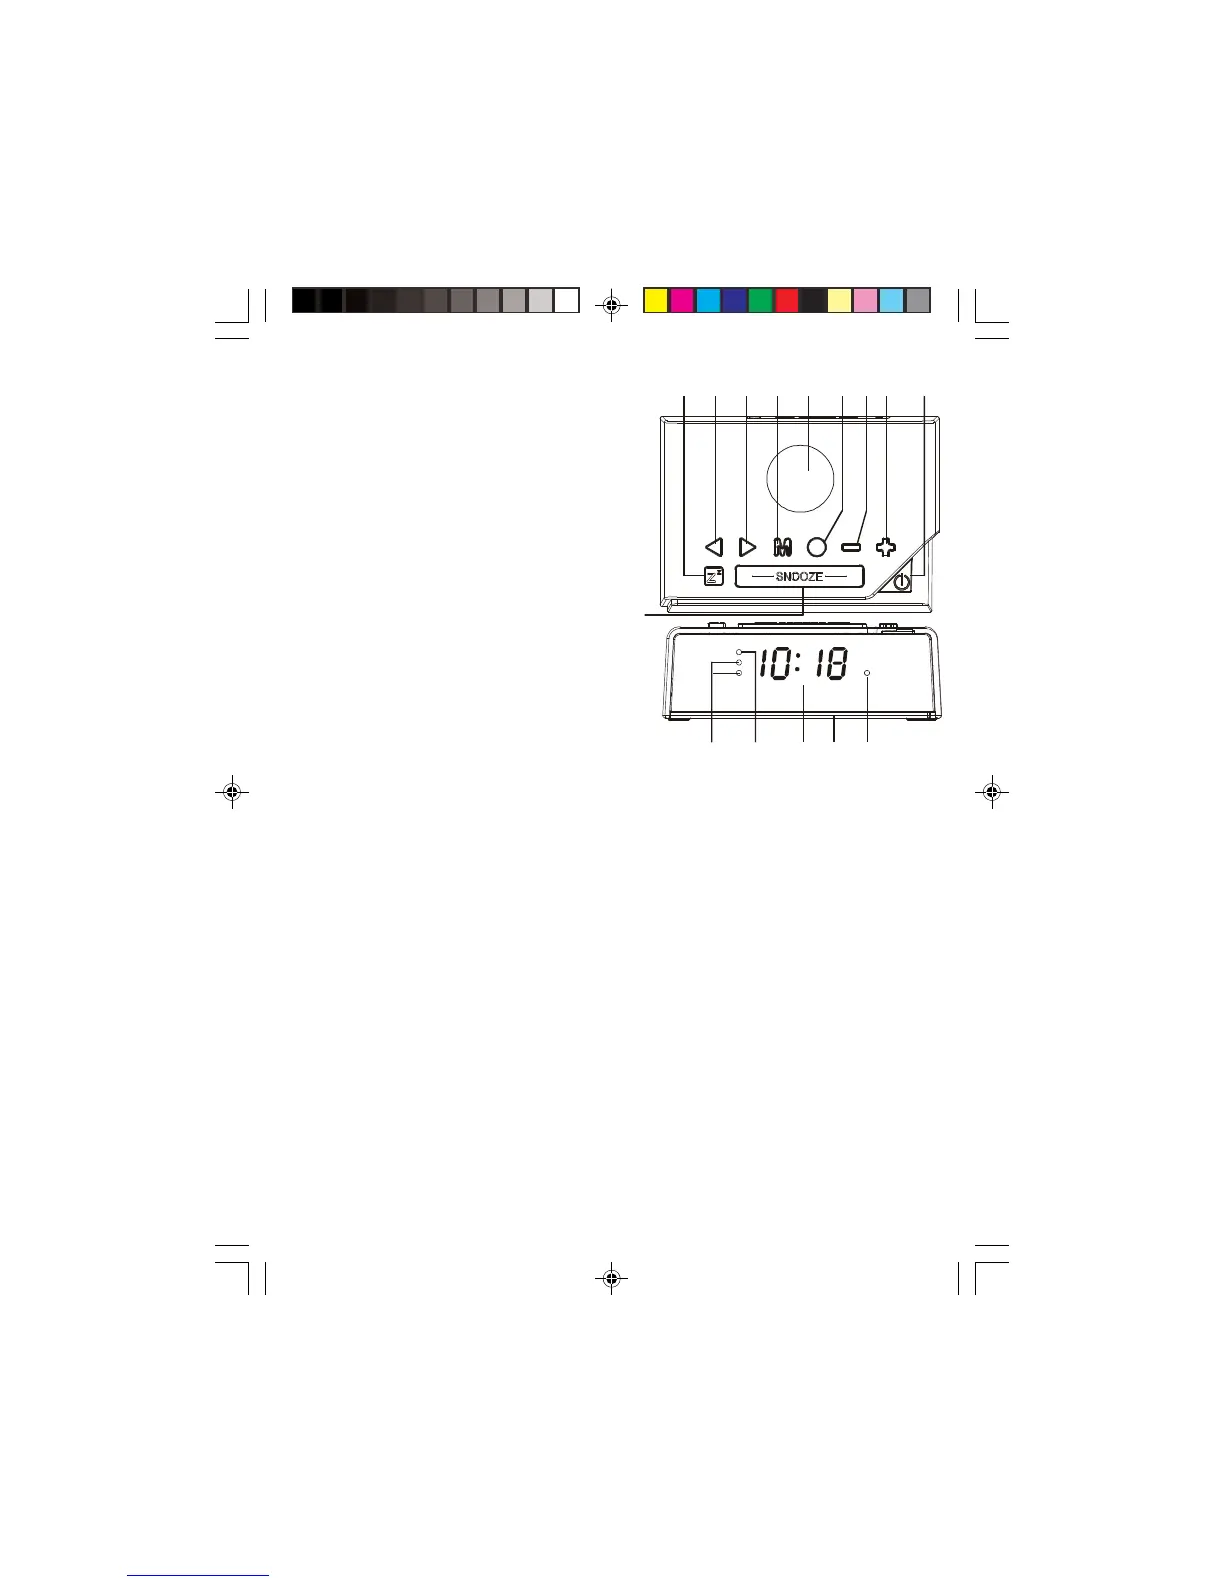
CONFIGURATION AND FUNCTIONS :
1. Sleep Button
2. Tuning Down/Hour Button
3. Tuning Up/Minute Button
4. Preset/Memory Up/
Time Set Button
5. Built-In Speaker
6. FM/AM Button
7. Volume Down/Alarm Button
8. Volume Up Button
9. On/Standby/Alarm Off Button
10. Snooze Button
11. Alarm Indicator -
Buzzer / Radio
12. PM Indicator
13. LED Display
14. Battery Compartment
(Bottom side -
Backup batteries)
15. Sleep Indicator
912 876435
10
11 151412 13
Teac CRX060 (Aust).p65 2014/3/26, ¤U¤È 05:245
 Loading...