Timer-controlled recording
(BEC/PLAY
ll
only)
1.
Turn the
power
to the audio
timer
0N.
2.
Turn the
power
to the amplifier to
0N,
and
tune t0 the broadcasting
station
to be recorded.
3.
Load a usable cassette into REC/PLAY
il.
4.
Pres
the PAUSE button and
the
RE-
cord
button simultaneously, then adjsut
the recording
level with the
REC0RD
control. After
then, release
both buttons.
5.
Set
the
REVEBSE
M0DE
switch and
the
D IRECTI0N
switch
as
required.
6.
Set
the required starting
(power
on)
time and stopping
(power
off)
time with
the
audio timer,
and
set
to
the AUTO
(or
TIMER
0N)
mode.
(For
details, refer
to the
instructions of
the audio timer.)
When this
setting
is complete, the
power
to all components
will be
switched
off.
7.
Check
that the
p0wer
to
the deck
is cut
off, then
press
the
REC0RD button.
(tfre
deck
enters
the record-standby
mode.)
8.
Leave
the P0WER
switch
of this unit set
to
the
0N
position.
\iVhen
the
preset
starting
time
is
reached,
the
power
will be supplied to the
re-
levant
components and
recording will
start aut0matically. And when the tape
reaches
the
end,
the
auto
shut-off
func-
tion is activated, and the mechanism
will be
i'eleased
automatically. When
the
preset
stopping
time
is
reached, the
p0wer
to
all
components will be cut off .
Timer-controlled
playback
(PLAY
I
or
BEC/PLAY II)
1. Turn the
power
to
the
audio
timer 0N.
2.
Load
the
pre-recorded
casette into
PLAY I or REC/PLAY
ll.
Set the REVERSE
M0DE
switch and
the D lR
ECTI0 N switch
as
required.
Turn
the
power
t0
the
amplifier 0N
and
ad
juSt
t he
p
layb
a
ck level
with th
e
volume
control of
the amplifier.
Set
the required
starting
(power
on)
time
with the audio
timer, and set to the
AUT0
(or
TIMER 0N)
mode.
(For
de-
tails,
refer to the
instructions
of the
audio timer.) When
this
setting is
com-
plete,
the
power
to all components
will
be
switched off
.
Check
that
the
power
to
this unit is cut
off,
then
pres
the
PLAY button.
(The
deck enters the
play-standby
mode.)
Leave
the
P0WEB switch of
this unit
set to the 0N
position.
When
the
preset
starting
tirne is
reached,
the
power
will
be supplied
to
the re-
levant c0mponents
and
playback
will
start automatically.
And
when the
preset
stopping
time is
reached, the
power
to all comp0nents
will be cut off .
Maintenance
(Fig.
6)
The heads
and tape
path
should
be cleaned
and demagnetized
periodically.
Cleaning
Tape
Path
o
Apply head
cleaning
fluid*
to the speciat
cotton
buds
or
a
soft cloth,
and
lighrry
rub
the heads,
capstan
and all
,.netal
parts
in
the tape
path.
o
Also clean
the
pinch
roller
usrng rubber
cleaning
fluid*.
*
Both
are available rn
TEAC
i-lC-1
and
BC1
in
the
USA
or TEAC
12.261
Tape Recorder
Cleaning
Kit rn
other
areas.
Oemagnetizing
Heads
Be
sure
that
the
power
is
off,
then
de.
magnetize
the heads
using
a TEAC E-3
demagnetizer, For
details
of its use, read
its instructions.
Caution:
lf
the
surface
of
the
unit
gets
dirty,
wipe
with
a soft cloth
or
use
a diluted
neutral
cleaning
liquid.
Clean
off thoroughly.
Do
not
use
thinner,
benzine
or alcohol
as they
may
damage
the surface
of
the
unit.
DOLBY HX PR(l
Dolby HX
Pro
rs
an
"active
bias" technique
that
can improve the
quality
of audio
tape
recordings.
High-level
high frequencies
can
be
recorded
m0re accurately,
without
sacrificing
signal-to-noise
ratio,
while
such
side
effects of
tape
saturation as
distortion
are reduced.
What
ls
Bias?
Bias
is
a very
high-frequency
signal
generat-
ed
within
a
tape deck and
recorded
on the
tape simultaneously with
the
pr0gram
material.
This inaudible signal
allows a low
noise, low
distortion
recording
and flat
frequency response.
Different magnetic
tape
formuiations require
different
am0unts
of bias
for
0ptimum
performance.
lf
the
bias
level is
to0
high,
high-frequency
Maximum
0utput
Level
(M0
L)
decreases.
The
Problem
of
Self-Bias
Unfortunately, bias
level is
often influenced
by the signal
being
recorded.
The
high
f re-
quencies
contained
in
some
music act
as
bias.
This
unpredictable
source
of
bias
is
added
t0 the existing
bias,
resulting
in a
loss
of
high-frequency response.
As the high-
frequency
content of the
signal
increases,
the
ability
of
the
recorder
to
record
high
f requencies
(M0
L)
decreases.
This
pheno-
menon is
called self-biasing.
How
Dolby HX
Pro
Solution
Tne
D
o by
H
X
Pro
monitors
the high-
{.eq
rency
c0ntent of
the
program
material
3.ro
adJUsts the
recorder
bias
oscillator
to
:r'a
nlarn
a
c0nstant total
bias
level.
The
'esult
rs
improved
hrgh
frequency
resp0nse
3nd
rower
drst0r|0n.
Depending
on
the
type
of
tape, the
rmprovement
in headroom
can
5e
6
dB o, more
The
Benefits
Wrth Dolby
HX Pro,
rt rs
easrer
to make
m0re
accurate
recordings
of
the
kind
of
musrc
which contains
hrgh-level
high fre-
quencies.
The improvement is
srmrlar
to
that
of
hrgh-performance
tape
0ver c0nven-
tional tape, so
regardless
of
the
type
0f
tape
used, the
results
wrll sound
better.
Most important
of all,
Dolby HX Pro
requrres
n0 decoding
pr0cess.
0nce the
tape
rs
recorded
with
it,
the
rmprovements
will be
realized
when
playing
the tape
back
on any machine.
?ABz
50
r00
2!a
_.0C
!
:
t
,0
20r
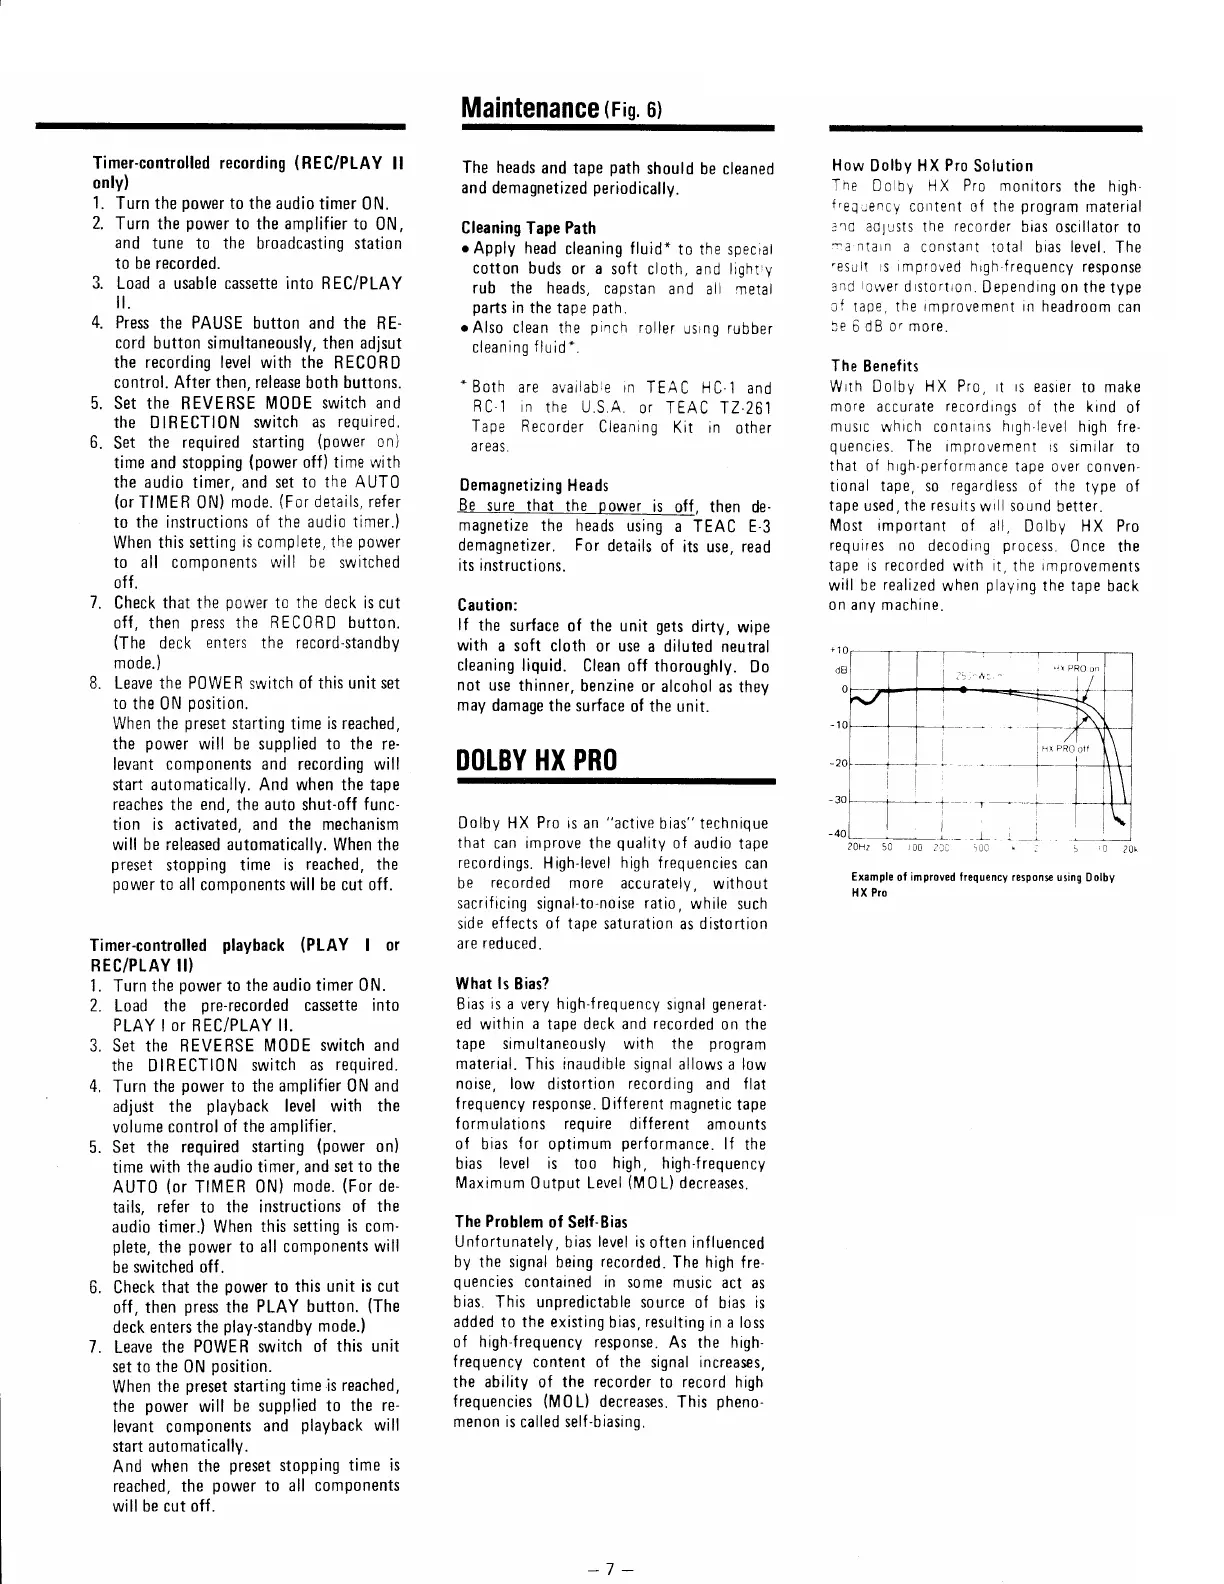
Example
of
improved
frequency respons€ using
Dolby
HX Pro
a
J-
+.
5.
D.
7.
-7
-


 To Next Page
 Loading...