9
Model: TX-241; Article No. 5064; 02/2023
CAUTION!
It is strongly recommended to install surge protectors in the appropriate meter
box.
CAUTION!
You should not use an AC residual current device to protect the
corresponding circuit to the micro inverter, even if it is an outdoor circuit. None
of the small residual current devices (5~30 mA) are designed for regeneration
and will be damaged if regeneration occurs. The same is true for AC arc fault
circuit breakers. They are not evaluated for regenerative power and could be
damaged if regenerated with the output of a solar micro inverter.
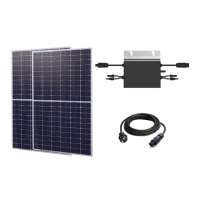
Connect the solar panels (DC connection)
Connect the solar panels DC cables to the DC input side of the micro inverter.
The 800W micro inverter provides two pairs of MC4 connectors for two solar panels.
Simply connect the DC connection cables of the micro inverter to the matching
counterpart of the solar panel. When doing so, plug the pair of connectors together
until you hear a "click" sound. The connectors of some solar panels have the polarity
(+, -) printed on them, which is valid for the panels. The DC cable of the micro inverter
with the plus marking (+) is connected to the - pole of the panel, the negative marked
cable (-) to the + pole. Make sure that the polarity is correct.
Note: When plugging in the DC cables, if the AC cable is already plugged in, the micro
inverter LED should immediately flash green and start synchronizing with the grid
within 2 minutes. If the AC cable is not plugged in, the red LED will flash continuously
and repeat this until the AC cable is plugged in (see chapter LED Status).
Connecting the micro inverter to the AC grid (AC connection)
A maximum of 1x 800W may be connected to an EU / 50Hz / 230V installation
with 10A automatic circuit breaker.
The connection to the mains is made with a suitable power cable. Only use 3-core
cables that are also approved for outdoor installation and have a conductor cross-
section adapted to the amperage (preferably 1.5mm² or 4mm²).
Fasten the connection cables to the mounting rail using UV-stable cable ties in such