Do you have a question about the Technics SL-B2 and is the answer not in the manual?
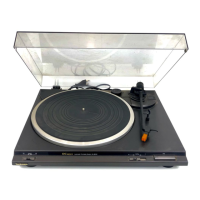
Steps for placing the turntable platter, attaching the belt, and placing the mat.
Instructions for connecting lead wires to cartridge terminals and installing it.
Guidance on adjusting cartridge overhang using a gauge or specified measurement.
Steps to insert and lock the headshell into the tonearm.
Instructions for placing the balance weight on the tonearm's rear shaft.
Procedure to balance the tonearm and set the stylus pressure using the balance weight.
Setting the anti-skating control knob to match the stylus pressure.
Guidance on how to place and detach the dust cover.
How to adjust the tonearm lift height using the adjustment screw.
Procedure to adjust the tonearm's automatic return timing.
How to adjust turntable speed using the pitch-control knob and strobe dots.
Instructions on how to stop the turntable and return the tonearm.
Procedure to lift the stylus from the record using the cueing lever.
Instructions for using the 45-rpm adaptor for large hole records.
Maintenance advice for cleaning headshell terminals to prevent hum.
Cleaning instructions for the dust cover and turntable base.
Steps for removing and reinstalling the turntable platter and belt.
Guidance on replacing the stylus, including recommended model.
Important safety information regarding voltage and DC current.
Safety precautions for connecting and handling the power cord.
Recommendations for placing the unit to ensure good ventilation and avoid heat.
Safety warnings for keeping small items away from the unit.
Immediate actions to take if water spills on the unit.
Warning against attempting to remodel or repair the unit.
Reminder to ensure the unit is powered off after use.
| Drive System | Belt Drive |
|---|---|
| Motor | DC motor |
| Type | Semi-automatic |
| Effective Length | 230 mm |
| Overhang | 15 mm |
| Speeds | 33 and 45rpm |
| Platter | Aluminum Die-cast |
| Tonearm Type | Straight tonearm |