EasyManuals Logo

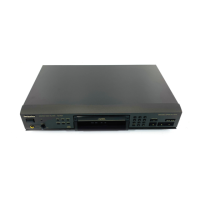
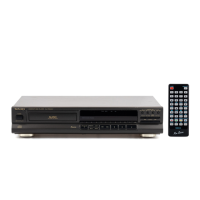
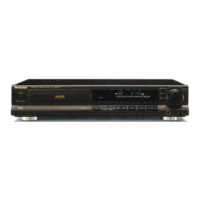
Technics SL-PG450 User Manual

Technics SL-PG450
48 pages
To Next Page IconTo Next Page
To Previous Page IconTo Previous Page
Page #40 background imageLoading...
Page #40 background image
Disc
link
Enlace
de
discos
Editing
with
only
desired
tracks
Example:
Recording
only
desired
tracks
from
four
discs
on
a
C-46
tape.
Edit
recording
of
the
first
disc
_
1
Prepare
the
cassette
deck.
Perform
step
1
on
page
30.
2
Program
the
desired
tracks
in
order.
Perform
steps
1
and
2
on
page
18.
3
Press
TAPE
LENGTH
and
specify
the
length
of
the
tape
(C-46).
4
Press
DISC
LINK.
5
Adjust
the
recording
level.
Perform
steps
3
and
4
on
page
30.
6
Press
PLAY
to
start
recording.
If
the
cassette
deck
has
no
SYNCHRO
EDIT
terminal,
see
page
32.
Recorded
contents
of
tape:
D
Edit
recording
of
the
secon
d
disc
1
Insert
the
new
disc.
2
Erase
the
programmed
tracks
on
both
sides
A
and
B.
©
Press
CLEAR
until
the
track
number
displayed
is
0.
©
Press
SIDE
A/B
to
switch
to
side
B.
®
Press
CLEAR
until
the
track
number
displayed
is
0.
@
Press
SIDE
A/B
to
switch
;o
side
A.
3
Program
the
desired
tracks
in
order.
4
Adjust
the
recording
level.
5
Press
PLAY
to
start
recording.
Recorded
contents
of
tape:
ED
Edit
recording
of
the
third
disc
1
Insert
the
new
disc.
2
Erase
the
programmed
tracks
on
side
B.
3
Program
the
desired
tracks
in
order.
4
Adjust
the
recording
level.
5
Press
PLAY
to
start
recording.
Recorded
contents
of
tape;
B
<
3
>
Edit
recording
of
the
fourth
disc
The
procedure
Is
the
same
as
that
for
the
third
disc.
Recorded
contents
of
tape:
ID
To
cancel
CD
edit
mode:
Press
STOP.
Notes
•When
a
new
disc
Is
inserted
close
to
the
end
of
side
A
of
the
tape
and
the
time
remaining
on
side
A
is
shorter
than
the
next
track,
advance
the
tape
to
the
begin¬
ning
of
side
B
and
begin
recording
again.
•The
cassette
deck
which
has
no
SYNCHRO
EDIT
terminal
continues
to
ad¬
vance
the
tape
even
after
disc
playback
has
ended.
Don’t
forget
to
stop
the
tape
and
rewind
it
to
the
point
where
recording
ended.
•if
the
cassette
deck
is
not
equipped
with
an
auto
reverse
mode,
change
the
tape
over
to
side
B
when
the
recording
on
side
A
is
finished.
Edicion
de
las
melodias
deseadas
solamente
Ejempio:
~
Grabacidn
de
las
melodias
deseadas
de
cuatro
discos
en
una
cinta
C-46.
Grabacidn
con
edicion
del
primer
disco
1
Prepare
la
platina
de
casete.
Realice
el
paso
1
de
la
pdgina
30.
2
Programe
las
melodias
deseadas
en
orden.
Realice
los
pasos
1
y
2
de
la
pdgina
18.
3
Pulse
TAPE
LENGTH
y
espe-
ciflque
la
duracldn
de
la
clnta
(C-46).
4
Pulse
DISC
LINK.
5
Ajuste
el
nlvel
de
grabacidn.
Realice
los
pasos
3
y
4
de
la
pdgina
30.
6
Pulse
PLAY
para
Inlciar
la
gra¬
bacidn.
Si
la
platina
no
tiene
terminal
SYNCHRO
EDIT,
consulte
la
pdgina
32.
Contenldo
grabado
en
la
cinta:
El
Grabacidn
con
edicidn
del
segundo
disco
1
Inserte
el
nuevo
disco.
2
Borre
las
melodias
programadas
para
los
(ados
A
y
B.
©
Pulse
CLEAR
hasta
que
el
numero
de
melodfa
visuaiizado
sea
0.
©
Pulse
SIDE
A/B
para
cambiar
al
(ado
B.
©
Pulse
CLEAR
hasta
que
el
ndmero
de
melodfa
visuaiizado
sea
0.
®
Pulse
SIDE
A/B
para
cambiar
ai
iado
A.
3
Programe
las
melodias
deseadas
en
orden.
4
Ajuste
el
nlvel
de
grabacidn.
5
Pulse
PLAY
para
inlciar
la
gra¬
bacidn.
Contenldo
grabado
en
la
cinta:
ID

Questions and Answers:

Question and Answer IconNeed help?

Do you have a question about the Technics SL-PG450 and is the answer not in the manual?

Technics SL-PG450 Specifications

General IconGeneral
BrandTechnics
ModelSL-PG450
CategoryCD Player
LanguageEnglish

Related product manuals