(Step2)
Remove the top cover in the direction of arrows (refer to [Fig. 1] ).
(Step3)
Remove the keyboard cover in the direction of arrow (refer to [Fig. 1] ).
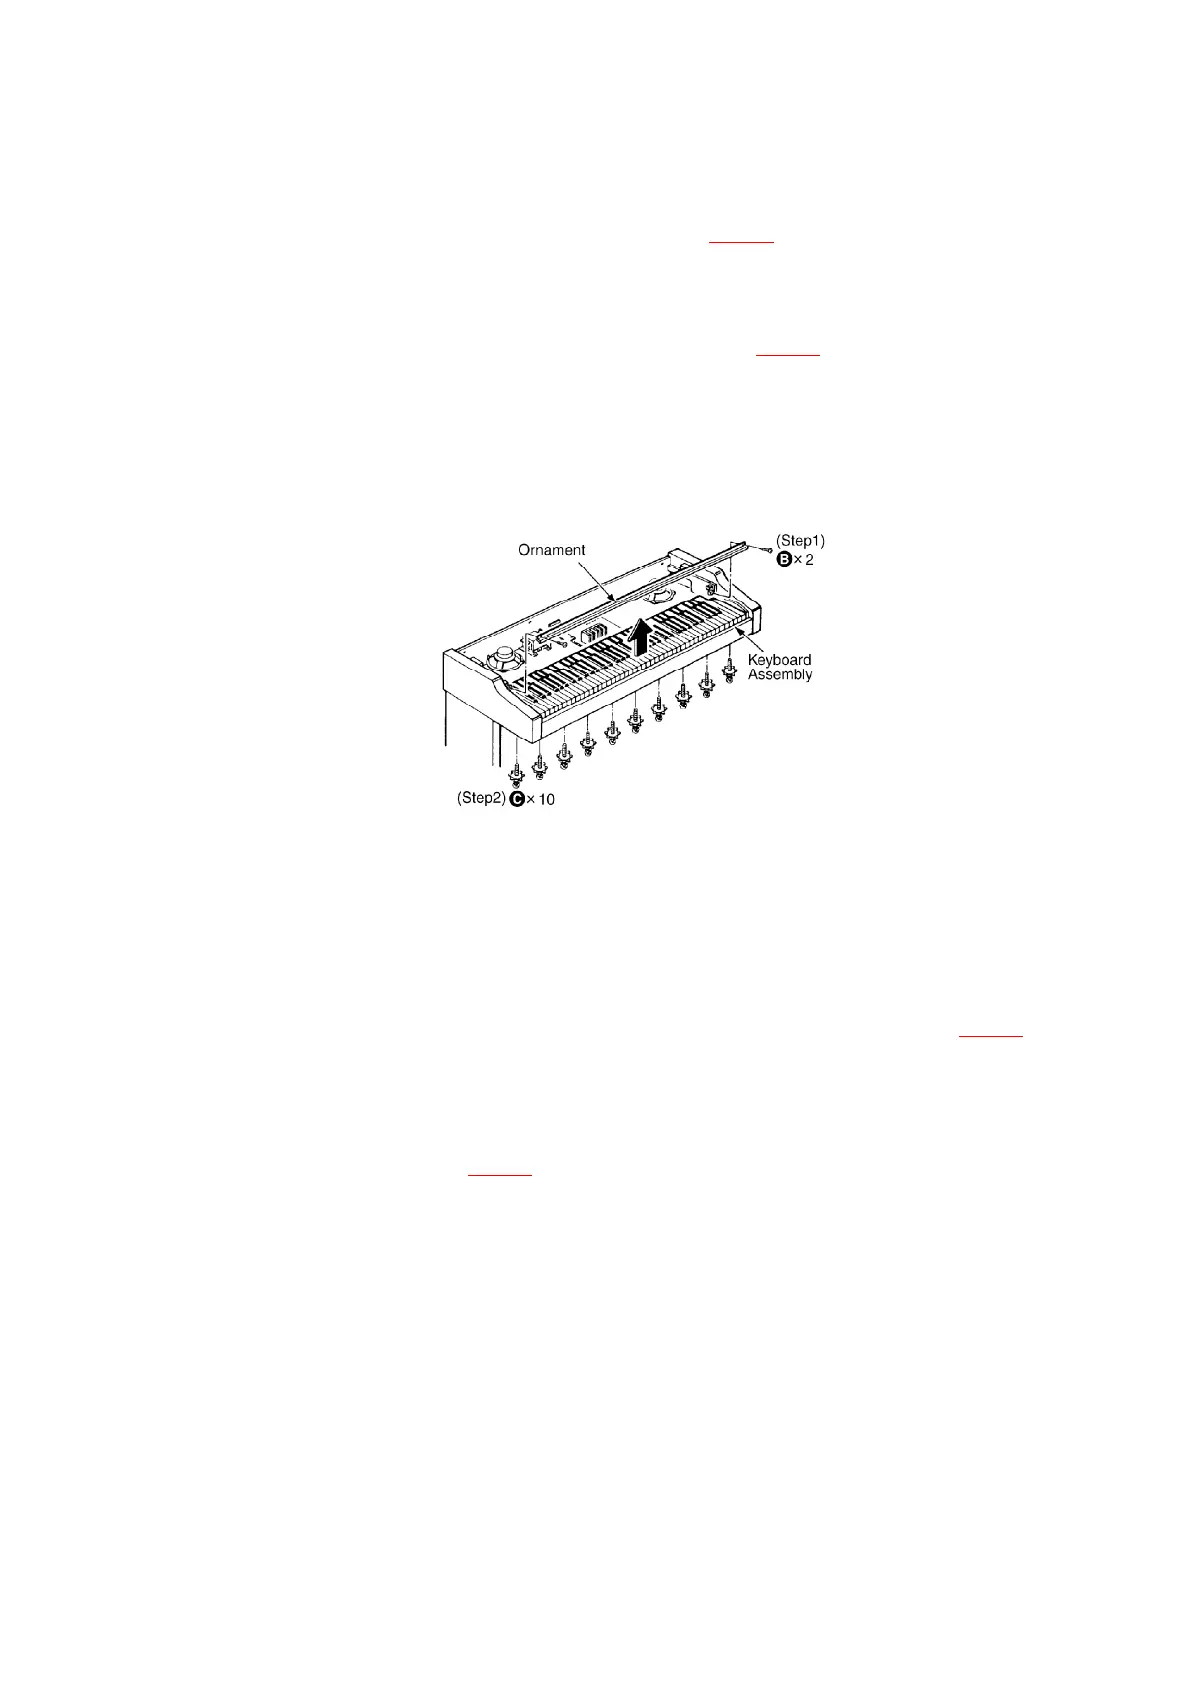
7.2. Removing the keyboard assembly
- Follow the item 7.1.
[Fig. 2]
7.3. Disassembly and assembly of key(s)
- Follow the item 7.1.
- Follow the item 7.2.
7.3.1. Disassembly
(Step1)
Insert the thin solid board between white key and black key, push the claw (refer to [Fig. 3] ).
(Step2)
While pressing slightly the front of the key, push the rear of the key forward to disengage the key
claw from the chassis (refer to [Fig. 3] ).
(Step3)
Lift the key and remove it.
[Fig. 3]
6