3
Quick Start Guide
Self-timer
( )0Seconds
(
)2Seconds
( )Double
( ) Voice Memo
Focus Range
( ) Macro
Metering
( )Spot
( )Multi
Effect
( ) Black&White
( )Normal
( ) Sepia
( )RGB
( ) Exposure +/– 0
White Balance
( )Auto
( )Daylight
( )Cloudy
( )Fluorescent
( )Tungsten
( )Sunset
( )Custom
(
) Memory Card
Sharpness
( )Soft
( )Normal
( )Vivid
Quality
( ) SuperFine
(
)Fine
( ) Normal
Size
(8M) 3264x2448
(7M) 3072x2304
(5M) 2560x920
(4M) 2304x728
(3M) 2048x536
(2M) 600x200
( ) Available Shots
Zoom Status Indicator ( )
ISO
( )AUTO
( )ISO=00
( )ISO=200
( )ISO=400
HISTOGRAM
(
)Histogram
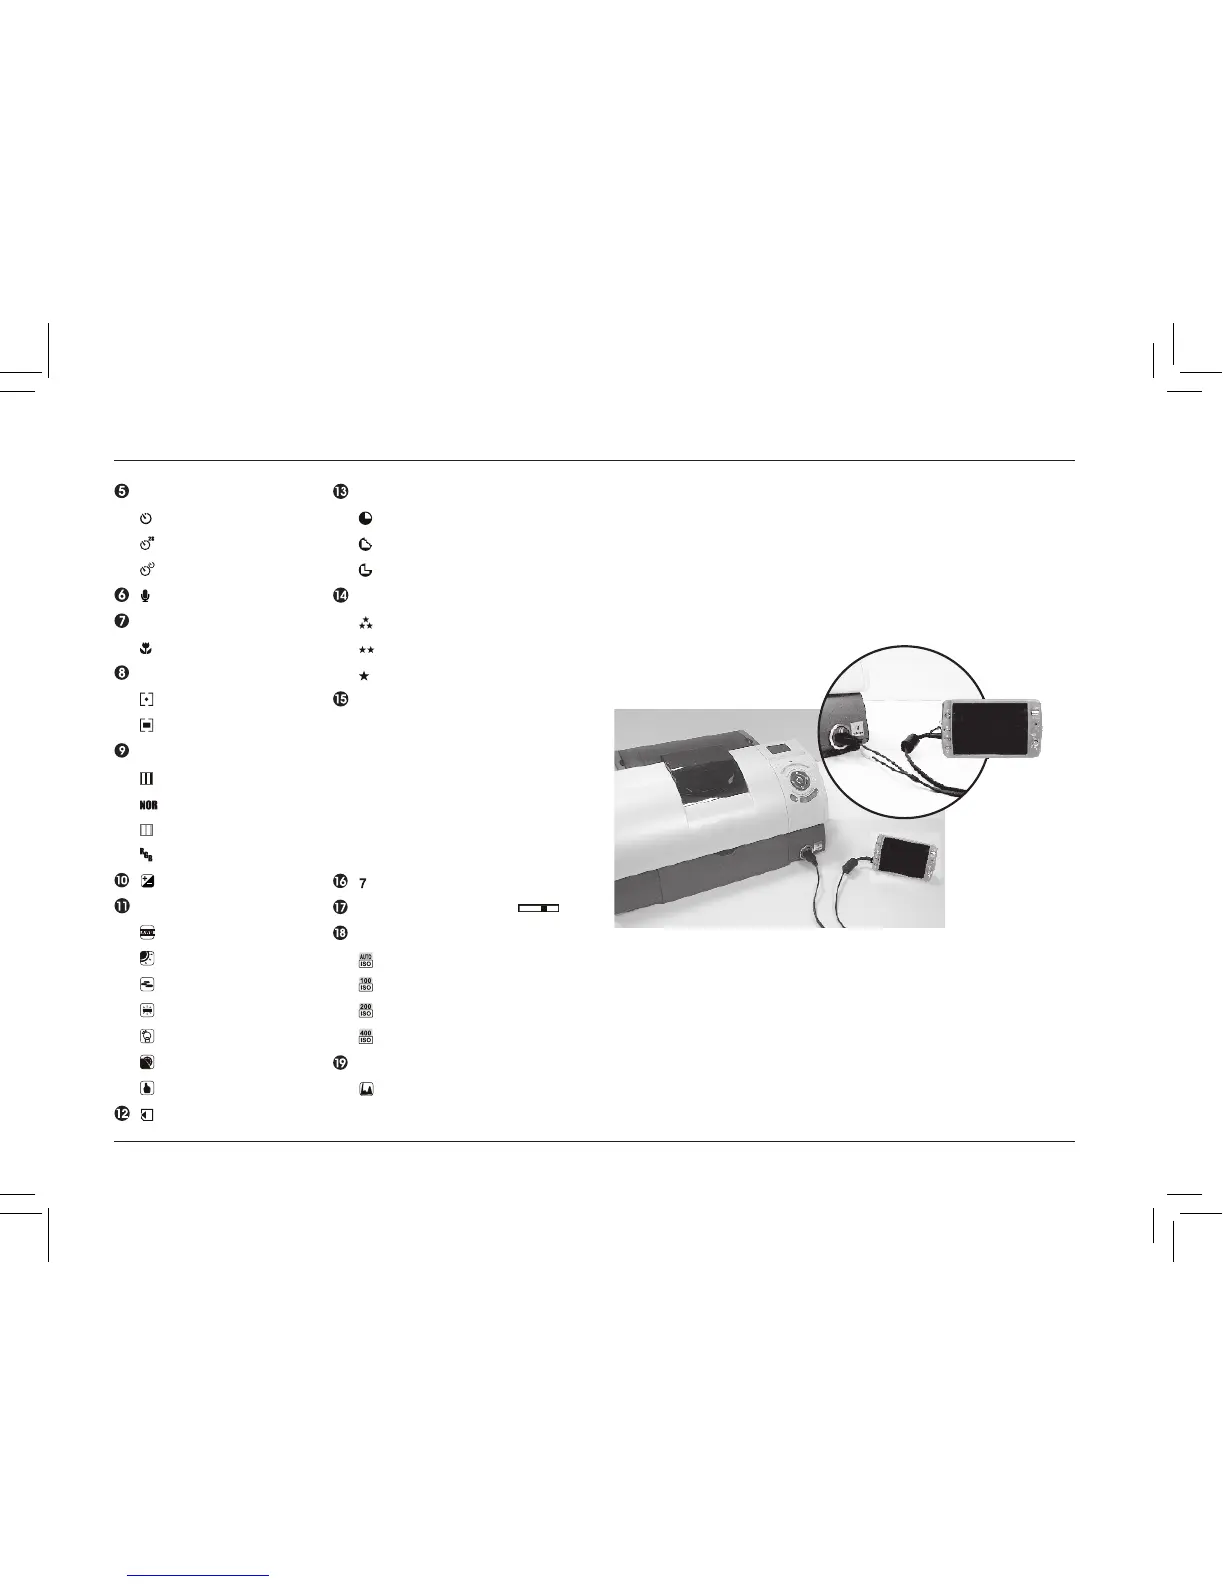
PRINTER CONNECTION (PICTBRIDGE MODE)
Connecting The Camera To A Pictbridge–Supported
Printer
IftheprinteryouhavesupportstheinterfaceofPictBridge,thenyou
canhaveyourcameraconnectedwiththeprinterbythesupplied
USBcabletohavethestoredimagesprintoutdirectly.
. Havebothofthecameraandtheprinterpoweron.
2. PresstheMENUButtontogotoSETUPMode.
3. GotoUSBandselectPRINTERforprinterconnection.
4. UsethesuppliedUSBcabletoconnectthecameratothe
PictBridge-supportedprinterasshownabove.
 Loading...