PG 14
PG 15
FITTING OVEN ACCESSORIES AND CLEANING
Safety warnings about cleaning
• Always make sure that the cooker is turned o before cleaning.
• Always clean cooker immediately after use.
• Do not use steam cleaners. These may cause moisture build-up.
• Do not use caustic- based cleaners. These will damage aluminums parts, and remove enamel gloss.
Cleaning the enamel
• Keep enamel clean by wiping it with a soft cloth dipped in warm soapy water.
• Rub dicult stains with a nylon scourer or creamed powder cleanser.
• Do not use abrasive cleaners, dry powder cleaners, steel wool or wax polishes.
• If you use an oven cleaner, then follow the instructions on the product carefully.
Cleaning the control panel
• Make sure control knobs are in o position.
• Clean the control panel by wiping it with a soft cloth dipped in warm soapy water and squeezed dry.
• Take care when cleaning around knobs to ensure printing on control panel is not removed, this can occur if abrasive
cleaners are used, therefore, should not used at all.
Cleaning The Gas Hob
Removing the trivets (Refer Figure 1)
• The trivets locate in the recessed area of the hob.
• They can be removed for cleaning by carefully lifting them from the hob.
• Clean by washing in warm soapy water. Dry thoroughly.
• Take care when replacing the trivets as dropping them onto the hob may
damage the enamelled surface.
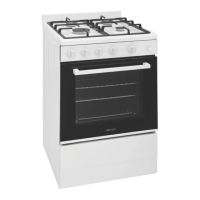
Removing the burners (Refer Figure 2)
• The burner caps and crowns are removable for cleaning.
• Flame port bloackage should be removed by means of a match stick or
brush.
• If the caps, crowns and cups are heavily soiled, use a non-abrasive
cleaning compound.
• Do not clean them with abrasive or caustic type cleaners, or put in a
dishwasher as they will be damaged.
Refitting the burner crowns and caps
• The burner crown must be fitted correctly into the burner cup or damage
will occur during operation.
• To do this, ensure that the 2 ribs on either side of the spark plug hole are positioned into the 2 slots on the burner
cup. (See figure 2).
• The burner cap is simply positioned over the top of the burner crown.
NOTE: When the burner is correctly fitted it will sit level on the knob. If ignition is dicult or fails after cleaning, then
either burner parts are not dry or parts have not been positioned correctly.
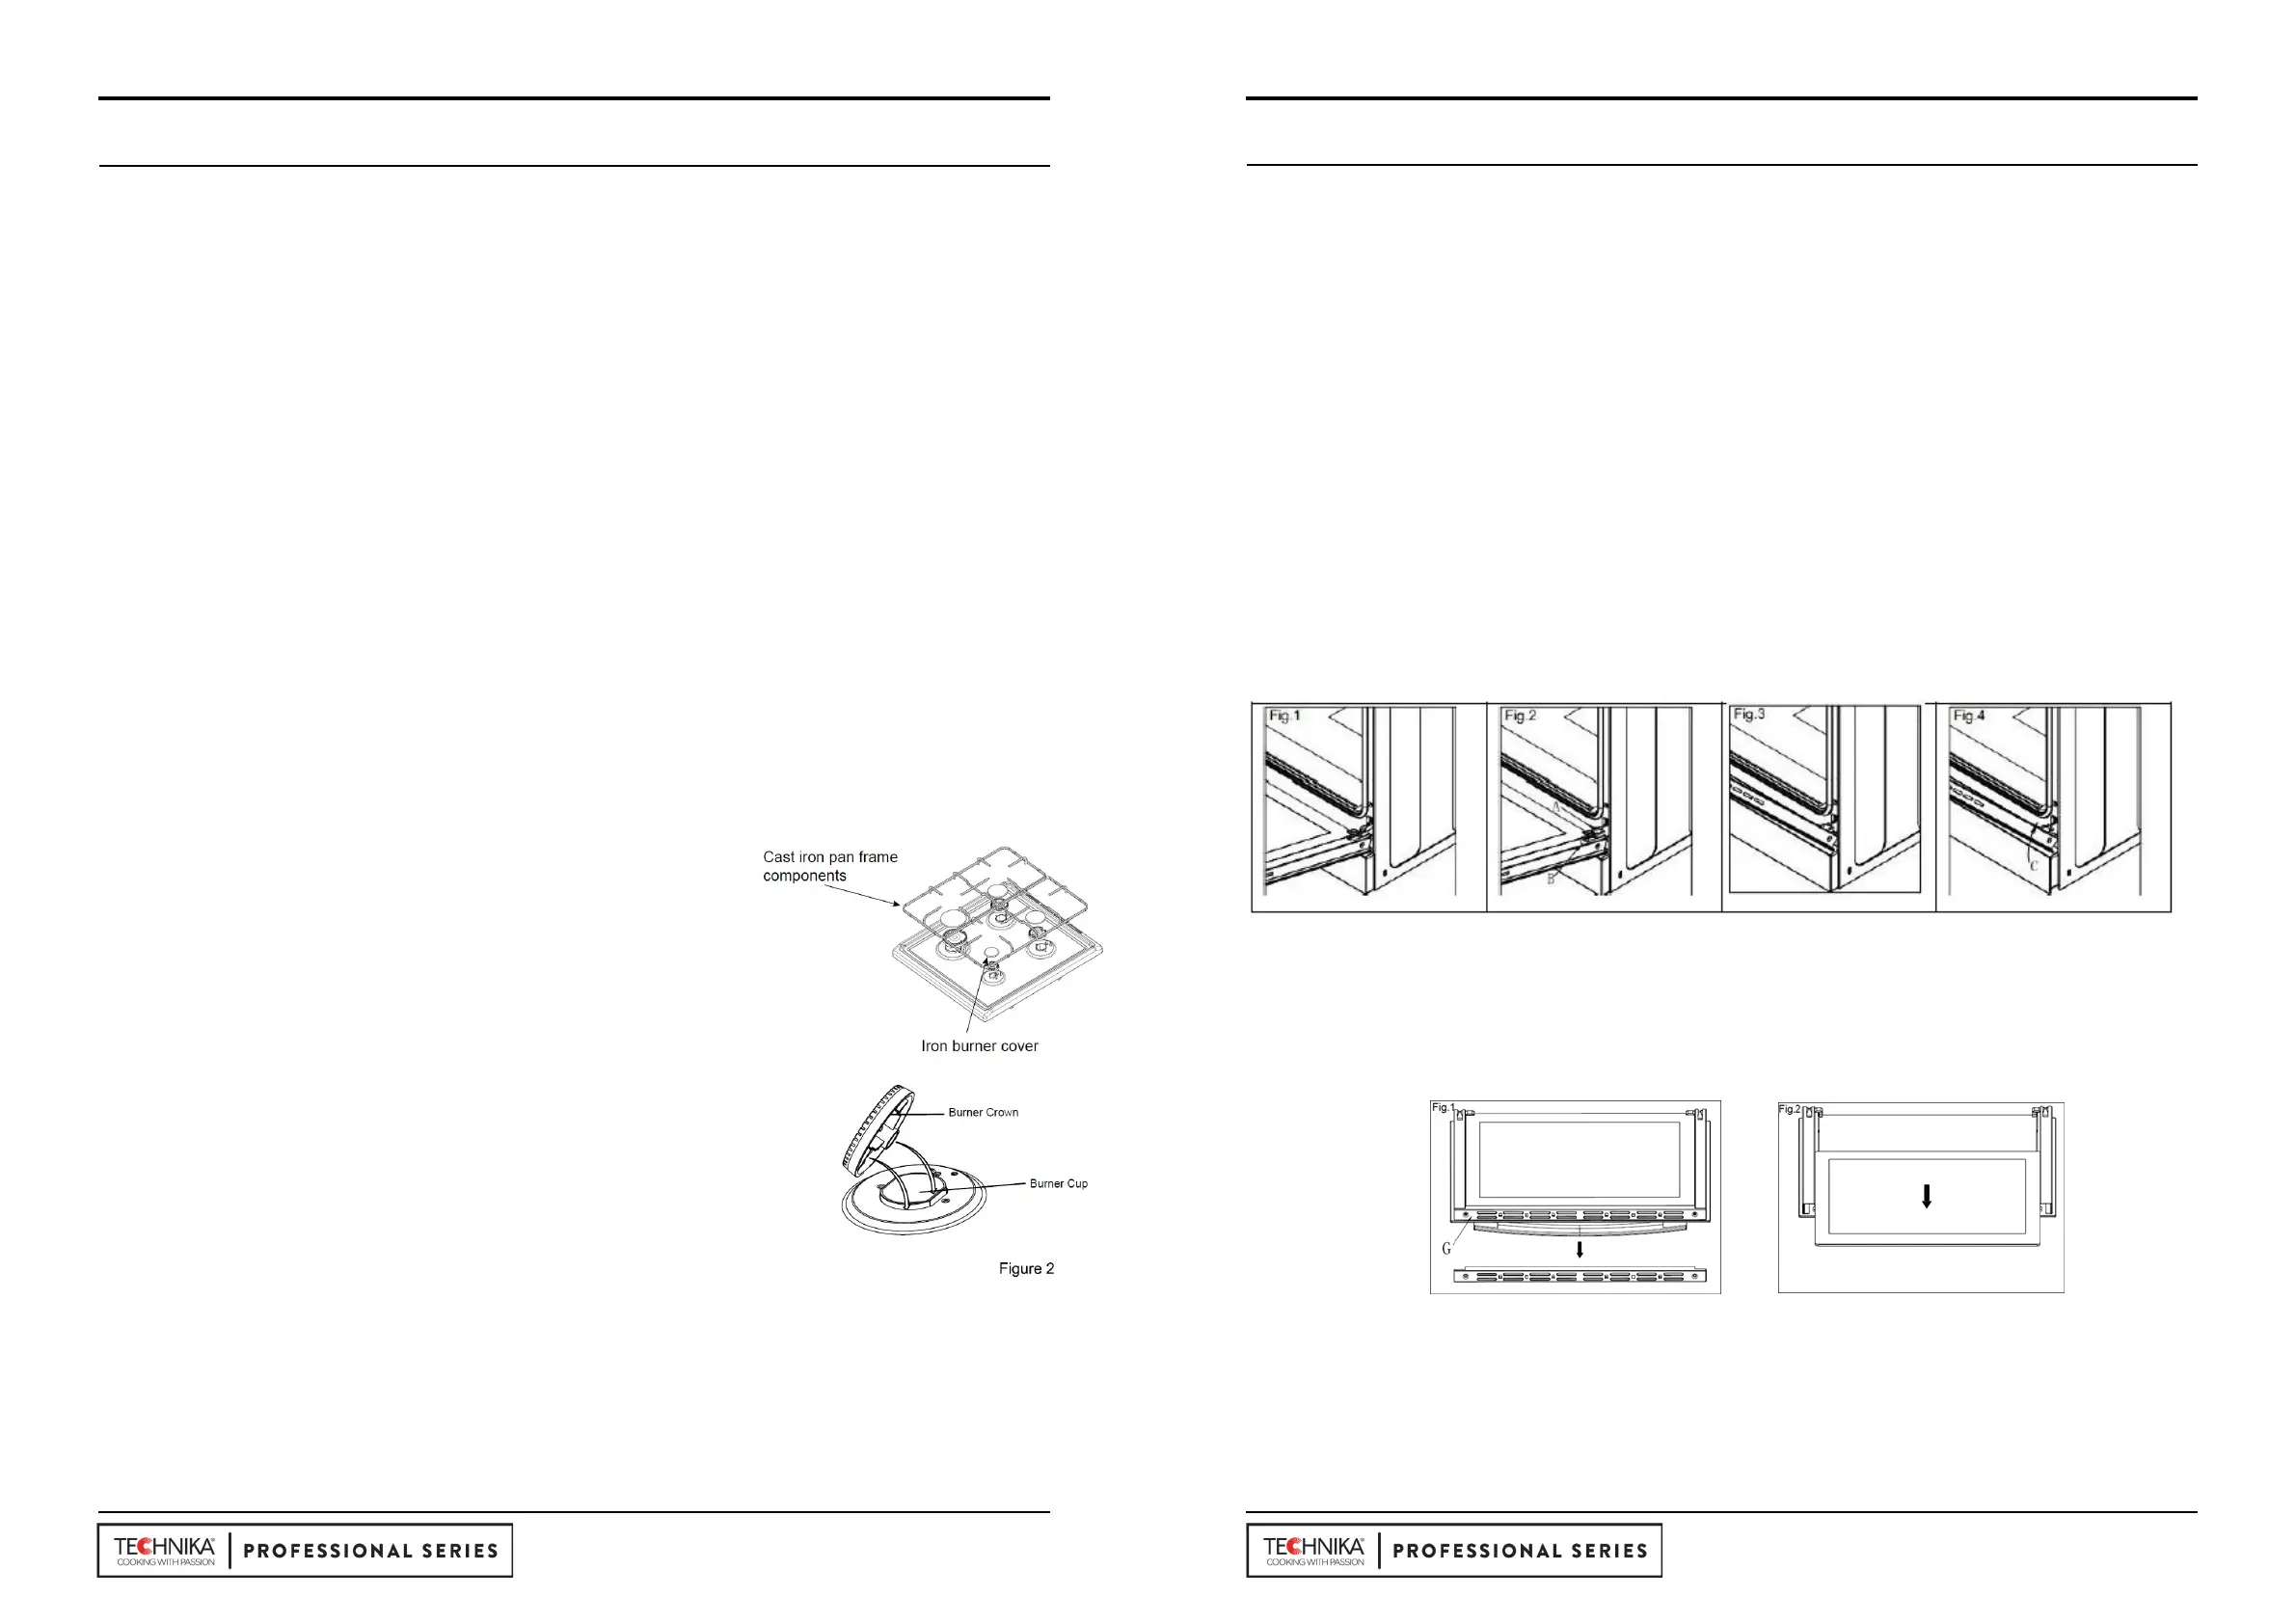
Cleaning the oven door / How to remove the oven door
For a more thorough clean, you can remove and disassemble the oven door. Proceed as follows:
• Open the door to the full extent (fig. 1)
• Open the lever A completely on the left and right hinges (fig. 2)
• Hold the door as shown in (fig. 3) approximatley 30 degree angle upwards
• Gently close the door (fig. 3) until left and right hinge levers A (fig. 2) are hooked to part B (fig. 2) of the door
• Withdraw the hinge hooks from their location following arrow C (fig. 4)
• Rest the door on a soft surface, to reduce risk of damage to the door
• To replace the door, repeat the above steps in reverse order
Removing the Inner Pane of Glass
• Triple Glazed oven door: Remove the top frame (G) by unscrewing the 2 screws, located on the left and right
sides
• Gently pull out the inner pane of glass (fig. 2). Also remove the centre pane of door glass, not shown here.
• Clean the glass panes with an appropriate cleaner. Dry thoroughly, and place on a soft surface.
• Now you can also clean the inside of the outer glass.
Cleaning the door glass
• Clean the glass door using non-abrasive products or sponges and dry it with a soft cloth.
• Do not use the oven without the inner door glass fitted.
• Do not use harsh abrasive cleaners or sharp metal scrapers to clean the oven door glass since they can
scratch the surface, which may result in shattering of the glass.
Cleaning the oven
• Open door fully.
• Remove oven shelves and side racks.
• Clean in hot soapy water.
 Loading...