15
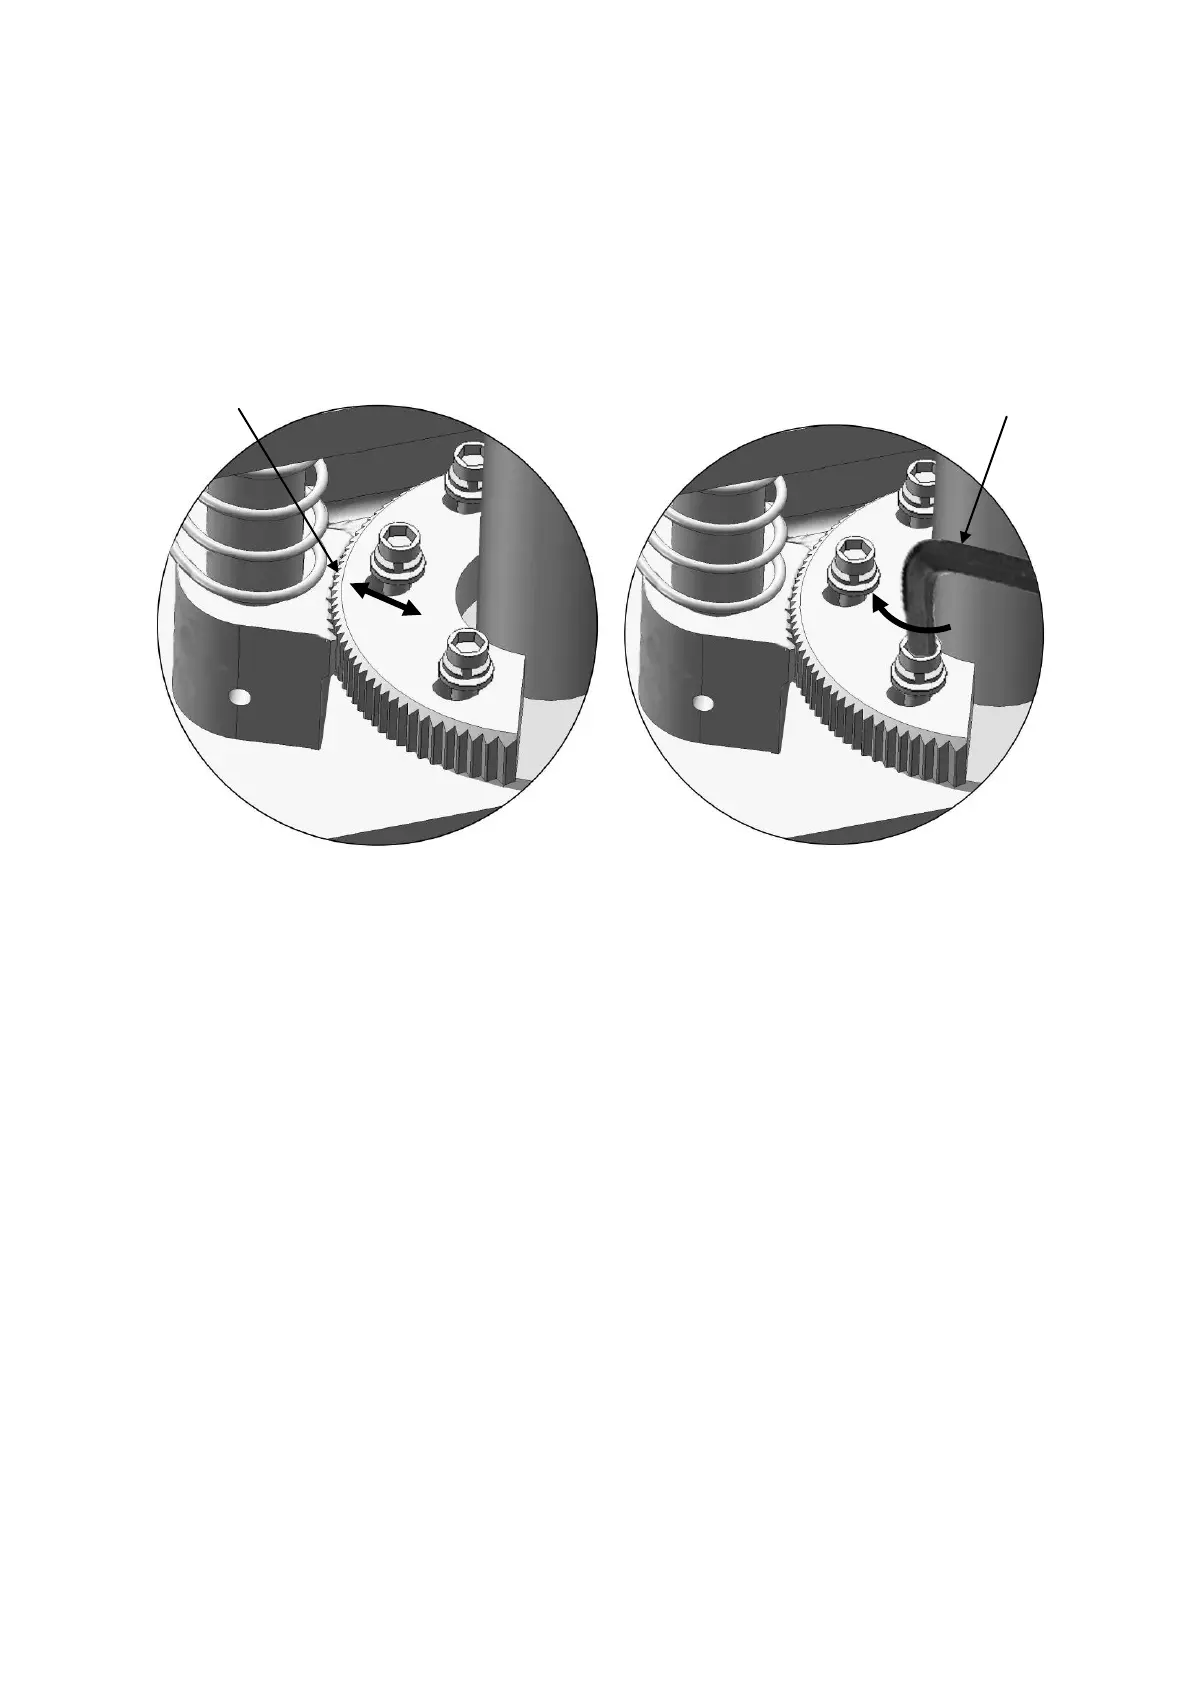
2. Lowing the carriages down to the lowest position, then use the 8# socket head wrench
to loosen the socket bolt
(See Fig. 24)
3. Adjust the moon gear as arrow direction (See Fig. 25).
4. Adjust the moon gear and arm lock to make it to be meshed, then tighten bolts of arm
lock
(See Fig. 26).
O
. Tighten all the hydraulic fittings, and fix the oil hose by retainer.
Note: In consideration of Power Unit’s durability and keep the equipment running in the
perfect condition, please use Hydraulic Oil 46
P.
Install Electrical System
Connect the power source on the data plate of Power Unit.
Note: 1. For the safety of operators, the power wiring must contact the floor well.
2. Pay attention to the direction of rotations when using 380V, three phase motors.
Single phase motor (See Fig. 27).
1. Connecting the two power supply lines (active wire L and neutral wire N) to
terminals of AC contactor marked L1, L2 respectively.
2. Connecting the two motor wires to terminals of AC contactor marked T1, T2.
3. Connecting A2 to L2 of AC contactor.
the moon gear and
arm lock engaged well