Figure 25
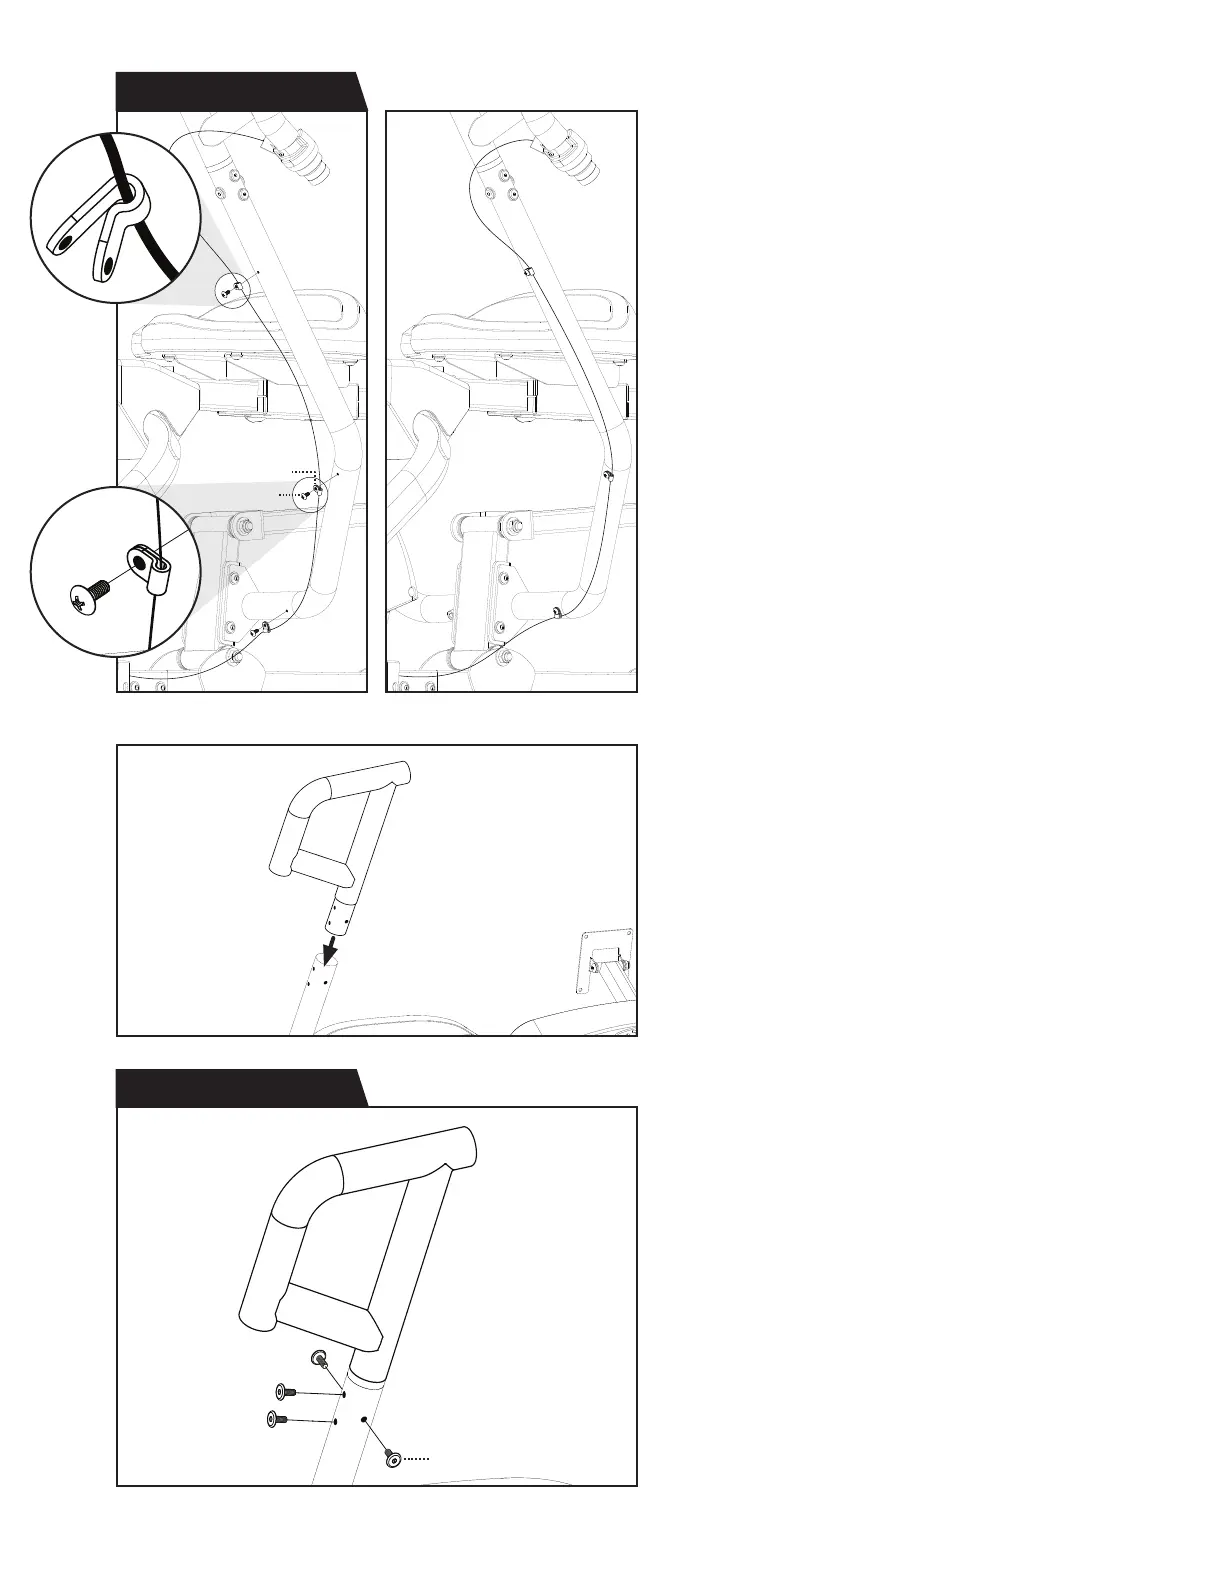
Figure 24a Figure 24b
Figure 26
Step 12 Hardware Kit
Step 11 Hardware Kit
Clip
Bolt (M4 x 10)
Bolt (M6 x 15)
14
Figure 24a & 24b: Use the Step 11 Hardware Kit
to attach the Cable to the Lower Left Handle.
First, open each of the 3 × Clips and insert
the Cable into the rounded end of the Clips.
Position each Clip over a hole in the Lower Left
Handle and hand tighten 3 × Bolts through the
Clips and into the Lower Left Handle.
Proceed to fully tighten all 3 × Bolts with
the Phillips Screwdriver.
Figure 25: Slide the Upper Right Handle into
the top of the Lower Right Handle and align
the screw holes.
Figure 26: Use the Step 12 Hardware Kit
to attach the Upper Right Handle.
Hand tighten 4 × Bolts through the Upper
Right Handle and into the Lower Right Handle.
Proceed to fully tighten all 4 × Bolts with
the 4mm Allen Wrench.