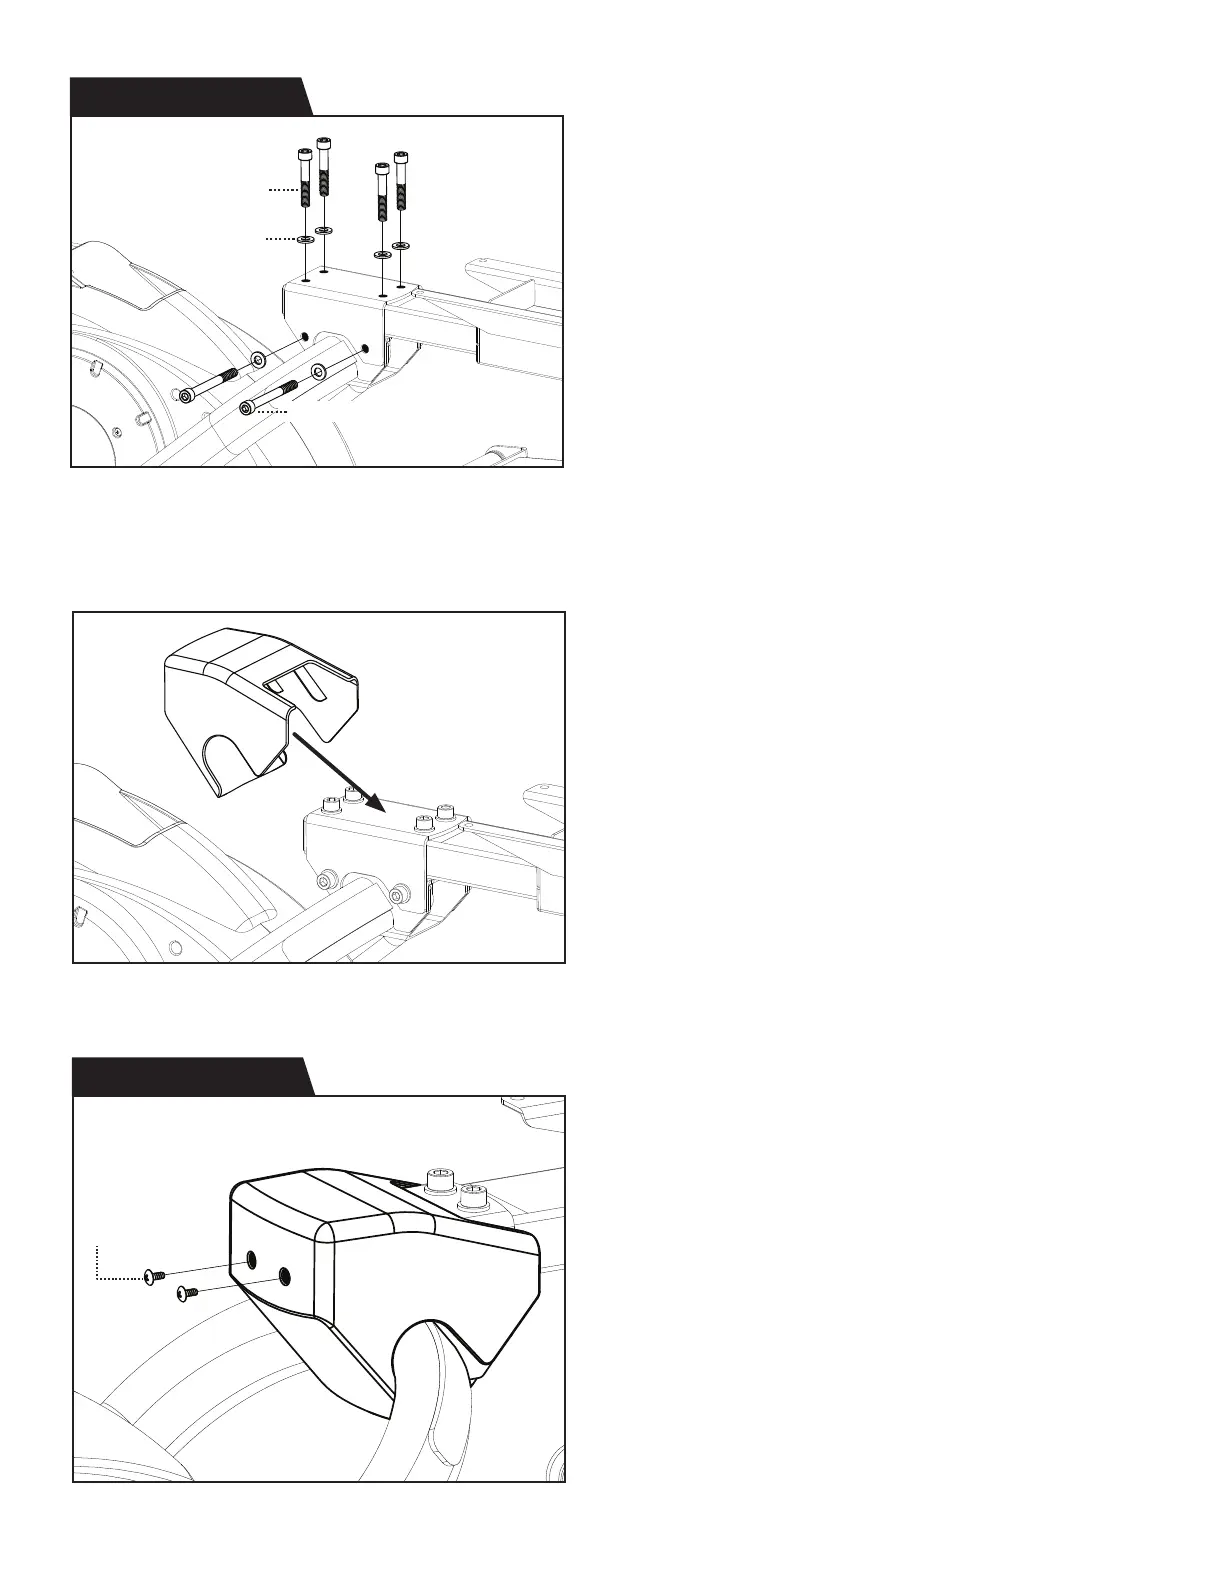
Figure 4: Use the Step 2 Hardware Kit to attach the
Base Fork to the Rear Linkage Arm at the Fork Joint.
Hand tighten 6 × Bolts with 6 × Washers on the
Fork Joint.
Proceed to fully tighten the bolts with the
8mm Allen Wrench.
Figure 6: Use the Step 3 Hardware Kit to attach the
Fork Joint Cover over the Fork Joint and fully tighten
the 2 × Screws with the Screwdriver provided.
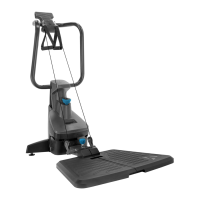
Figure 5: Align the Fork Joint Cover over the Fork Joint.
6
Screw (M4 x 10)
Figure 4
Figure 6
Figure 5
Step 3 Hardware Kit
Step 2 Hardware Kit
Bolt (M10 x 60)
Washer (M10)
Bolt (M10 x 100)