2: Performance verification DMM6500 6½-Digit Multimeter with Scanning
Calibration and Adjustment Manual
2-52 DMM6500-905-01 Rev. E June 2021
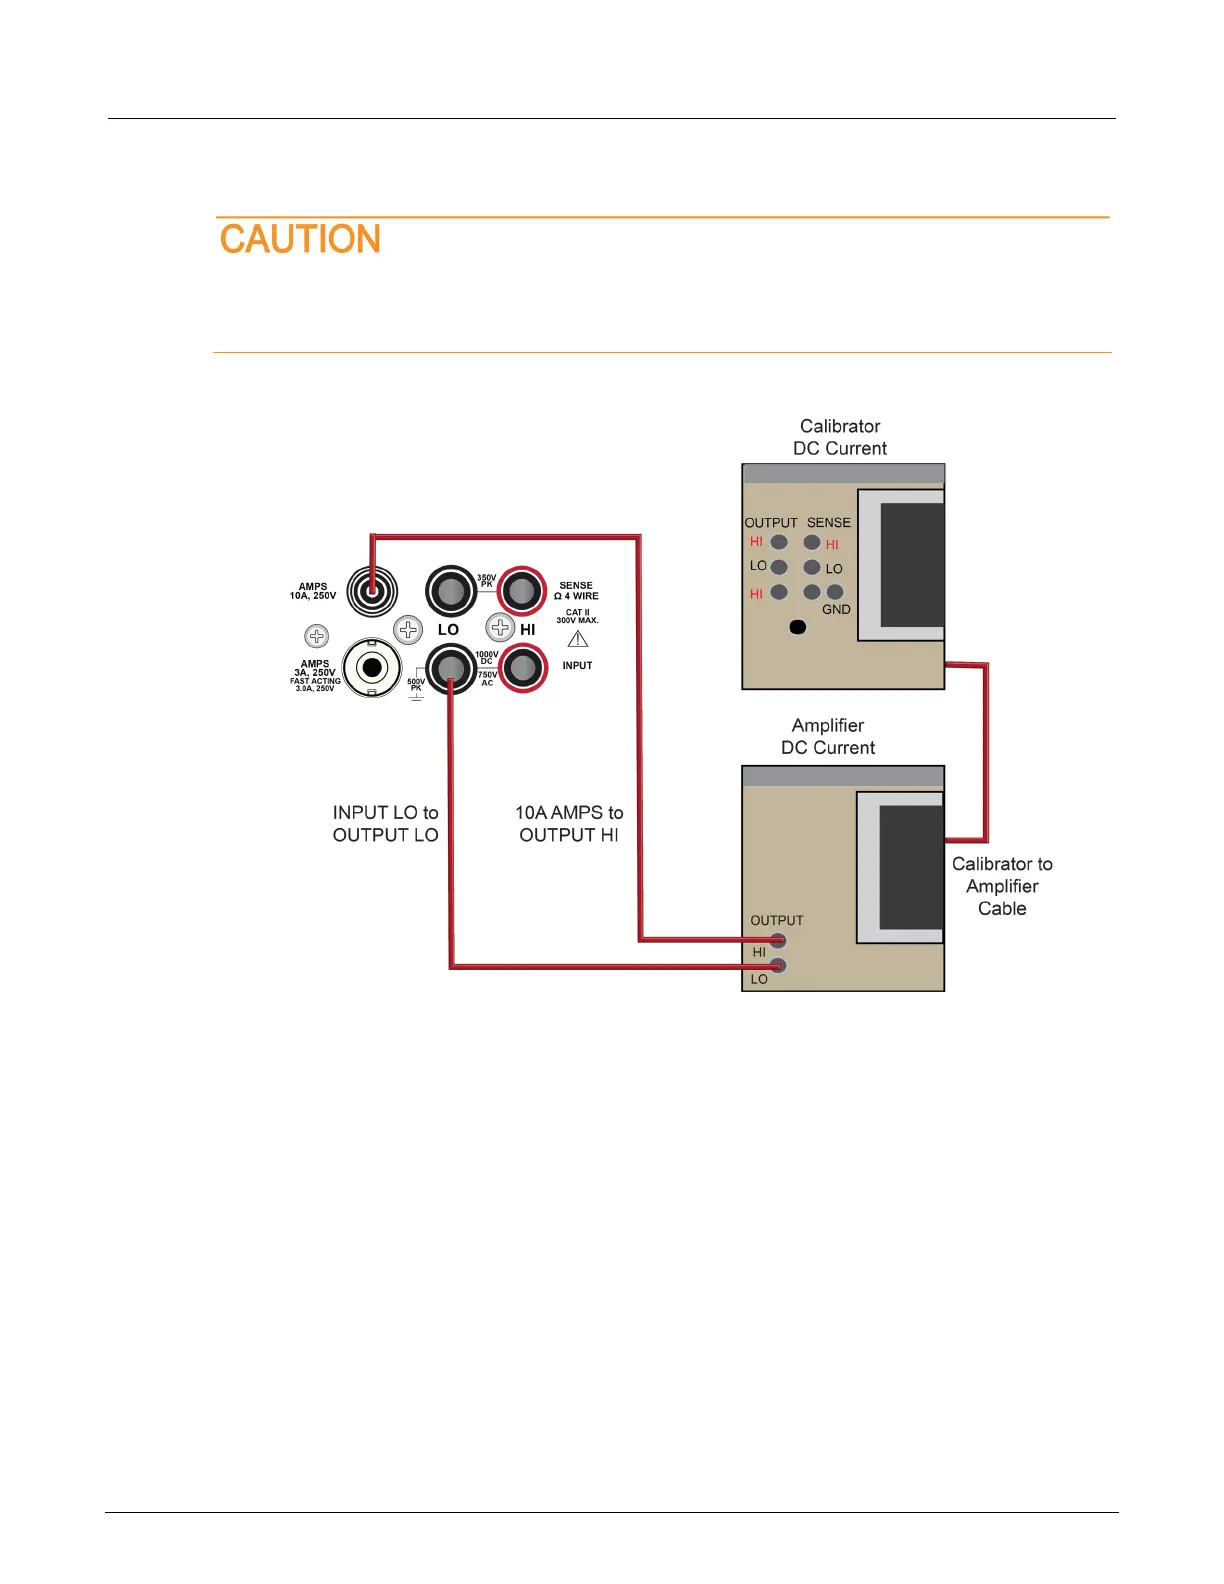
8. Connect the DMM6500 to the calibrator and amplifier as shown in the following figure.
Ensure cabling is designed to conduct 10 A without significant voltage drop. In general,
cables for the 10 A range steps should be made of heavy gauge wire and should be as short
as practical.
Figure 20: Connections for the 10 A range
9. Enable the calibrator amplifier and select the BOOST key.
10. On the calibrator, set the amplifier range lock to ON.
11. Source ac current for each of the frequencies listed in the following table.
12. On the calibrator, select OPR/STBY key. Make sure that the front panel displays OPERATE.
13. For each setting, allow the calibrator and amplifier to settle properly and verify the reading is
within low and high limits.

 Loading...