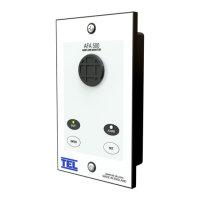
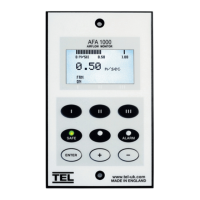
1.2 Alarm Configuration / Calibration
The alarm is supplied with a factory configuration.
The only part of the configuration that can be changed is the setting for the Sash High repeat
timer time delay and the percentage figure for the Low Air alarm point when using the two point
calibration mode-- if required these can be changed by connection to a Laptop or PC via the
RS232 com port.
The alarm has two modes for the calibration of the airflow alarm point. These two modes are
selectable via a ‘jumper connection’ on the back of the alarm PCB. The jumper is labelled as
CAL and is situated on the edge of the PCB above the Com port.
The two calibration modes are :-
a. Single Point Calibration ( with the Jumper connected ) - The airflow is reduced
mechanically ( using balance damper or slowing down the extract fan) to the Low Air alarm
point and this airflow is ‘captured’ by the alarm. The airflow is then restored to the normal
operating value and the Low Air alarm will activate if the airflow subsequently falls to the
alarm point
b. Two Point Calibration ( with the Jumper not connected) - This is a two point
calibration method. The airflow is set to the normal operating value and this value is
‘captured’ by the alarm and taken to be 100%. The airflow is then increased to one and a half
times the normal operating value and this value is ‘captured’ by the alarm and taken to be
150%. The Low Air alarm will then activate if the airflow subsequently falls to 80% of the
normal operating value.
NOTE :- for fume hoods where it is not possible to use the side wall sensor connection or LEV
extract systems the sensor can be connected directly to the extract duct using adaptors and a
¼ inch PVC tube – see installation section below for details. Only the Single Point Calibration
method can be used for this configuration
See ‘Quick Start Installation’ below for details of the Calibration procedures
1.3 Start up
When unit is powered up the following sequence of events occur :-
1. The 12V DC power is applied to the airflow sensor and the alarm then performs a self test
on the functions , LEDs and audible alarm ( approx 2 sec ) and then initiates a delay timer to
allow the airflow sensor to stabilise.
2. During the whole of thedelay period all alarms and relay outputs are inhibited and the Red &
Green LEDs will be permanently ON.
3. At the end of the delay period the unit performs one of two options :-
a. If the alarm calibration has been previously completed – the unit goes to
normal operating mode ( Run )
b. If the unit has not been calibrated -- the Red & Green LEDs will flash on/off and
the audible alarm will be muted. It is then possible to press the Enter button for
5 secs and go into the calibration mode – (See ‘Quick Start Installation’ below for
details of the Calibration procedures)