With the handset down, press the n button for the menu.
Use the ‘Up’ and ‘Down’ buttons (ramp and book icons) to
display ‘Ajustes’ and press the
n button to accept. Use
the ‘Up’ and ‘Down’ buttons (ramp and book icons) to
display ‘Fecha y Hora’ and press the
n button. Enter the
date as a string of 6 numbers - eg.170708 (without
separators). Press the
n button when complete. Enter 4
numbers as the time - eg.1626 (without separators). Press
the
n button to complete. Press the ‘Left Arrow’ button
several times to return to the basic display.
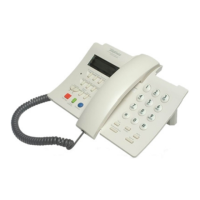
Some users find that the Domo2 does not maintain the correct
date and time, where the handset is connected to the Telefonica
system via a radio connection.
Remember, if you have the caller Identification service enabled,
when receiving a call, the hour and date display will be adjusted
automatically.
With the handset down, press the n button for the menu.
Use the ‘Up’ and ‘Down’ buttons (ramp and book icons) to
display ‘Ajustes’. Press the
n button to accept. Use the
‘Up’ and ‘Down’ buttons (ramp and book icons) to display
‘Audio’ and press the
n button to accept.
You can access various Audio settings by pressing the
n
button to select, and the ‘Up’ and ‘Down’ button (ramp
and book icons) to choose the settings for -
‘Volume’
‘Melody’
‘Advising tones’.
Date and
Hour
Audio
With the handset down, press the
n button for the menu.
Use the ‘Up’ and ‘Down’ buttons (ramp and book icons)
to display ‘Ajustes’. Press the
n button to accept. Use
the ‘Up’ and ‘Down’ buttons to display ‘Contraste’. Press
the
n button. Now use the ‘Up’ and ‘Down’ buttons to
select one of the contrast settings and press the
n button
to complete.
Display
Contrast
Telefonica Domo2 Rapid Guide in English Telefonica Domo2 Rapid Guide in English
8 9
HANDSET ADJUSTMENTS