` 4
2.5 Attention:
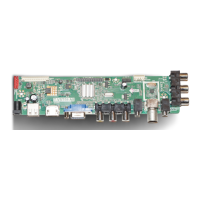
LVDSVDD – if the LCD is in 5V, it must be switched to the setting of 5V. And
if the LCD is in
3.3V, it must be switched to the setting of 3.3V. (Switch setting: CN6 -- 5V or
3.3V )
3. Instruments
3.1 Multimeter:
Max Input Current : over 1A / Max Input Voltage : 500Vdc
Measurement Range : 10Mvr~100Vdc / Accuracy : 0.03%
3.2 Oscillograph
Frequency Band : over 20M /Input Impedance : over 1M
Input Capacitance : below 30pF / Max Input Voltage : 250V
3.3 PC: XGA (1024X768@60Hz)
3.4 HD Singal Generator: 480P 576P 720P 1080i@50/60HZ
3.5 DVD Player: Audio/Video output, S-VIDEO output, HDMI output.
3.6 VGA cable, S-VIDEOcable, RCA cable, YpbPr cable and HDMI cable.
3.7 Chip test:18.5” or 24” LCD, power board, panel cable, INVERTER cable,
3.8 Control board, Receiver, Remote controller.
3.9 Color TV Pattern Generator: FLUK 54200.
3.10 Work equipment will need Anti static searing-iron, tweezer,wire
cutter,soldring tin, rosin,brush
4. Software Upgrade
The chip inside the LCD is designed with a FLASH ROM memory program: it
can be erased
and reprogrammed, it can be also updated via the USB port or VGA port. The
program is related to the chip fucntion ---Different functions of chips need to be
planted with different versions of prgrams.
Please ugrade the new software by the USB port the instruction steps
below:
-------Please copy the new software to the USB
-------Power ON the TV and press MENU to display the main menu ,then
press / to the
OPTION menu. And then select the software in the root of your USB memory ,
Press ENTER .then press to update and to cancel.
Remarks: When the first upgrading is finished, the action of turning on the tv
will be a little slow. So when you turn on the TV at the first time, you need to
press the "power" key on the remote control several times until you turn on the
tv. Turning on the TV at the first time is very important, you need to operate it
carefully to avoid the upgrading is not successful.

 Loading...