EasyManua.ls Logo

Tempur-Pedic TEMPUR-ERGO PLUS - User Manual

Tempur-Pedic TEMPUR-ERGO PLUS
2 pages
Print Icon
To Next Page IconTo Next Page
Loading...
CUSTOMER SERVICE: 1–800–821–6621
Adjusting Your
TEMPUR-Ergo
Plus
Adjustable Base
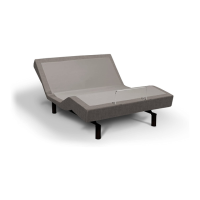
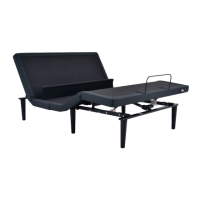
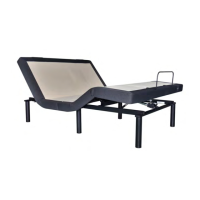
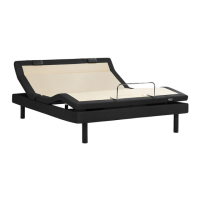
To adjust the Head section, press the HEAD UP
button (1) or HEAD DOWN button (2). Keep pressing
the respective button until the desired height is
reached.
To adjust the Leg section, press the LEG UP button
(3) or LEG DOWN button (4). Keep pressing the
respective button until the desired height is reached.
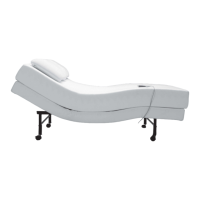
Press and hold the FLAT button (5) for 3 seconds,
and the bed frame will automatically move into its
complete  at position.
5
6
CUSTOMER SERVICE: 1–800–821–6621
Change From a
Single System to a
Tandem System
This function will pair the remotes from two
adjustable bases, allowing each remote to control
both bases in unison.
Pair Remote 1 to Base 2 by pressing and holding the
Learn Button on the Control Box. It will blink three (3)
times when ready.
Press the Learn Button two (2) times. This will select
the second remote channel. The LED will turn off.
Press any button on the new remote. The LED on
the Control Box will blink two (2) times and return on
once programmed.
Pair Remote 2 to Base 1 by repeating the process
above.
Patents Pending Rev 101013
Quick Start
Guide
TEMPUR-Ergo
Plus
Adjustable Base
CUSTOMER SERVICE: 1–800–821–6621
© 2013 Tempur-Pedic Management, LLC. All rights reserved.
NOTE: Ensure all obstructions are clear of the
adjustable base’s undercarriage when lifting
or lowering the base’s head and leg sections
to avoid risk of pinching or damage.
NOTE: Each remote must be programmed to
the opposite control box.
1. HEAD UP (HU)
3. LEG UP (LU)
6. MEMORY PRESET 1
2. HEAD DOWN (HD)
7. MEMORY PRESET 2
5. FLAT (F)
4. LEG DOWN (LD)

Other manuals for Tempur-Pedic TEMPUR-ERGO PLUS

Questions and Answers

Summary

Adjusting Your TEMPUR-Ergo Plus Adjustable Base

Adjusting Head and Leg Sections

Instructions for adjusting the head and leg sections using UP/DOWN buttons.

Flat and Memory Preset Functions

Utilizing the FLAT button for a flat position and memory presets.

Adjustment Safety Precautions

Ensure clear space around the base during adjustments to prevent pinching or damage.

Tandem System Setup

Pairing Remote to Base 2

Press and hold Learn Button on Control Box to pair Remote 1 with Base 2.

Selecting Second Remote Channel

Press Learn Button twice to select the second remote channel for pairing.

Confirming Programming

Press any button on the new remote; LED blinks twice upon successful programming.

Programming Requirement Note

Each remote must be programmed to the opposite control box for tandem operation.

Setting Up Your TEMPUR-Ergo Plus Adjustable Base

Choosing Base Location and Unpacking

Decide placement near an electrical outlet and carefully lift the base from the carton.

Installing Remote and Power Supply Batteries

Install AA batteries into the remote and 9-Volt batteries into the power supply.

Attaching Legs and Flipping Base

Hand-tighten legs securely, avoid over-tightening, and carefully flip the base.

Connecting System Components

Route control box cable, connect power cord to surge protector, and check functionality.

Installing the Mattress Retainer Bar

Retainer Bar and Plate Installation

Install the retainer bar and plates onto the frame, aligning threaded holes.

Securing Retainer Bar Bolts

Insert and secure retainer bar bolts through the plate and into the base.

Placing Mattress on Base

The final step is to carefully place the mattress onto the installed adjustable base.

Tempur-Pedic TEMPUR-ERGO PLUS Specifications

General IconGeneral
Adjustable Head and FootYes
Wireless RemoteYes
Zero Gravity PositionYes
USB PortsYes
MassageYes
Under-bed LightingYes
Wall-Hugging DesignYes
Warranty25-Year Limited Warranty
Preset PositionsYes
TypeAdjustable Bed Base

Related product manuals