6
BACK GAUGE ADJUSTMENT
Slide back gauge rods (62) through the adjustment blocks (66) and brackets (71). Mount the rods in the holes
found at the rear of the cutter bar. Move the gauge angle (63) up the rods until it contacts with the lower blade.
Observe the pointers attached to the adjustment blocks and adjust the rods in or out until the embossed scales read
zero on the pointers. Tighten the set screws (44) to lock the rods in place.
To attain a particular setting, loosen the four lock screws (70) and slide the gauge to an approximate position. Fine
tune adjustments are accomplished by locking the screws of the two adjustment brackets (71) while keeping those
of the blocks (66) loose. The adjustment dial (68) can then be used to position the gauge in or out.
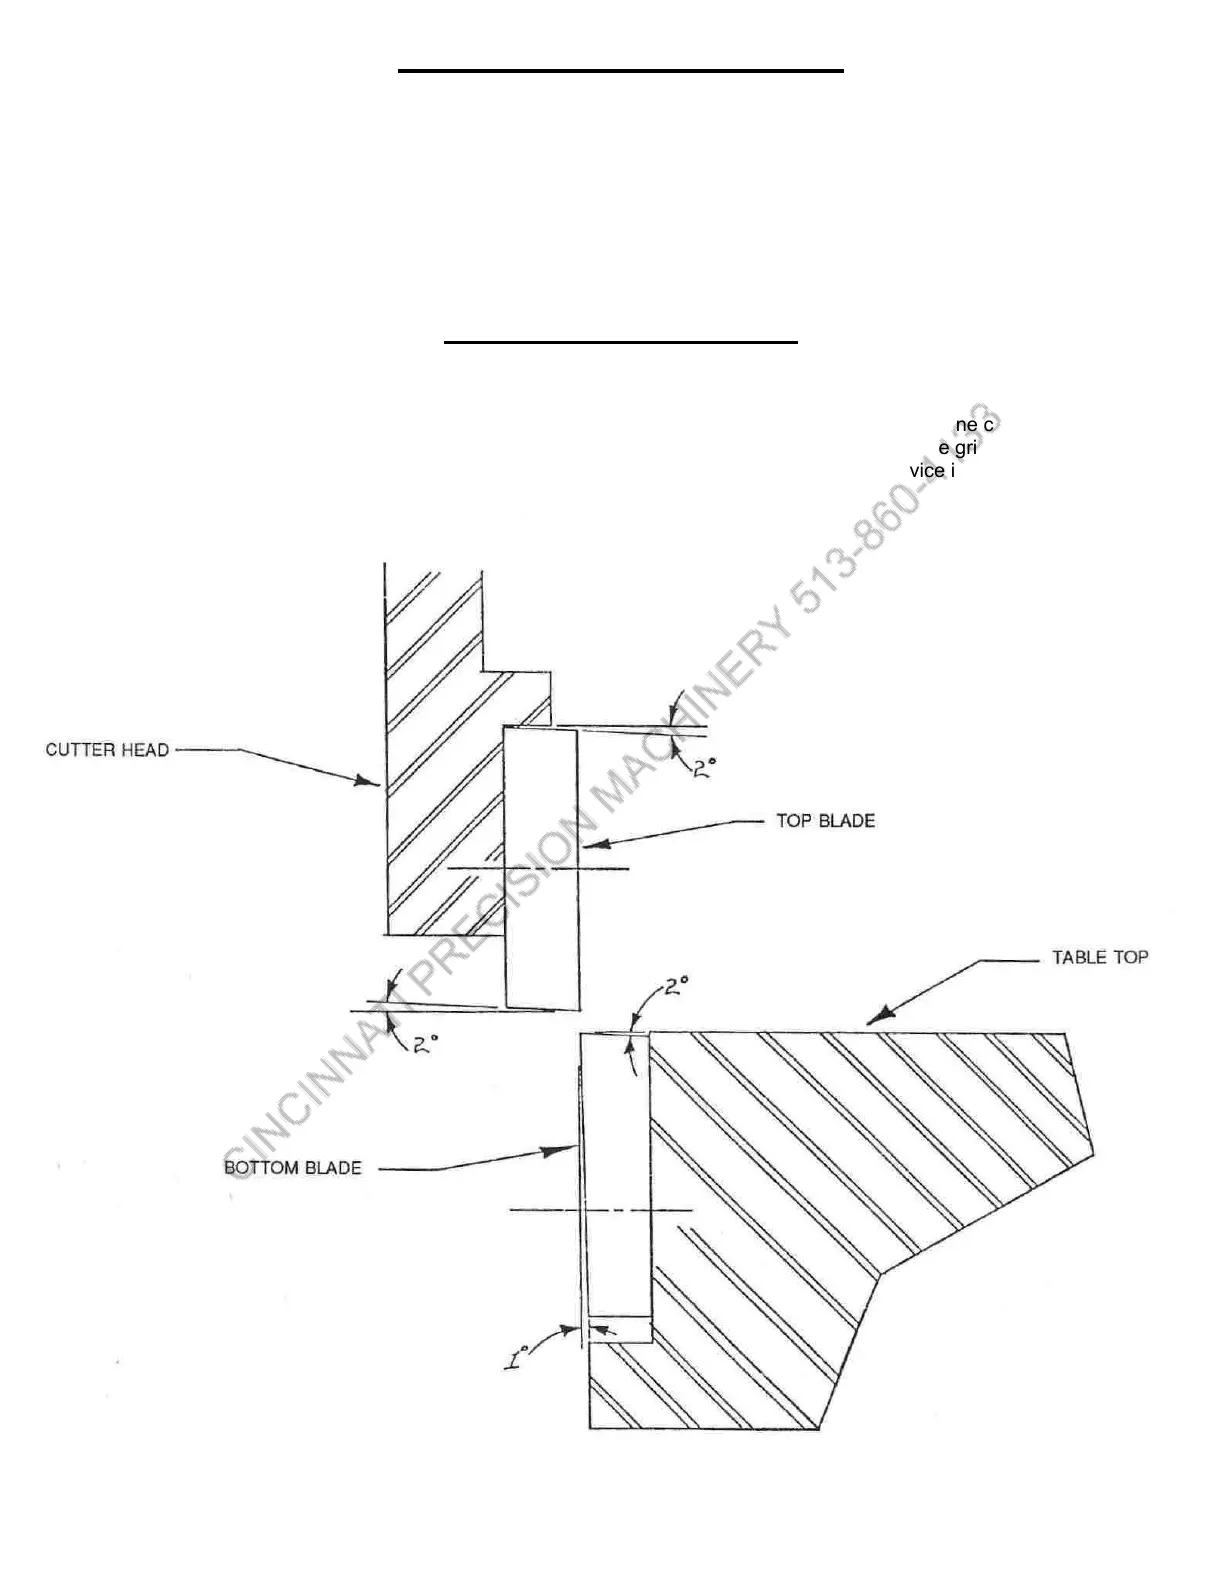
SHARPENING BLADES
Your TENNSMITH shear features “Tri-Action” ground blades. The upper blade has two cutting edges which are
ground with a 2 degree edge relief. The upper blade can be turned over to expose the new cutting edge. It can be
sharpened on a surface grinder by grinding both wide sides to the blade. The lower blade has one cutting edge
with a 2 degree cutting edge relief and a 1 degree face relief. It can be sharpened on a surface grinder by grinding
the wide side of the blade having the 1 degree relief. See Figure 2). Blade sharpening service is available from the
factory.