5
Section 250-0200
SM 1985 Rev 1 11-00
Testing
Operating Test - The valve must open (exhaust)
when the pressure applied at the supply port 'P-1' is
above 10.75 bar (156 lbf/in²). The valve should
exhaust sharply, with a 'pop' action. If the valve does
not relieve, ball (20) must be stuck on its seat. The
complete valve should be replaced.
Leakage Test - With the air system at operating
pressure, test for leakage by applying soap suds to
valve body (16) and exhaust port. If leakage exceeds
a 25 mm soap bubble in 5 seconds, replace the valve
assembly.
Adjustment
Adjust the safety valve opening pressure to 10.75 bar
(156 lbf/in²) by loosening locknut (18) and turning
adjusting screw in to raise the pressure setting or out
to reduce the setting. Always tighten locknut (18) after
making adjustment.
Maintenance
Note: This is a non-serviceable item and should be
replaced with a new safety valve assembly, if
damaged.
PURGE VALVE
Removal
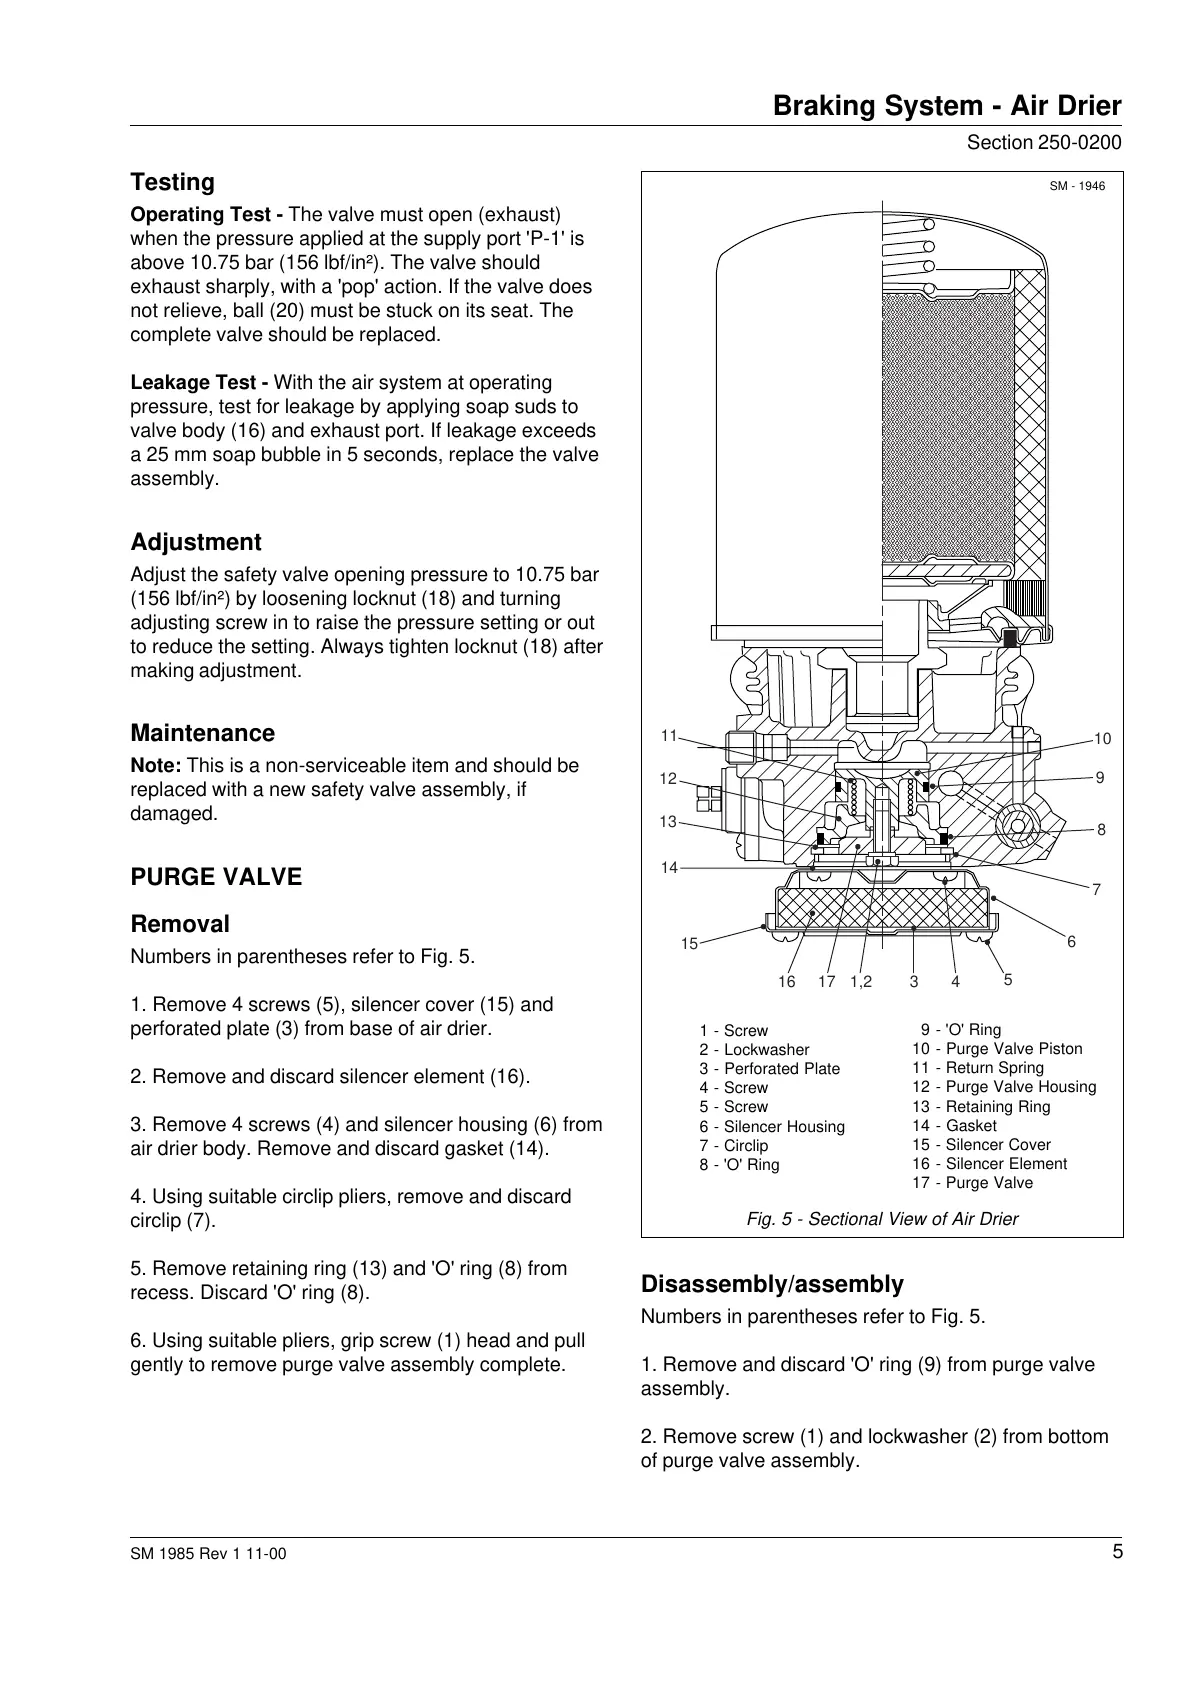
Numbers in parentheses refer to Fig. 5.
1. Remove 4 screws (5), silencer cover (15) and
perforated plate (3) from base of air drier.
2. Remove and discard silencer element (16).
3. Remove 4 screws (4) and silencer housing (6) from
air drier body. Remove and discard gasket (14).
4. Using suitable circlip pliers, remove and discard
circlip (7).
5. Remove retaining ring (13) and 'O' ring (8) from
recess. Discard 'O' ring (8).
6. Using suitable pliers, grip screw (1) head and pull
gently to remove purge valve assembly complete.
SM - 1946
Fig. 5 - Sectional View of Air Drier
Braking System - Air Drier
Disassembly/assembly
Numbers in parentheses refer to Fig. 5.
1. Remove and discard 'O' ring (9) from purge valve
assembly.
2. Remove screw (1) and lockwasher (2) from bottom
of purge valve assembly.
1 - Screw
2 - Lockwasher
3 - Perforated Plate
4 - Screw
5 - Screw
6 - Silencer Housing
7 - Circlip
8 - 'O' Ring
9 - 'O' Ring
10 - Purge Valve Piston
11 - Return Spring
12 - Purge Valve Housing
13 - Retaining Ring
14 - Gasket
15 - Silencer Cover
16 - Silencer Element
17 - Purge Valve
11
12
13
14
15
16
17 1,2 3 4
5
6
7
8
9
10
Courtesy of Machine.Market
 Loading...


