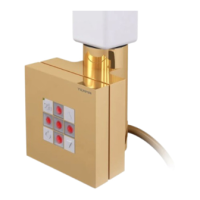
CLOCK PROGRAMMING
Press both arrow buons at the same me
Hour eld will start ashing
Set the required hour using and Conrm it by
pressing .
Minute eld is ashing
Set the required minutes using and conrm it by
pressing .
Set me is displayed.
Clock programming is nished.
In case of electric power supply failure, aer the electricity is back on, the display panel
will show the last remembered me. The displayed me may not be correct – this will be
indicated by the Clock sign ashing. Please conrm the me by pressing any buon or
program the correct seng.
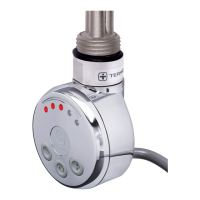
24-hour Timer enables specicaon of 4 dierent me zones (T1, T2, T3 and T4), which al-
low dierent temperature sengs and, including periods when the device is switched o.
The start of every me zone is programmed subsequently from T1, T2, T3 to T4 (hour
and minutes), and the temperature for every me zone is specied. The enre cycle is
repeated every day on condion that the device is on and Timer is acve.
Turning the device o does not delete the Timer sengs.
Aer turning the device back on with the buon the Timer will be acvated with the
clock sengs from before the device was turned o.
In order to deacvate the Timer press the , buon for a while, use the arrows to set the
Timer to OF and press again (the device will switch to the Manual Mode).
During the Timer operaon, Dryer Mode can also be used – Dryer Mode command is
superior to the Timer therefore the device will act according to the parameters set for
the Dryer, only aer the Dryer Mode is nished will the device go back to the Timer
funcon (see → Dryer Mode).
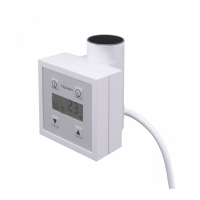
Turn on the device by pressing .
Press and hold → buon ON or OF will start ashing
Acvate (On) or deacvate (Of) the mode with the use of
and . Conrm by pressing .
Clock eld is ashing on the display panel and T1 is on
Set the START of the rst me zone with the use of and
. Conrm by pressing .
et the START of subsequent me zones T2 – T4 with the
use of and . Conrm by pressing .
Temperature eld is ashing on the display panel and
T1 is on
Set the required TEMPERATURE for T1 zone using and
. Conrm by pressing .
Set the required TEMPERATURES for the me zones
T2 – T4.
Conrm by pressing .
Display panel is no longer ashing, TIMER icon and a
relevant me zone code T(1-4) depending on current
me are on
TIMER programming is nished.
When TIMER is acve and it controls the device funcons, the user may
modify the set temperature without inuence on the current program. The manual set-
ng will only operate unl the next automac TIMER seng change.