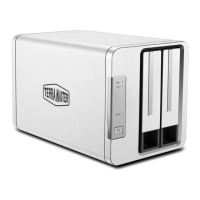
The TerraMaster D2-310 is a RAID storage device designed to provide robust data storage and management for users, offering a blend of performance, reliability, and ease of use. As a "Data Storage Master," it aims to simplify the complexities of data management, making advanced storage solutions accessible to a wider audience.
Function Description
At its core, the D2-310 serves as an external RAID enclosure, capable of housing two hard drives (HDD1/HDD2) to create various RAID configurations. The primary function of this device is to protect and manage data through redundancy and performance enhancements offered by RAID technology. It supports multiple RAID modes, including RAID 0, RAID 1, and SINGLE, allowing users to choose the configuration that best suits their needs for speed, data protection, or individual drive access.
In RAID 0 mode, the device stripes data across both hard drives, effectively combining their capacities and significantly boosting read/write speeds. This mode is ideal for applications where high performance is critical, such as video editing or large file transfers, but it offers no data redundancy. If one drive fails, all data is lost.
RAID 1, on the other hand, provides data mirroring. Data is simultaneously written to both hard drives, creating an exact duplicate. This ensures that if one hard drive fails, the data remains accessible from the other drive, offering a high level of data protection. This mode is particularly suitable for storing critical data where data integrity and availability are paramount.
The SINGLE mode allows each hard drive to be recognized as an independent volume. This is useful for users who prefer to manage their drives separately or who want to use different file systems on each drive without the overhead of RAID.
The D2-310 connects to a computer via a USB Type-C interface, ensuring high-speed data transmission. This modern interface provides a fast and reliable connection, compatible with a wide range of contemporary devices. The device is powered by a DC 12V power input, and it is crucial to use only the original power adapter to prevent potential damage.
Usage Features
The D2-310 is designed with user-friendliness in mind, from installation to daily operation and RAID configuration.
Hard Drive Installation: The installation process for hard drives is straightforward. Users pull out the hard drive tray, fix the hard drive into the tray with provided screws, and then insert the tray back into the device along its track. A key feature here is the handle mechanism: it must be open when inserting the tray and then closed to lock the tray in place once fully inserted. This ensures a secure connection and proper alignment. The manual emphasizes the importance of fully inserting the tray before locking the handle to prevent read/write instability or difficulty in removal.
RAID Setup: Configuring the RAID mode is an intuitive process. A rotary switch located on the rear cover allows users to select their desired RAID mode (RAID 0, RAID 1, or SINGLE) using a screwdriver. After selecting the mode, a crucial step is to press and hold the RESET button for 5 seconds using a pin. This action activates the newly selected RAID mode, making it effective. This two-step process (select, then reset) ensures that RAID mode changes are intentional and properly applied.
Initialisation: Once the RAID mode is set, the newly created RAID needs to be initialized. The manual provides detailed instructions for both Windows OS and Mac OS users.
- Windows OS: Users navigate to "Computer Management > Storage > Disk Management," find the unallocated disk, right-click to "Initialise Disk," and complete the setup. It highlights the importance of selecting GPT partition for capacities over 2TB. After initialization, users create a "New Simple Volume" to complete the process.
- Mac OS: The process involves going to "Disk Utility > External," finding the unallocated disk, selecting it, and clicking "Erase." Users then select the relevant "Name," "Format," and "Scheme" before confirming the erase operation. This initializes the RAID for use with macOS.
Indicators: The device features clear indicators for monitoring its status.
- Hard Drive Indicators (1 & 2): These indicators provide real-time status of each hard drive.
- Off: Hard drive not detected or in sleep mode.
- Green: Hard drive is ready.
- Flashing Green: Indicates active reading/writing.
- Flashing Red: Signals a hard drive fault or array damage.
- During RAID 1 data recovery, one indicator flashes green (for the healthy drive) while the other flashes yellow (for the drive undergoing recovery), providing a visual cue of the recovery process.
- Power Indicator:
- On: Device is powered on.
- Off: Device is powered off.
Power Button: A short press powers the device on, while a long press (for 3 seconds) powers it off, offering simple and direct control over the device's power state.
Rotary Switch: This switch is dedicated to changing RAID modes, providing a physical and tactile way to configure the storage array.
Reset Button: The reset button, typically accessed with a pin, is essential for applying new RAID configurations and for troubleshooting. It resets the device to match its current hardware settings, ensuring that any changes made via the rotary switch are properly registered.
Maintenance Features
The D2-310 incorporates features and guidelines to ensure data integrity and facilitate recovery in case of drive failure, particularly in RAID 1 mode.
Data Recovery (RAID 1): One of the most significant maintenance features is the automatic data recovery process in RAID 1. If a hard drive in a RAID 1 configuration fails, users can simply replace the defective drive with a new one. The device will automatically begin recovering the data from the healthy drive to the newly inserted drive.
The steps for data recovery are:
- Ensure the device and computer are powered on and connected.
- Remove the failed hard drive.
- Insert a new hard drive.
- Observe the indicators: the newly-inserted drive's indicator will flash orange, and the original drive's indicator will flash green, signifying that data recovery is in progress.
- Once both indicators stop flashing, the recovery is complete.
Important Notes for Data Recovery:
- The device must remain powered on throughout the entire recovery process.
- The capacity of the new hard drive must be greater than or equal to the capacity of the faulty hard drive to ensure successful recovery.
- Data recovery can be a lengthy process, potentially lasting several hours to tens of hours, depending on the hard drive capacity.
- Both the device and the computer must remain powered on for the duration of the recovery to avoid interruptions.
Troubleshooting RAID Setup: The manual provides a specific troubleshooting sequence for issues related to hard drives that may have been used with other devices and are not compatible with the D2-310's initialization process. This involves cycling through RAID modes and using the reset button to re-initialize the drives, effectively "wiping" any previous configurations that might be causing conflicts.
Warnings and Best Practices:
- Power Adapter: Always use the original power adapter to prevent damage.
- Hard Drive Installation: Ensure trays are fully inserted and locked to maintain stable read/write operations.
- RAID Mode Changes: A critical warning is issued regarding changing RAID modes. Such changes can lead to hard drive formatting and the deletion of all data. Therefore, users are strongly advised to back up their data before switching RAID modes. This emphasizes the importance of data backup as a primary maintenance practice.
In summary, the TerraMaster D2-310 is a comprehensive RAID storage solution that combines flexible RAID configurations, user-friendly installation and setup, clear status indicators, and robust data protection features, particularly in RAID 1 mode. Its design prioritizes ease of use while providing essential tools for data management and recovery, making it a reliable choice for users seeking secure and efficient external storage.