- 6 -
Note: If LED does not light up or is on permanently, make sure the
battery is inserted the correct way and inserted fully, starting over if
necessary. Do not install the batteries backwards as it may permanently
damage the outdoor sensor.
Note: We recommend Lithium batteries for cold weather climates, but
alkaline batteries are sufficient for most climates. Rechargeable batteries
have lower voltages and should never be used.
3.5 Mount outdoor sensor
3.5.1 Before you mount
Before proceeding with the outdoor mounting detailed in this section, you need
to make sure the base station can receive the data from outdoor sensor, while
you keep the assembled outdoor sensor package nearby (although preferably
not closer than 1.5m from the console). This will make any troubleshooting and
adjustments easier and avoids any distance or interference related issues from
the setup.
After setup is complete and everything is working, return here for outdoor
mounting. If issues show up after outdoor mounting they are almost certainly
related to distance, obstacles etc.
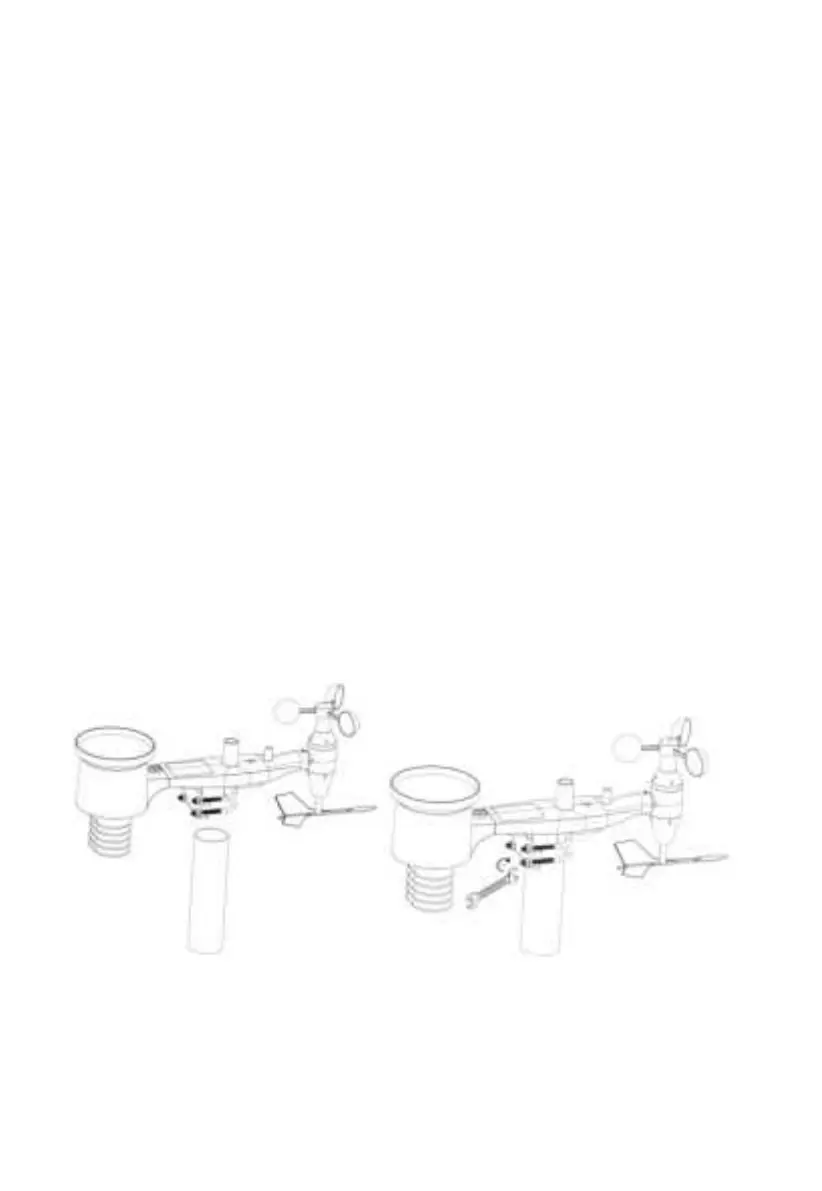
3.5.2 Mounting
Reference Figure 8, the mounting assembly includes two U-Bolts and a bracket
that tightens around a 1 to 2” diameter pole (not included) using the four U-Bolt
nuts.
Figure 8: Sensor package mounting diagram
Note
Beside the antenna, there is an arrow icon with “WEST” words (Figure 9)
representing the direction of west. The sensor body has to be adjusted so that
the “WEST” indication is facing to real west direction in your location. A
compass device is recommended to help adjust direction. Permanent wind