7
Pre-heating the fryer
Always pre-heat the fryer before use.
• Set the temperature control fully anti-clockwise to the
minimum position.
• Take the power cord out of its storage pocket in the back
of the control unit.
• Connect the power cord to a convenient mains outlet.
The Power/Temperature indicator will light green.
• Set the Temperature control to the heat setting you want
to use.
The Power/Temperature indicator will light red and the oil
will begin to heat.
When the oil reaches working temperature the Power/
Temperature indicator will switch to green. The fryer is now
ready to use.
In use, the Power/Temperature indicator will switch from
green to red as the fryer maintains the temperature of the
oil.
OPERATION
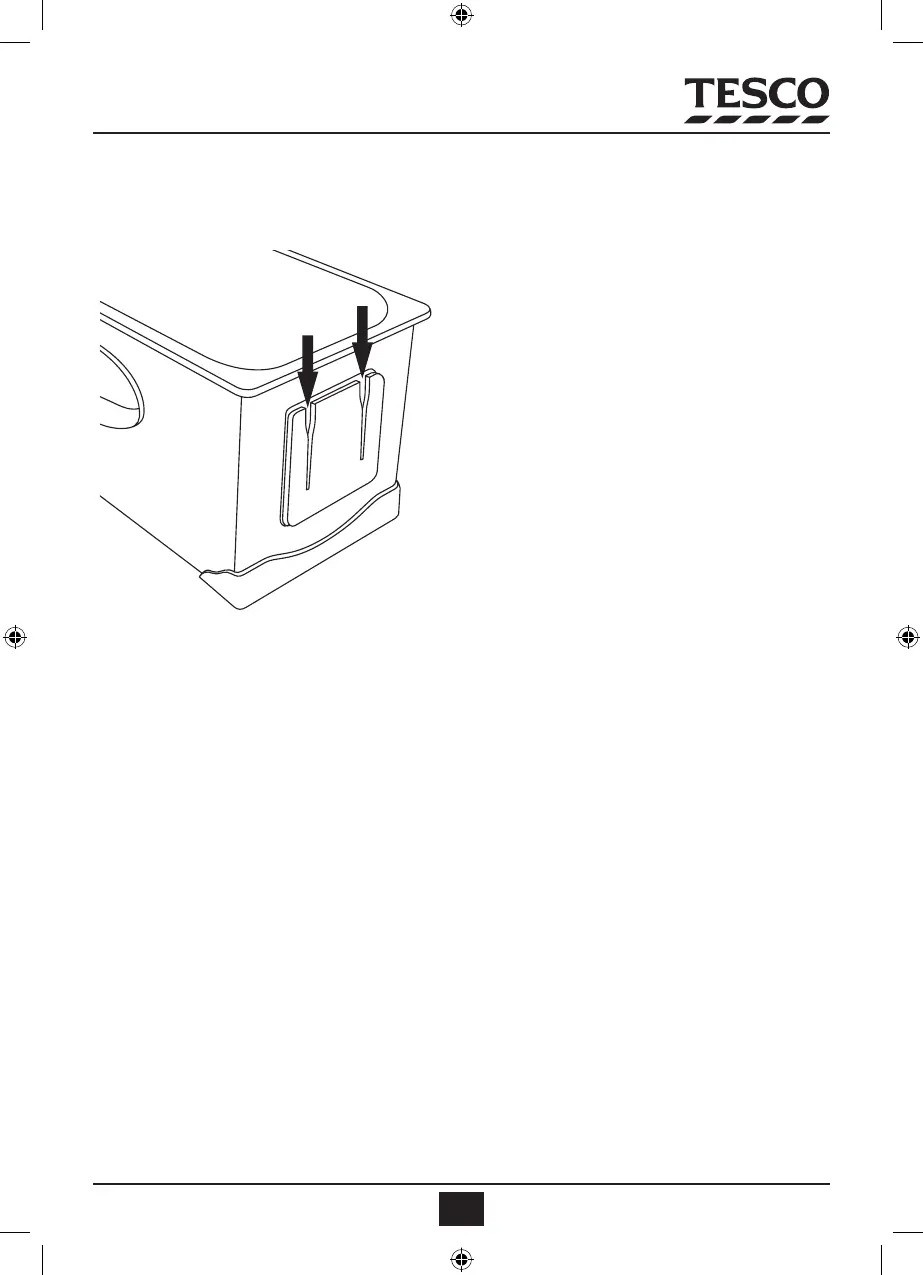
Assembling the fryer
• Place the oil pan in the base.
• Locate the two slots at the back of the base.
• Slide the guide rails on the control unit into the slots.
• The control unit will drop into place.
The element should sit in the bottom of the oil pan.
NOTE: There is a safety cutout that prevents the control unit
from operation unless it has been correctly tted.
• Place the basket in the oil pan.
• Place the lid over the basket.
Filling the fryer with oil
• Remove the fryer lid.
• Lift out the basket.
• Pour the oil directly into the oil pan.
There are maximum and minimum levels marked on the
inside of the oil pan. Fill with oil to a level between the MAX
(3.0L) and MIN (2.5L) marks.
NOTE: Oil should be replaced after 6 to 8 times of use and on
a more regular basis when frying sh or heavily battered
food. This will help to avoid oil splashing in case of moisture
trapped at the bottom of the pan.