16
3.2 Front Panel Menu Descriptions :
By using (↑), (↓) and ENTER buttons you can access the following menus. At the end of each menu there
is <ENTER> EXIT message will be showed, if you press enter you will exit to upper menu. All menus have
3 or 4 levels.
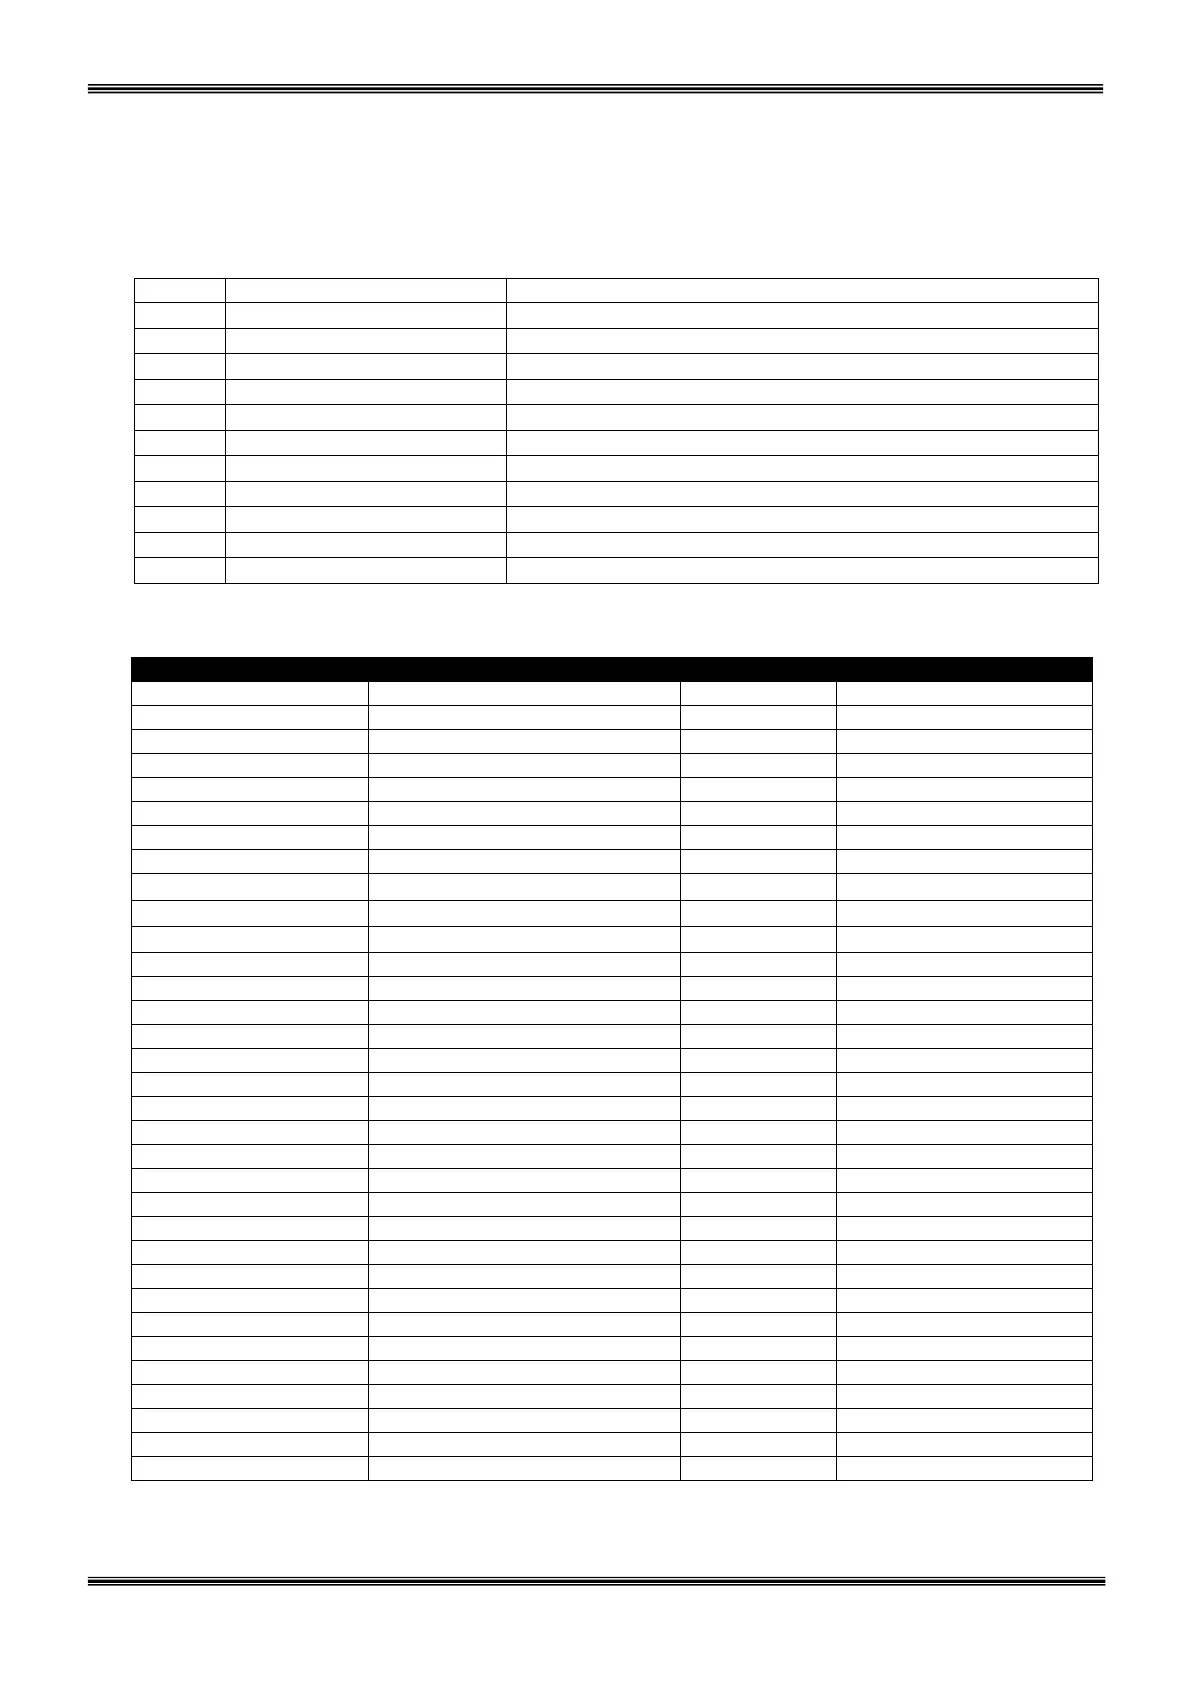
Main menu (Level 1)
STATUS
→ Enter Status menu
MEASUREMENTS
→ Enter Measurements menu
ALARM LOGS
→ Enter Alarm logs menu
INFORMATION
→ Enter Information menu
OPTIONS
→ Enter Options menu
COMMAND
→ Enter Command menu
TIME
→ Enter Time menu
SERVİCE
→ Enter Service menu
ADJUST
→ Enter Adjust menu
T. CALIB
→ Enter TFT Panel Calibration menu
Goto 1
→Back to Status Menu
Sub menus (Level 2)
STATUS STATUS OF THE UPS
MEASUREMENTS INPUT Input measurements
BYPASS Bypass measurements
INVERTER Inverter measurements
OUTPUT Output measurements
DC DC measurements
GENERAL General measurements
TEMPS (ONLY IN DX 100-250)
ENTER - EXIT
ALARM LOGS
UPS LOG RECORD
Page1
ENTER CLEAR LOG
Page1
INFORMATION RS232 COMM 1:-- Page1
RS232 COMM 2:-- Page1
MAX POWER (VA) Page1
NOMİNAL VALUE Page1
INV VERSİON Page1
PFC VERSİON Page1
LCD VERSİON Page1
MODEL Page1
PROTOCOL Page2
CHASSİS NO Page2
OPTIONS LCD OPTIONS LCD panel options
COMMUNICATION OPTIONS Communication options
ALARM OPTIONS Alarm options
BYPASS OPTIONS Bypass options
COMMAND ENTER <BYPASS> Page1
ENTER <BOOST> Page1
ENTER <B.TEST> Page1
RELAY TEST Page2
ENTER:MODEM INIT Page1
ALARM SOUND : ON/OFF Page1
ENTER - EXIT
TIME TİME AND DATE ADJUST



 To Next Page