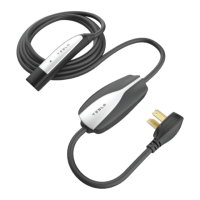
8 HIGH POWER WALL CONNECTOR INSTALLATION GUIDE
Installation Overview
TOOLS REQUIRED
Before installing the High Power Wall
Connector, ensure you have the following
tools:
• Pencil or marker
• Drill and 9/32”and 3/16” drill bits
•T20 torx driver
• Hole saw (1 1/4” / 32 mm)
• Sharp knife or razor
• Phillips screwdriver
• Ratchet wrench with 8 mm and 17 mm
sockets, and a 2” (minimum) extension
• Voltmeter or digital multimeter (to
measure AC power at the site)
OVERVIEW OF STEPS
After running service wiring to the desired
installation location using 1” (25 mm) conduit,
(see pages 4 through 6), and installing the
appropriate circuit breaker (see page 7), TURN
OFF THE POWER SUPPLY. Then follow these
steps to install the High Power Wall
Connector:
1 Check box contents (see page 9)
2 Install wall bracket (see page 10)
3 Prepare for installation (see page 11)
4 Mount on wall (see page 12)
5 Connect wiring (see page 13)
6 Confirm a successful installation (see
page 14)
7 Set operating current (see page 15)
8 Secure cover and power up (see page 16)
9 Install Cable Organizer (see page 17)
HPWC_Install_Guide.book Page 8 Wednesday, April 2, 2014 3:30 PM