Usage and Storage Instructions 5
EN
English
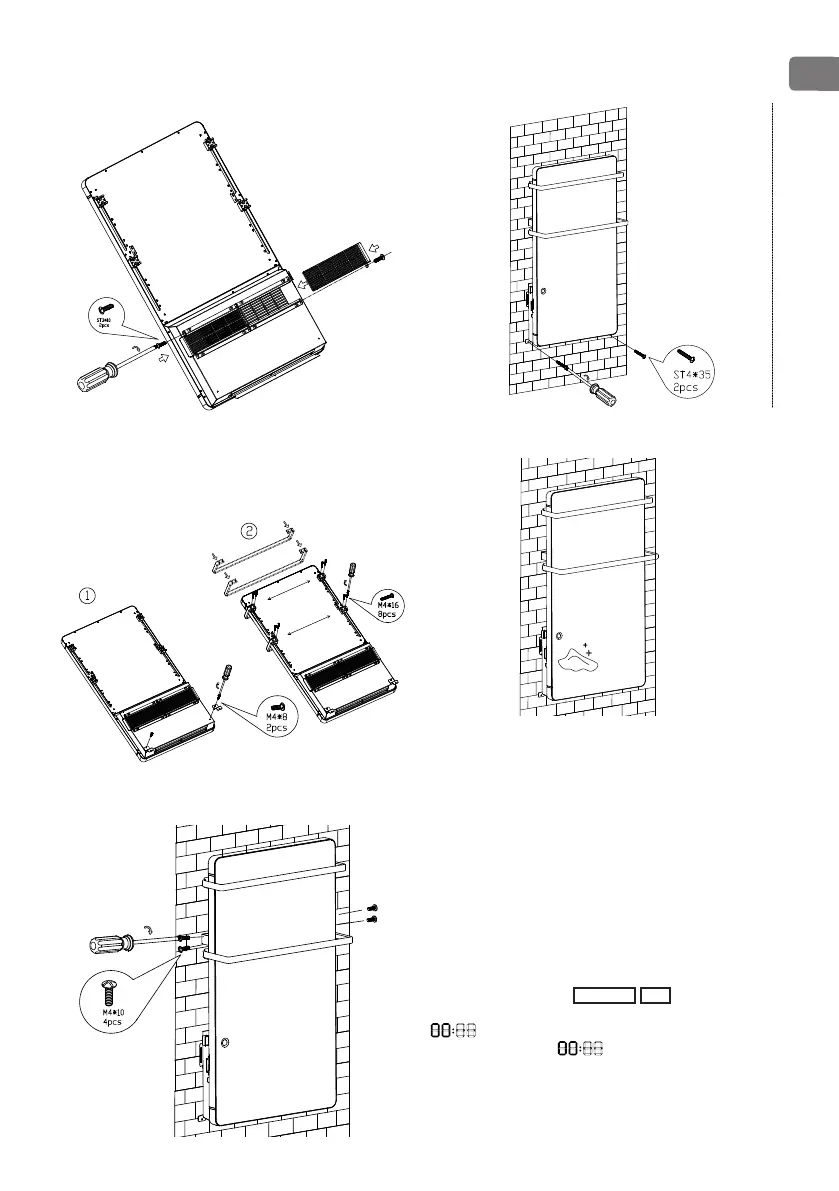
5. Insert the two lters in the left and right card slot,
tighten them with two ST3X10 screws (notice for the
screw position).
6. Put the two Z wall hanging brackets on the back of
the appliance with two M4X8 screws, put the small
towel rack into the xed slot and lock with four M4X16
screws, and then put the big towel rack into the xed
slot and lock with four M4X16 screws.
7. Assemble the appliance on the up-hook, tighten two
M4X10 screws on the right side and two M4X10 screw on
the left side to x the appliance (two people to assemble).
8. Fix the Z wall hanging brackets on the wall with two
ST4X35 screws
9. Use the cloth to clean the surface.
INSTRUCTION FOR USE
Connect to supply power, push the ON/OFF (0/I) button
located at the left side of the appliance to switch on the
appliance. Buzzer will have a short “D” sound and full
screen display will light up for 1 min, then automatically
switch to standby mode. Push ON/OFF button again, if
you want to switch o.
Set date and time:
The date and time setting can be done only when the
appliance is in standby mode.
Press SET, the day icon
1 2 3 4 5 6 7
ashes. Use +
and - to set current day. Then press OK, the hour icon
ashes. Use + and – to set hour. Then press
OK, the minute icon ashes. Use + and – to set
minute. In the end, press OK to conrm and nish day
and time setting. (Once day is set, the current day will be
highlighted.)