Working with Lists 9
won’t even be seen unless decimal places (found with the z key) have been set to some fixed
number.
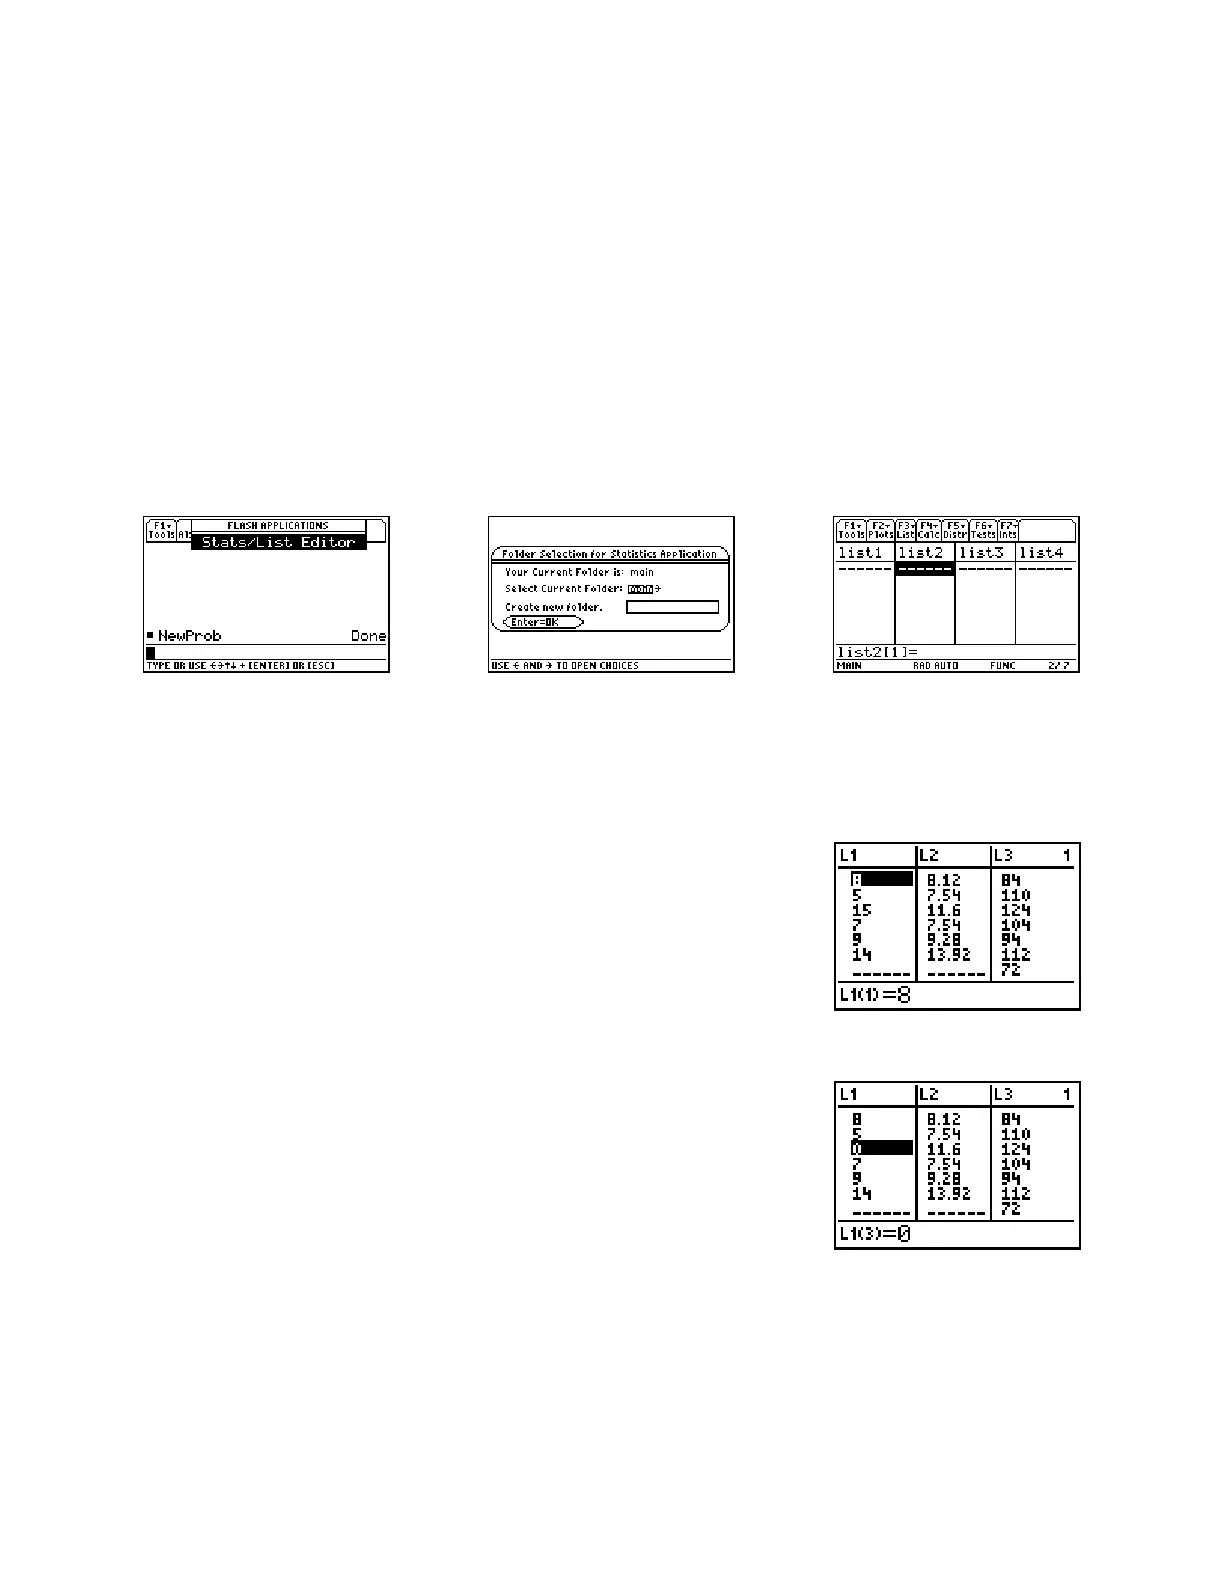
On a TI-89, press ¥O followed by the selection of the Statistics/List Editor Flash
Application followed by ¸. On the Titanium edition, select the Statistics/List Editor from
the main application menu screen. If this is the first time the editor has been accessed since the
calculator has been turned on, you will be prompted for a data folder as in the middle screen. The
default folder is main. Press Í to select main as the current folder, or press B to allow a
new folder to be created. To enter a new folder name, arrow to the entry block and type the
name of the new folder. Your lists will be stored in the new folder and it will be set to default.
To change folders, press B to select a folder. Then press Í to proceed to the list editor. If
the editor has been used since the calculator has been turned on, pressing Í to select the
application will automatically open the editor.
One word of advice: Most lists of data in texts are entered across the page in order to save space.
Don’t think that just because there are four (or more!) columns of data they belong in four (or
more) lists. Data which belongs to a single variable always belongs in a single list.
Entering Data into the STAT Editor
With the cursor at the first row of L1, type 8 and press Í. The
cursor moves down one row. Type 5 followed by Í and the 5
will be pasted into the second row of the list. Continue with 15, 7, 9,
and 14 as seen at right.
Correcting Mistakes with DEL and INS
In the screen above, we can delete the 15 by using the } key until it
is highlighted and then pressing { (¥0 on an 89).
To insert a 12 above the 7 move the cursor to the 7 then press y
{ (20 on an 89) (to choose INS or insert mode). Note a 0 was
inserted where you wanted the 12 to go. Just type over the place-
holding 0 with the value you want.