4) Place the lubrication amount check sheet ② underneath the rotary hook ③ and hold it
there.Then run the sewing machine at the normal sewing speed for 10 seconds.
(Any type of paper can be used as the lubrication amount check sheet ②)
5) Check the amount of oil which has spattered onto the sheet ②.
Caution:
1.Prior to the above-mentioned operation, remove the knockout plate and check whether
there is oil in the oil box.
2.Do not use fingers to touch the hook or other running components of feeding mechanism
when checking the amount of oil for the hook to avoid the accident.
3.Use the following procedure to check the amount of oil being supplied to the rotary hook
when replacing the rotary hook or when changing the sewing speed.
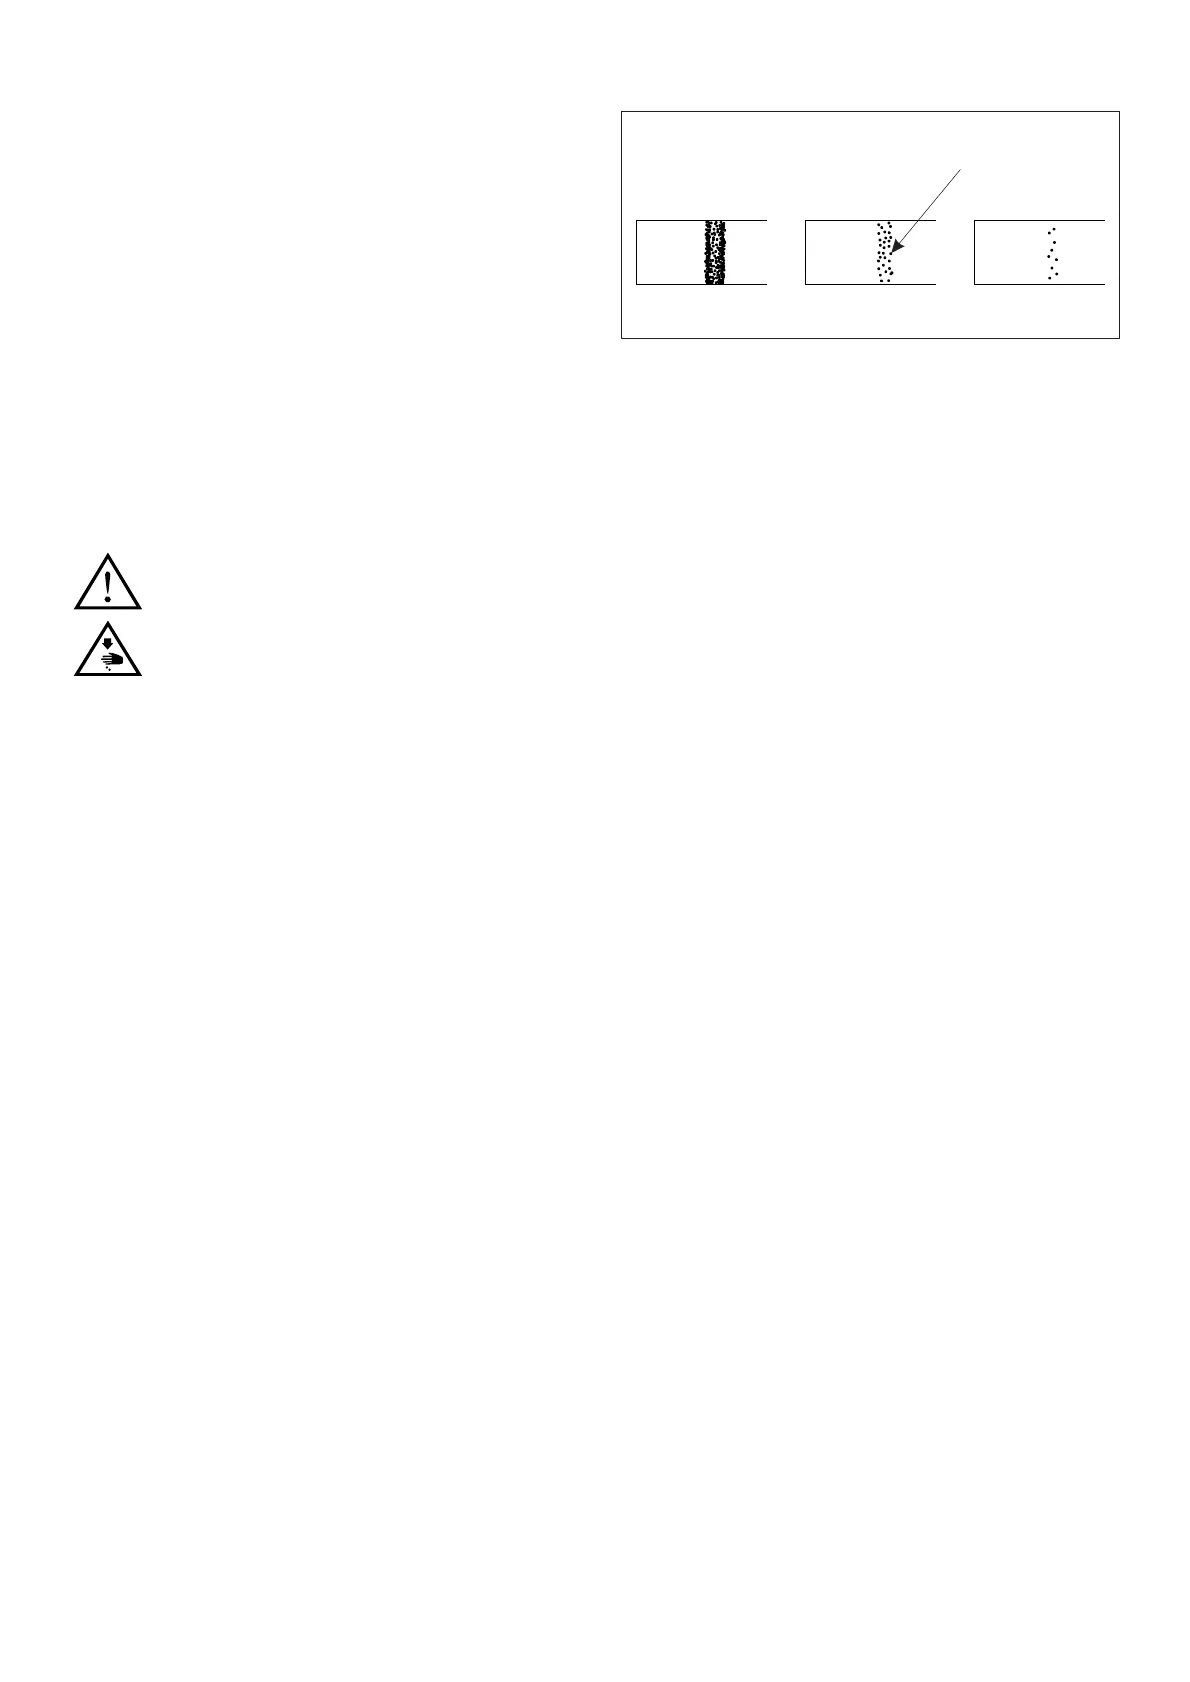
3.Guide sample of oil mass adequacy
1)The guide sample shown in the right-hand figure(see Fig. 23) may be finely adjusted
图 23Fig.23
Too much Too littleCorrect
Spattered oil
2.Confirming the Oil Mass
1)Remove the thread from all points fromthe
thread take-up to the needle.
2)Use the lifting lever to lift the presser foot.
3)Run the machine at the normal sewing
speed for approximately 3 minute without
sewing any material (following the same
start/stop pattern as when actually sewing)
18
Adjusting t he Presser F oot P ressure(Fig. 2 4)
1.Unscrew pressure adjusting nut ②.
2.Presser foot pressure is:
-increased if pressure adjusting screw ① is turned clockwise ( namely in direction A);
-reduced if the screw is turned counterclockwise (namely in direction B).
3.Screw down pressure adjusting nut ② when adjustment is over.
 Loading...