1514
Mould RADAR thermo-hygrometer
8.2 Activate and deactivate the animation
• Slide the right switch (arrow symbol) at the back forward using a pin and the automatic
animation of the 24-hour mould radar display is activated.
• On the display the black bars are flashing.
• When the animation is deactivated (switch below) the black bars appear permanently.
8.3 Activate and deactivate the alarm function
• Slide the left switch (speaker symbol) at the back forward using a pin and the alarm
sound is activated.
• If the humidity rises above 65%, an alarm sounds for a minute and a red warning light
flashes.
• Press any button to stop the alarm sound.
• The warning light continues flashing until the measured humidity is below 65%.
• Slide the left switch (speaker symbol) back using a pin and the alarm sound is deacti-
vated.
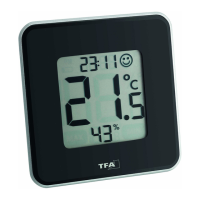
8.4 Comfort level
• The device shows two different indicators for the comfort level of the indoor climate:
• Smiling face: ideal values (40-60%)
• Sad face: too wet or too dry (< 40% or > 60%)
8.5 Display dew point
• With the switch inside the battery compartment can you change between the indication
“Taupunkt"” (position left) or “dew point“ (position right). Use a pin to slide the switch.
• Press the Taupunkt button to show the current dew point.
• On the display “Taupunkt” or “dew point” will be flashing and the current temperature
appears briefly.
• The display automatically returns to the current temperature and humidity.
This interdependency of temperature and relative humidity is expressed by means of
the dew point:
• If the air is cooled continuously at constant absolute humidity, then the relative
humidity will steadily increase up to a maximum of 100%. If the air is cooled
further, then the excess water vapor is separated out in the form of water droplets.
Mould RADAR thermo-hygrometer
• If the measuring unit indicates an air temperature of 20 °C and a relative humidity of 65%,
then the dew point temperature will be 13.2 °C. What does that mean? That the air, for
instance in your bedroom, will condense and from water droplets at all points on walls
and ceilings that are cooler than 13.2 °C, and that this may later lead to patches of mould
or damp.
• If the air is at a relative humidity of say 40%, then the dew point temperature is only
6 °C. The walls and ceilings would therefore have to be significantly colder for the air to
reach its dew point and for water droplets to form.
8.6 Temperature display
• Press and hold the Taupunkt button (5 seconds) to change between °C (Celsius) or °F
(Fahrenheit) as temperature unit.
8.7 Maximum and minimum values
• Press the min/max button.
• max appears on the display.
• The highest indoor temperature and humidity are displayed since the last reset.
• Press the min/max button again.
• min appears on the display.
• The lowest indoor temperature and humidity are displayed since the last reset.
• The instrument will automatically quit the MAX/MIN mode if no button is pressed or press
the min/max button again to return to the current display.
• Press and hold the Taupunkt button (3 seconds) when the highest or lowest values are
displayed to reset the display values to the current state.
9. Standing or hanging
• With the suspension device you can hang the instrument on the wall using a nail or a
screw.
• For table standing use the attached support.
• Since the humidity level within rooms can vary greatly according to the location, mount
the unit so that it will monitor the conditions in a location likely to be subject to the most
problems.
10. Care and maintenance
• Clean your instrument with a soft damp cloth. Do not use solvents or scouring agents.
• Remove the batteries if you do not use the product for a long period of time.
• Keep the instrument in a dry place.
TFA_No. 30.5032_Anleitung_05_14 28.05.2014 13:42 Uhr Seite 8

 Loading...