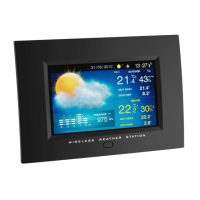
LOOK – Wireless Weather Station
1514
LOOK – Wireless Weather Station
•
Batteries contain harmful acids. Low batteries should be changed as soon as possible to
prevent damage caused by leaking. Never use a combination of old and new batteries
together, nor batteries of different types. Wear chemical-resistant protective gloves and
glasses when handling leaking batteries.
Important information on product safety!
•
Do not place the unit near extreme temperatures, vibrations or shocks.
•
Protect from moisture.
•
The outdoor transmitter is protected against splash water, but is not watertight. Choose a
shady and dry position for the transmitter.
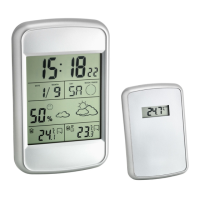
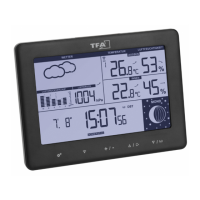
5. Elements
Receiver (Basic unit)
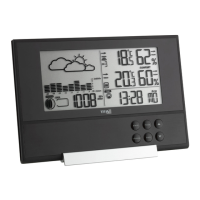
A: LCD Display (Fig. 1)
:
A 1: Time
A 2: Alarm symbol
A 3: Snooze symbol
A 4: Date and weekday
A 5: Moon phase
A 6: Indoor humidity
A 7: Comfort level indicator symbol
A 8: Weather symbol
A 9: Indoor temperature
A 10: Temperature trend indoor
A 11: Channel number
A 12: Reception symbol of outdoor data
A 13: Outdoor temperature
A 14: Temperature trend outdoor
A 15: Temperature alarm symbol
B: Buttons (Fig. 1)
:
B 1: TIME button
B 2: ALARM button
B 3: UP button
B 4: DOWN button
B 5: SNZ button
B 6: MAX/MIN button
B 7: ALERT button
B 8: CHANNEL button
C: Housing (Fig. 2)
:
C 1: Wall mount hole
C 2: Battery compartment
C 3: Stand (fold out)
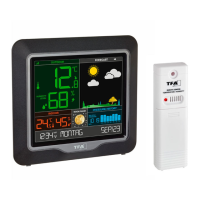
D: Transmitter (Fig. 3)
:
Buttons:
D 1: °C/°F button
D 2: Channel slide switch
LCD:
D 3: Outdoor temperature
D 4: Indication channel
Housing:
D 5: Wall mount hole
D 6: Battery compartment
D 7: Mounting holes for the stand
6. Getting started
•
Remove the protective films from the display of the basic station and from the transmit-
ter front.
Insert batteries
:
•
Place both instruments on a desk with a distance of approximately 1.5 meter. Check that
no other electronic devices are close.
•
Open the battery compartment of the transmitter by pushing the battery compartment
cover downwards (see marking) and lift the cover.
•
Insert two new batteries 1,5 V AAA, ensure battery polarity is correct.
•
Close the battery compartment again.
•
Open the battery compartment of the basic unit and insert two new batteries 1,5 V AAA,
ensure battery polarity is correct.
•
A brief beep tone will sound and all LCD segments will light up for a short moment.
•
Close the battery compartment again.
•
The unit is now ready to use and starts to scan the outdoor sensor data.
Reception of outdoor values
•
The basic unit automatically starts scanning the 433 MHz signal to register the transmitter
after batteries are inserted. If the reception of outdoor values fails, “- -” appears on the dis-
play. Check the batteries and try it again. Check if there is any source of interference.
•
Manual initialization can be helpful. Press CHANNEL button for 3 seconds.
7. How to operate
7.1 Manual setting of clock, time zone and calendar
•
Hold TIME button in normal mode. The year digit is flashing. Press UP or DOWN button to
adjust year.
•
Using TIME button you can switch to month, day, day-of-week language, hours, minutes,
and time zone setting (+/- 12 h), adjust with UP or DOWN button.
TFA_No. 35.1123_Anleit_09_13 01.10.2013 09:34 Uhr Seite 8