2524
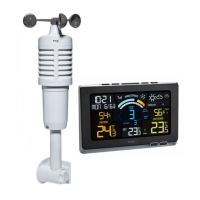
SPHERE – Wireless weather station
7.1 Manual settings
• Press and hold the SELECT SET/DISP button in normal mode.
• 1 (default) appears on the display and flashes.
• Press MIN/MAX + button to adjust the time zone.
• Press the SELECT SET/DISP button again to do the settings in the following sequence: The DCF reception (On - default), the
year, the month, the day, the hours, the minutes and the reset to factory settings (rst). Press the MIN/MAX + button to
adjust it.
• Confirm with the SELECT SET/DISP button.
• Once the DCF time signal is successfully received and the DCF reception is activated, the manually set time is overwritten.
7.1.1 Time zone setting
• You can make the time zone correction (-12/+12) in setting mode.
• The time zone correction is needed for countries where the DCF signal can be received but the time zone is different from
the DCF time (e.g. +1=one hour plus).
7.1.2 DCF reception
• By default, the DCF reception is activated (On) and after successful reception of the DCF signal no manual adjustment is
necessary.
• Press the MIN/MAX + button if you want to deactivate the DCF reception (OFF).
7.1.3 RESET function
• In the setting mode, you can reset the weather station to the factory setting (rst).
• Press and hold the MIN/MAX + button until “rst” stops flashing.
8. Alarm function
• Press the ALM button in normal mode to enter the alarm mode.
• ALM and 06:00 (default) or the last adjusted alarm time appear on the display.
• Press and hold the ALM button. The alarm symbol will appear and the hour digit will be flashing.
• Press MIN/MAX + button to adjust the hours.
• Confirm the setting with the ALM button and set minutes in the same way.
• Press the ALM button again.
SPHERE – Wireless weather station
• The current time and the alarm symbol appear on the display.
• When the adjusted alarm time is reached, the alarm rings.
• The alarm symbol flashes.
• Press any button to stop the alarm.
• If the alarm is not stopped manually, the alarm tone automatically turns off after two minutes and will be reactivated at the
same set time in the following day.
8.1 Activate/deactivate alarm
• Press the ALM button in normal mode to enter the alarm mode. To activate/deactivate the alarm function, press the ALM
button again.
• The alarm symbol appears/disappears.
• Press the SELECT SET/DISP button to return to normal mode.
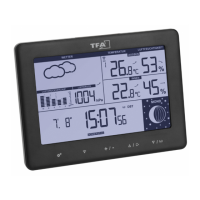
9. Display light
• The brightness levels can be adjusted directly (3 levels) with the DIM button on the back. The display shows d1, d2 or d3
instead of the time.
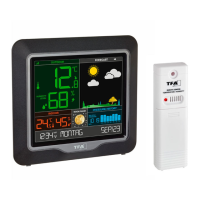
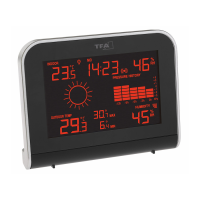
9.1 Display colour
• You can choose between three different colour settings with the MODE button on the back. c1, c2 or c3 appears, instead of
the time.
• Wait 3 seconds until the display returns to normal mode to confirm the setting.
9.1.1 C1 – Outdoor temperature colour mode
• The display colour adjusts to the temperature measured by the outside transmitter in 22 different colour hues.
Colour Temperature
yellow-red 22… >30°C
green tones 14… 21,9°C
blue tones 0 … 13,9°C
violet-pink < 0°C
TFA_No. 35.1148_Anleitung 09.10.2017 17:18 Uhr Seite 13
 Loading...